QX5
QXFXO4/QXISDN4/QXE1T1/QXFXS24; (SW Version 6.0.x) 61
QXFXO4/QXISDN4/QXE1T1/QXFXS24 Manual II: Administrator’s Guide
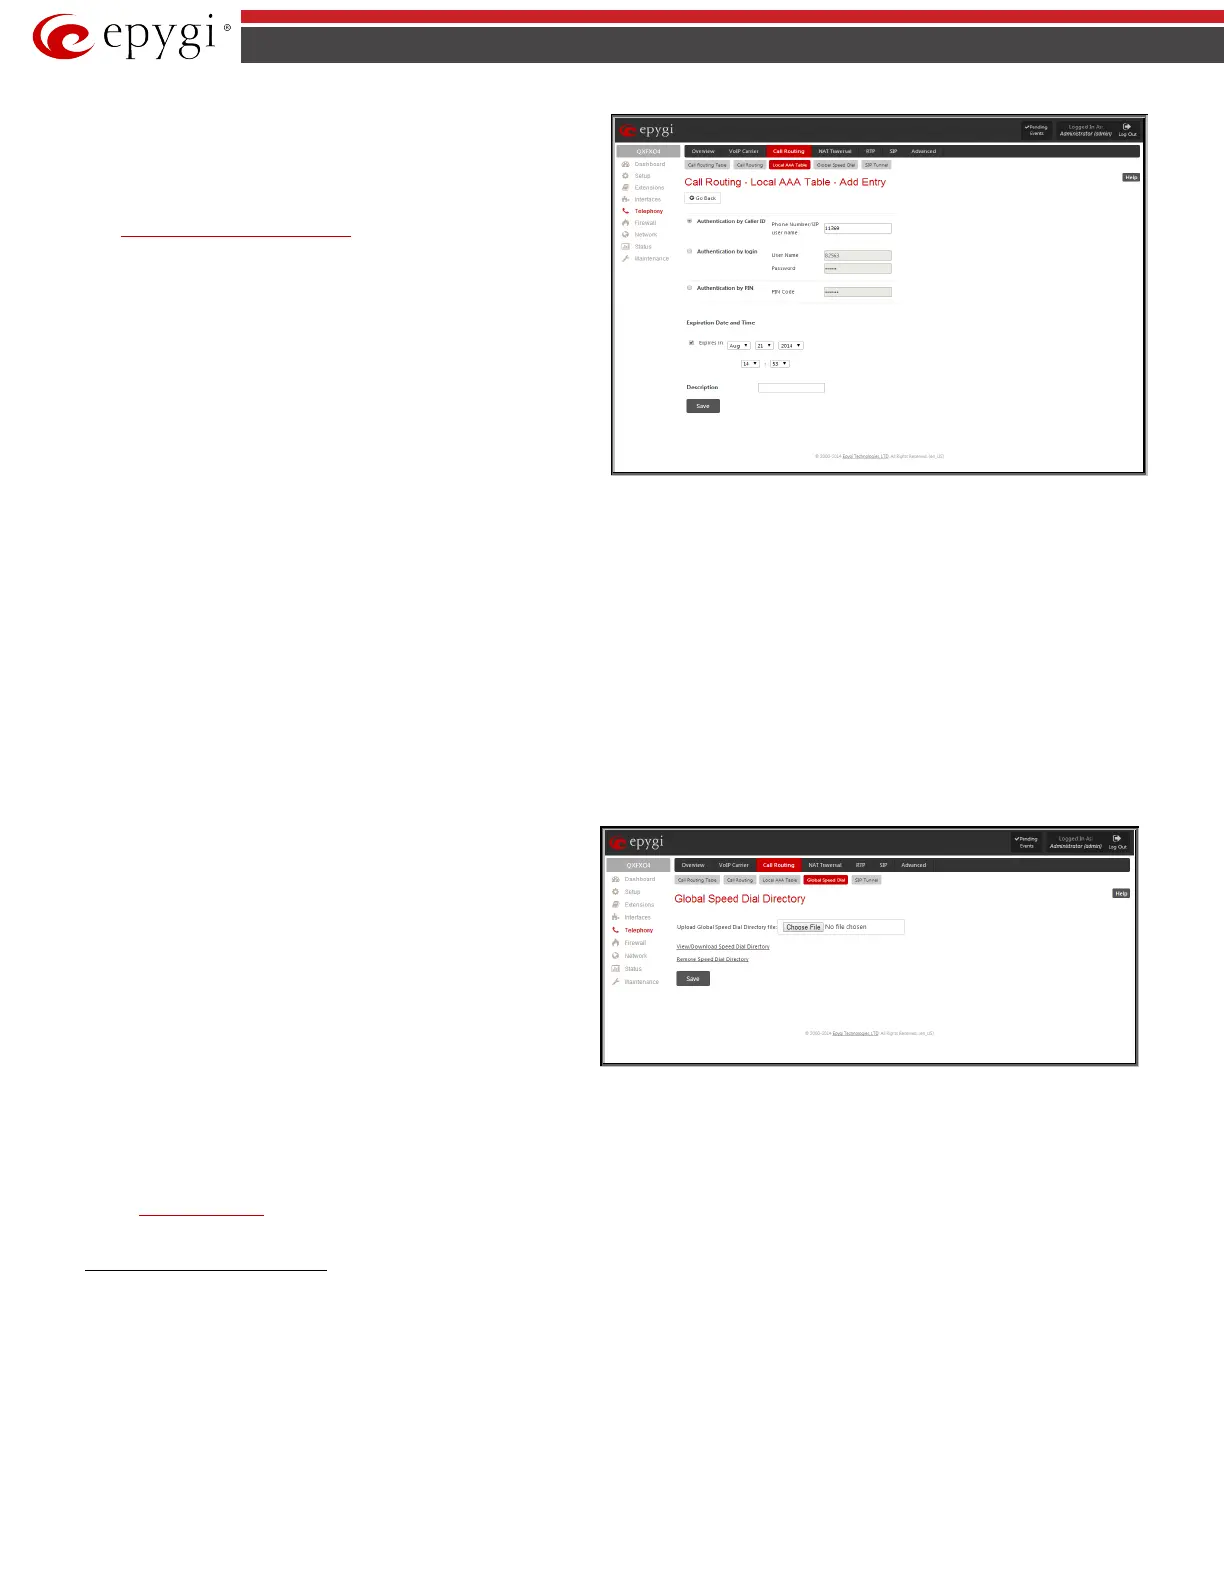
• Authentication by Caller ID
– this selection is used to set the
authentication based on the caller’s phone number (which is
considered to be automatically detected). The Phone Number/SIP
User Name text field requires the caller’s phone number or the SIP
username. Only numeric and wildcard characters (see chapter
Entering SIP Addresses Correctly) are allowed for this field. '[' , ']' ,
',', '-', ‘{‘, ‘}’ are used to define a range or a quantity of numbers. For
example, 2{13-17, ww, a-c} means that the dialed number may be
213, 214, 215, 216, or 217, 2ww, 2a, 2b and 2c to match the
specified phone number; in the case of 2[3,7], the dialed number
may be 23 or 27 to match the specified phone number. The {11, 15,
23, 38, 45} pattern means that the dialed number may be 11, 15, 23,
38 or 45 to match the pattern.
Fig.II- 75: Call Routing - Local AAA Table - Add Entry page
• Authentication by Login – this selection is used to set the authentication based on the username and password inserted by the user upon login. The
Username text field requires the authentication username. Only numeric values are allowed for this field, otherwise the error message “Incorrect
Username - digits allowed only” will appear. The Password text field requires the authentication password. Only numeric values are allowed for this
field, otherwise the error message “Incorrect Password - digits allowed only” will appear.
• Authentication by PIN- this selection is used to set the authentication based on the PIN inserted by the user upon login. Only digit values are
allowed for this field, otherwise the appropriate error message will be displayed.
The Expiration Date and Time drop down-lists are used to set the date and time when the registration will expire.
The Expires in checkbox is used to enable the Expiration Date and Time feature.
The Description text field requires an optional description about the calling party.
Edit opens the Edit Entry page to modify the local AAA entry.
Global Speed Dial Directory
Global Speed Dial Directory
page is used to define multiple speed
dial rules, write and save them in a file and then upload all of them at
once.
To compose the configuration file, any text editor can be used which
may produce files compatible to the CSV format: the speed dial code and
destination should be separated by commas. There should be a line
break after each code defined.
The View/Download Speed Dial Directory and Remove Speed Dial
Directory links appear only if a global speed dial configuration file is
uploaded previously.
Fig.II- 76: Global Speed Dial Directory page
The View/Download Speed Dial Directory link is used to download the configuration file to the PC and opens the file-chooser window where the saving
location may be specified. The Remove Speed Dial Directory link is used to restore the default configuration.
The speed dial configuration file downloaded from the QX is in the CSV format.
To use the global speed dialing rules, user should simply dial the speed dial code assigned to that speed dialing rule. The call will be parsed through the
rules of
Call Routing Table.
To create a new Call Routing rule
1. Click on the Call Routing Table tab on the Call Routing page.
2. Press the Add button on the Call Routing Table page.
3. Specify the Pattern in the corresponding field.
4. Select the Number of Discarded Symbols and Prefix if required.
5. Select the Destination Type from the drop down list.
6. Define the Metric or leave the default.
7. Enter a Description if needed.
8. Enable the Filter on Source / Modify Caller ID checkbox, if the route functionality should be limited. This is dependent on the source caller
information.
9. Enable the Set Date/Time Period(s) checkbox if a route should be functional within certain time/date intervals.
 Loading...