CHAPTER 5: DEVICE, SYSTEM, INPUT AND OUTPUT SETPOINTS DEVICE
850 FEEDER PROTECTION SYSTEM – INSTRUCTION MANUAL 5–23
NOTE:
Ideally the passphrase should be set through EnerVista and not directly from the Keypad,
where there are limitations in terms of space and types of characters supported. However,
for convenience, the passcode setting is available from the Keypad as well.
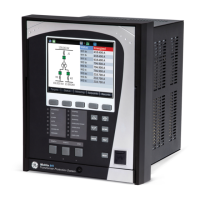
WiFi Status
A WiFi symbol is displayed in the caption area of the 8 Series product front panel. The
following table lists all possibilities for this icon:
WiFi Events
NOTE:
If the relay is in service mode and the settings are default a minor error is triggered.
WiFi Quick Start Procedure
The following provides the settings information and instructions to quickly setup WiFi.
Required Equipment
• 8 Series Relay with WiFi functionality
•PC with WiFi
•Access Point
Quick Start Procedure
1. The PC WiFi Network Settings are as follows:
Passphrase: provided with the 8 Series relay
2. The Access Point Settings are given below:
3. Any 8 Series relays in range are automatically connect to the configured Access Point.
4. Start EnerVista on a PC and use the Discover function, all relays within range appear
and are populated in EnerVista for initial configuration and commissioning.
5. Once the relay is configured, change the 8 Series relay default WiFi SSID and
Passphrase settings before the relay goes into service.
WiFi State WiFi Icon Color
Disabled Icon is grey and crossed by a red line
Disconnected Grey
Connecting Yellow
Connected Green
Event Description
WiFi Connected This event is recorded to indicate a network connect.
WiFi Disconnected This event is recorded to indicate a network
disconnect.
IP address: 192.168.0.1
Subnet Mask: 255.255.255.0
SSID: same as entered on the PC (SSID provided with the 8 Series relay)
Broadcast disabled
Security type: WPA2-PSK (WPA2-Personal)
Encryption: AES
Passphrase: same as entered on the PC (Passphrase provided with the 8 Series relay)
DHCP enabled range of 192.168.0.12 to 192.168.0.253

 Loading...