GEDRAFT LOGIQ P9/P7
D
IRECTION 5604324, REVISION 11 DRAFT (JANUARY 24, 2019) SERVICE MANUAL
Chapter 8 - Replacement Procedures 8-73
Section 8-11
Replacement of Monitor and LCD Arm Plastic Covers
8-11-1 Manpower
2 person, 15 minutes.
8-11-2 Tools
Standard Phillips Screwdriver, 4 mm Hex Wrench.
8-11-3 Preparations
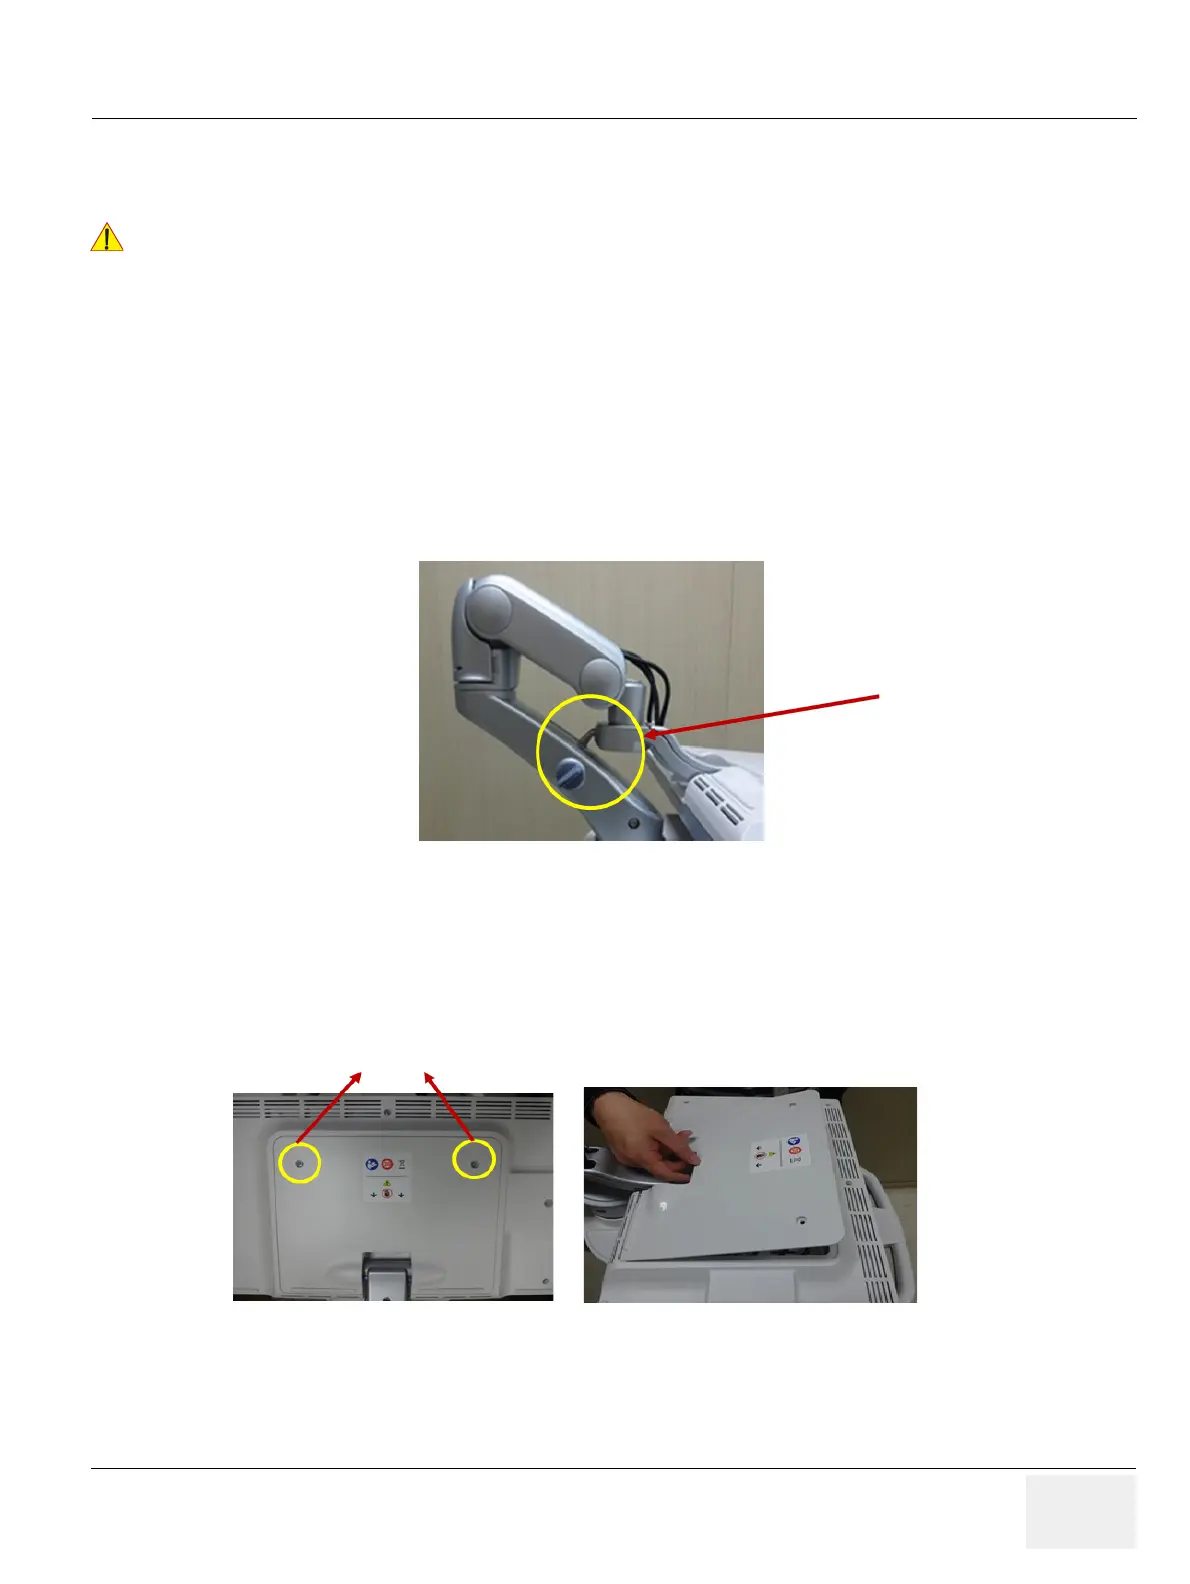
1) Lock the Monitor Arm to prevent hazard. Refer to the figure below.
8-11-4 Monitor Remove Procedure
1) Unscrew 2 screws, then remove the Monitor rear panel. Refer to the figure below.
Be care that the monitor does not fall during the replacement process.
Figure 8-59 Locking the Monitor Arm
Figure 8-60 Removing the Monitor cover

 Loading...


