GEDRAFT LOGIQ P9/P7
D
IRECTION 5604324, REVISION 11 DRAFT (JANUARY 24, 2019) SERVICE MANUAL
Chapter 3 - Setup Instructions 3-21
3-7-2 Power On / Boot Up
3-7-2-1 Scanner Power On
1) Ensure that the wall outlet is of appropriate type, and that the Circuit Breaker is turned off.
2) Uncoil the power cable, allowing sufficient slack so that the unit can be moved slightly.
3) Verify that the power cable is without any visible scratches or any sign of damage.
4) Verify that the on-site mains voltage is within the limits indicated on the rating label on the right side
of the rear panel.
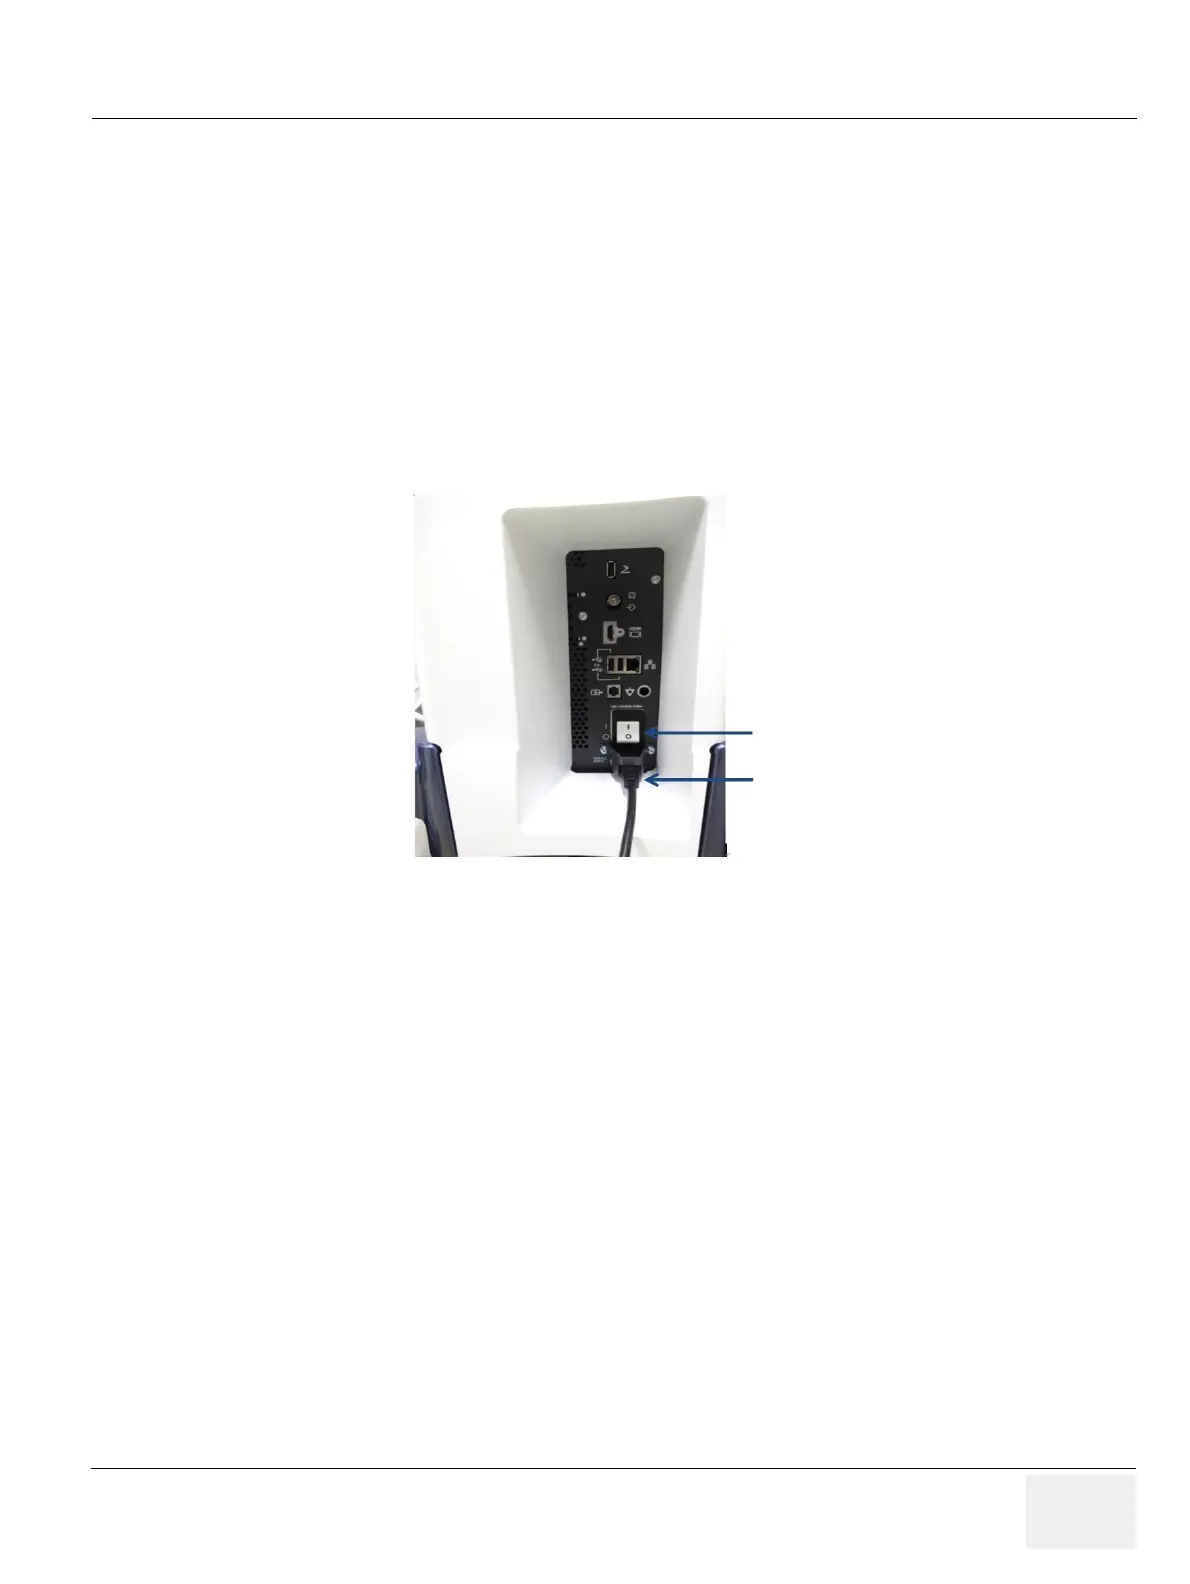
5) Connect the Main Power Cable to the back of the system. Refer to Section 8-28 for details.
6) Connect the Main Power Cable to a hospital grade power outlet with the proper rated voltage.
Never use an adapter that would defeat the safety ground.
7) Switch ON the Circuit at the rear of the system.
Figure 3-9 Circuit and main power cable at rear of system
Circuit Breaker
Main Power

 Loading...


