Removing the Front Bezel
To remove the front bezel, follow these steps:
1. Power off the server and disconnect the power cables. See “Powering On and Powering Off
the Server” (page 78).
2. If rack mounted, slide the server out from the rack. See “Extending the Server from the Rack”
(page 142).
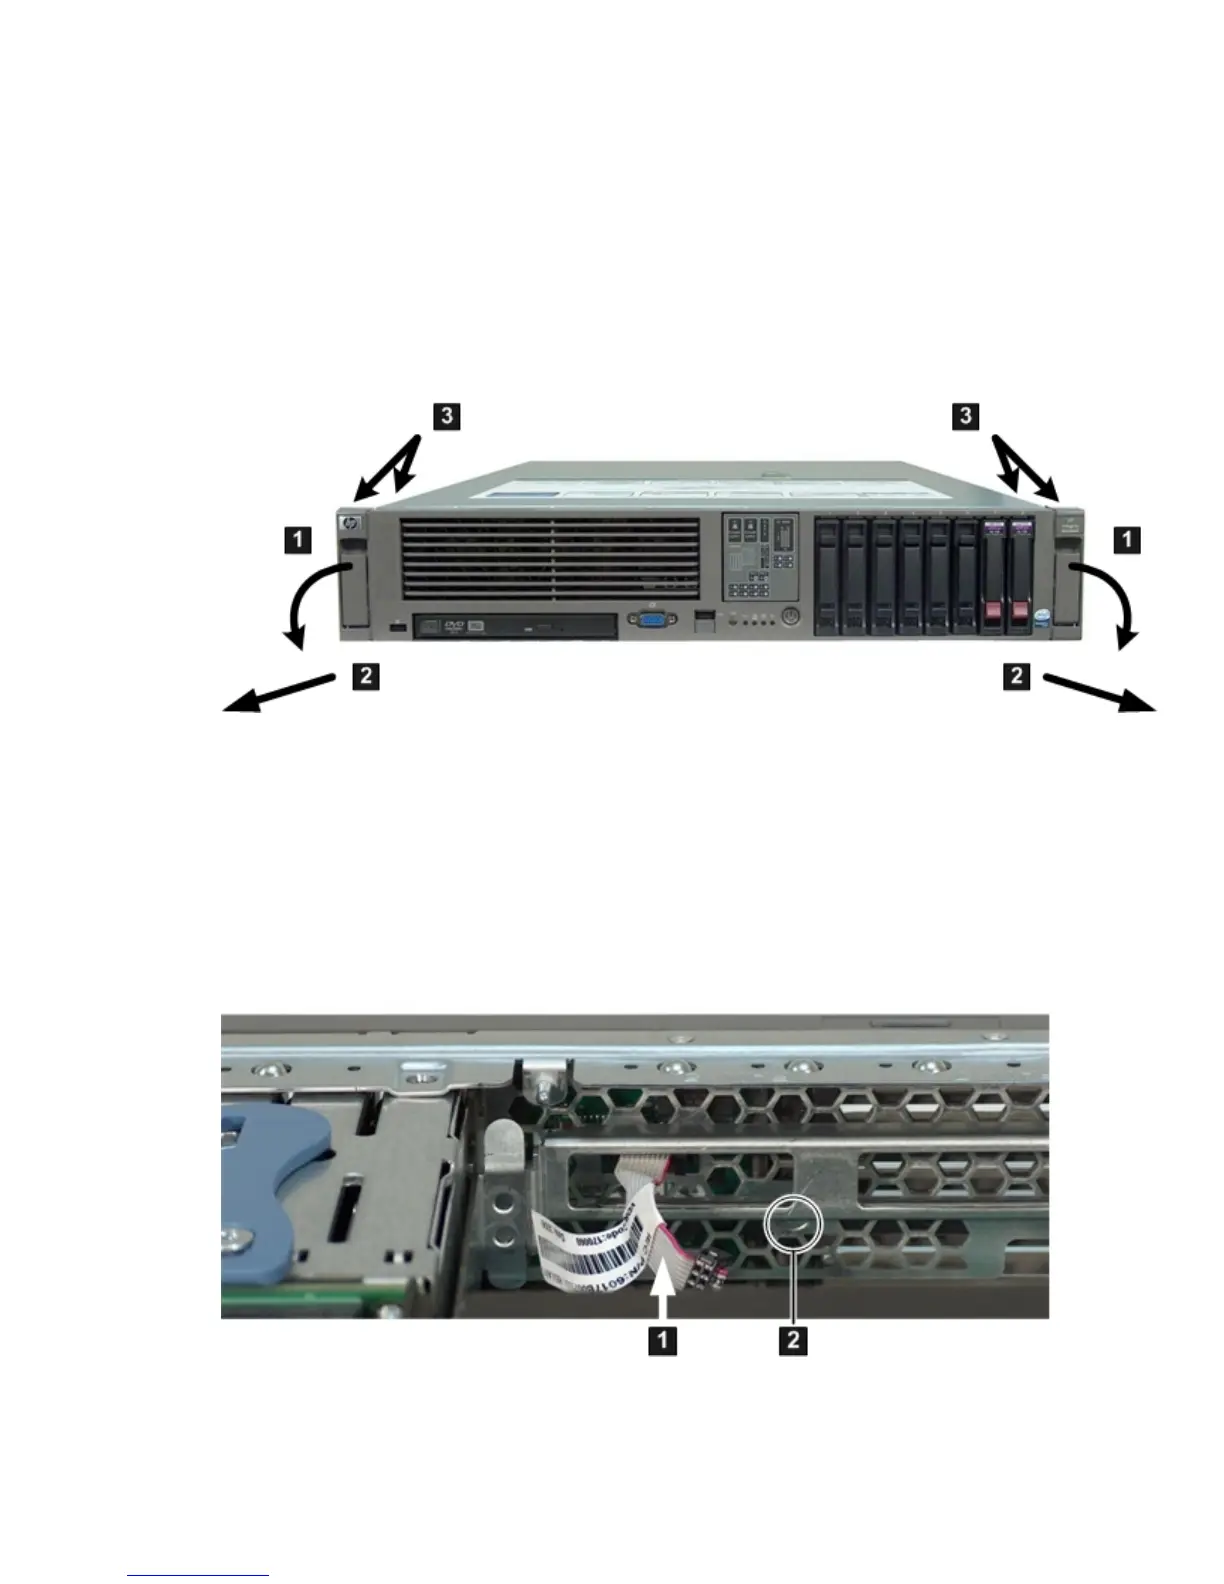
3. Remove the four T-10 screws that hold the bezel to the server. There are two screws on each
side of the server that attach to the bezel through the rack flanges (3).
Figure 6-16 shows the front bezel.
Figure 6-16 Removing the Front Bezel
4. Remove the top cover. See “Removing the Top Cover” (page 143).
5. Remove the system fans in the fan carrier. See “Removing a Server Fan” (page 150).
6. Remove the fan carrier. See “Removing the Fan Carrier Assembly” (page 161).
7. Disconnect the System Insight Display power cable from the fan/display board. See
Figure 6-17.
8. Remove the T-10 bezel screw next to the System Insight Display on the inside of the server.
See Figure 6-17.
Figure 6-17 Bezel Screw Location
9. Grasp the bottom of the bezel and pull gently until it is free from the server. Rotate the bezel
slightly upward and lift it off the server chassis.
10. While removing the bezel, make sure to guide the power connector on the System Insight
Display through the hole in the server chassis.
158 Removing and Replacing Server Components
 Loading...