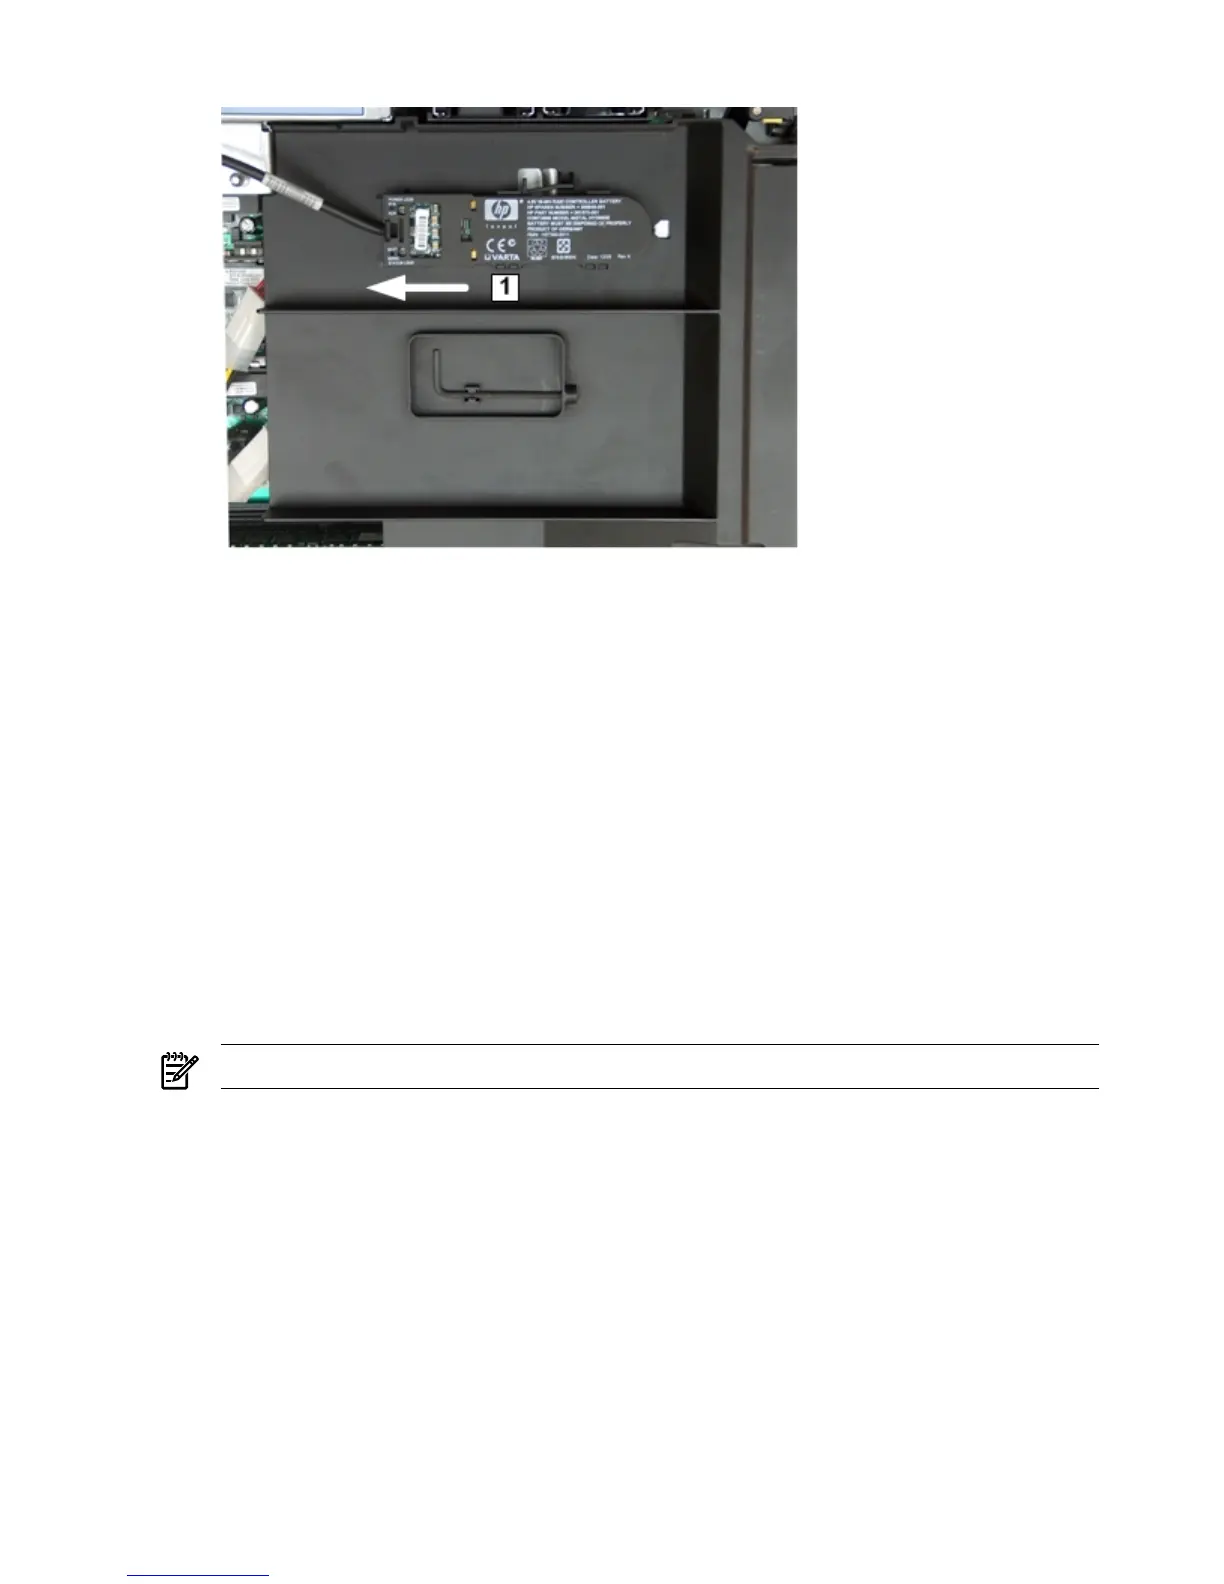
Figure 6-41 Installing the Battery on the Airflow Guide
4. Plug the battery cable into the connector on the SAS core I/O RAID board.
5. Replace the top cover, unless you continue with replacing the PCIe expansion board. See
“Replacing the Top Cover” (page 144), or proceed to “Replacing the PCIe Expansion Board”
(page 192).
6. If rack mounted, slide the server completely into the rack, unless you continue with replacing
the PCIe expansion board. See “Inserting the Server into the Rack” (page 143), or proceed to
“Replacing the PCIe Expansion Board” (page 192).
7. Reconnect the power cables and power on the server, unless you continue with replacing
the PCIe expansion board. See “Powering On and Powering Off the Server” (page 78), or
“Replacing the PCIe Expansion Board” (page 192).
Replacing the PCIe Expansion Board
To replace the PCIe expansion board, follow these steps:
1. Make sure the board rail clip are in the open position.
2. Guide the PCIe expansion board into the rails, and seat the board into the slot on the system
board.
NOTE: The PCIe expansion board and slot are keyed to fit only one way.
3. Push the board rail clips toward the PCIe expansion board to lock the board in place.
192 Removing and Replacing Server Components
 Loading...