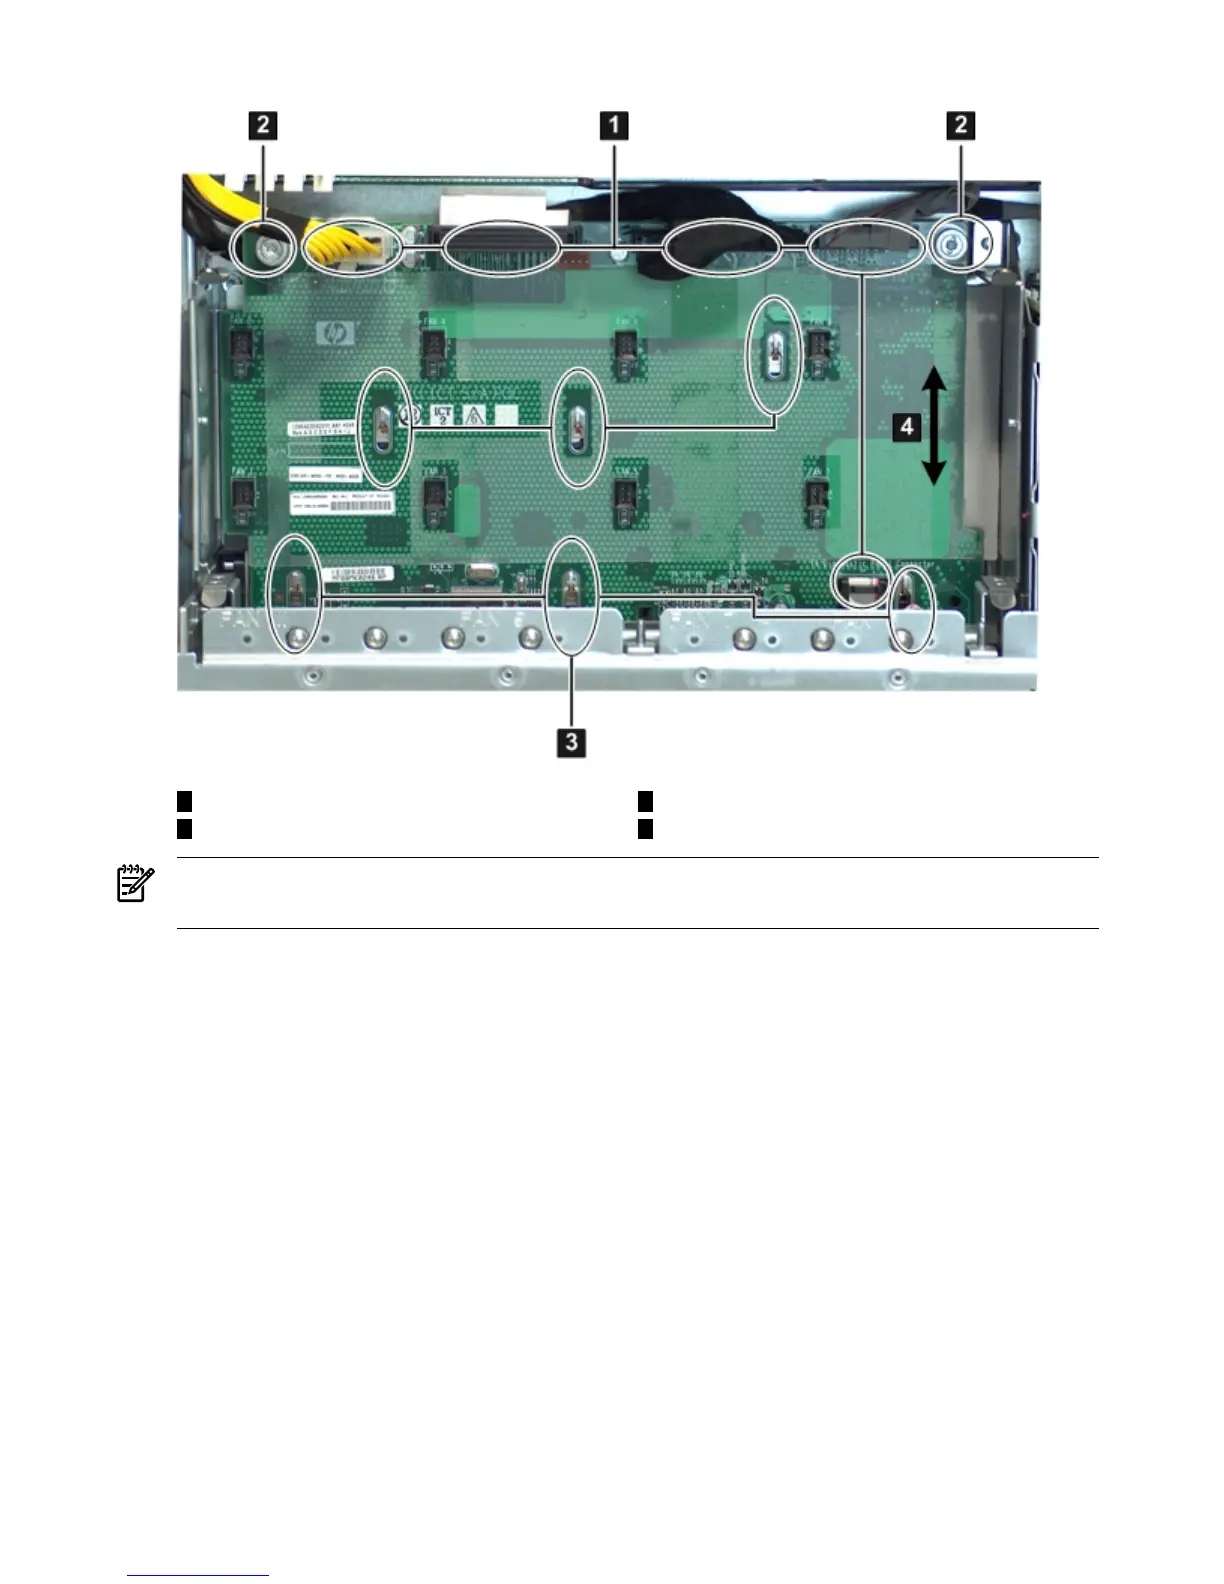
Figure 6-26 Removing and Replacing the Fan / Display Board
3
Keyways on the fan/display board
1
Cables connected to the fan/display board
2 4
Captive thumbscrews Fan/display board
NOTE: Figure 6-26 (page 172) shows the Data Center fan/display board. The Office Friendly
board is nearly identical.
Replacing the Fan / Display Board
To replace the fan/display board, follow these steps:
1. Align the connectors with the openings on the front bezel and place the fan/display board
onto the guide pins. Shuttle the board toward the front of the server until it locks into
place (3).
2. Turn the knurled thumb screws clockwise until the board is secured into place (2).
3. Reconnect the five cables into the connectors on the fan/display board (1).
4. Replace the fan carrier. See “Replacing the Fan Carrier Assembly” (page 163).
5. Replace the top cover. See “Replacing the Top Cover” (page 144).
6. If rack mounted, slide the server completely into the rack. See “Inserting the Server into the
Rack” (page 143).
172 Removing and Replacing Server Components
 Loading...