Operate the Plasma System
Powermax65/85/105 SYNC Operator Manual 810470 85
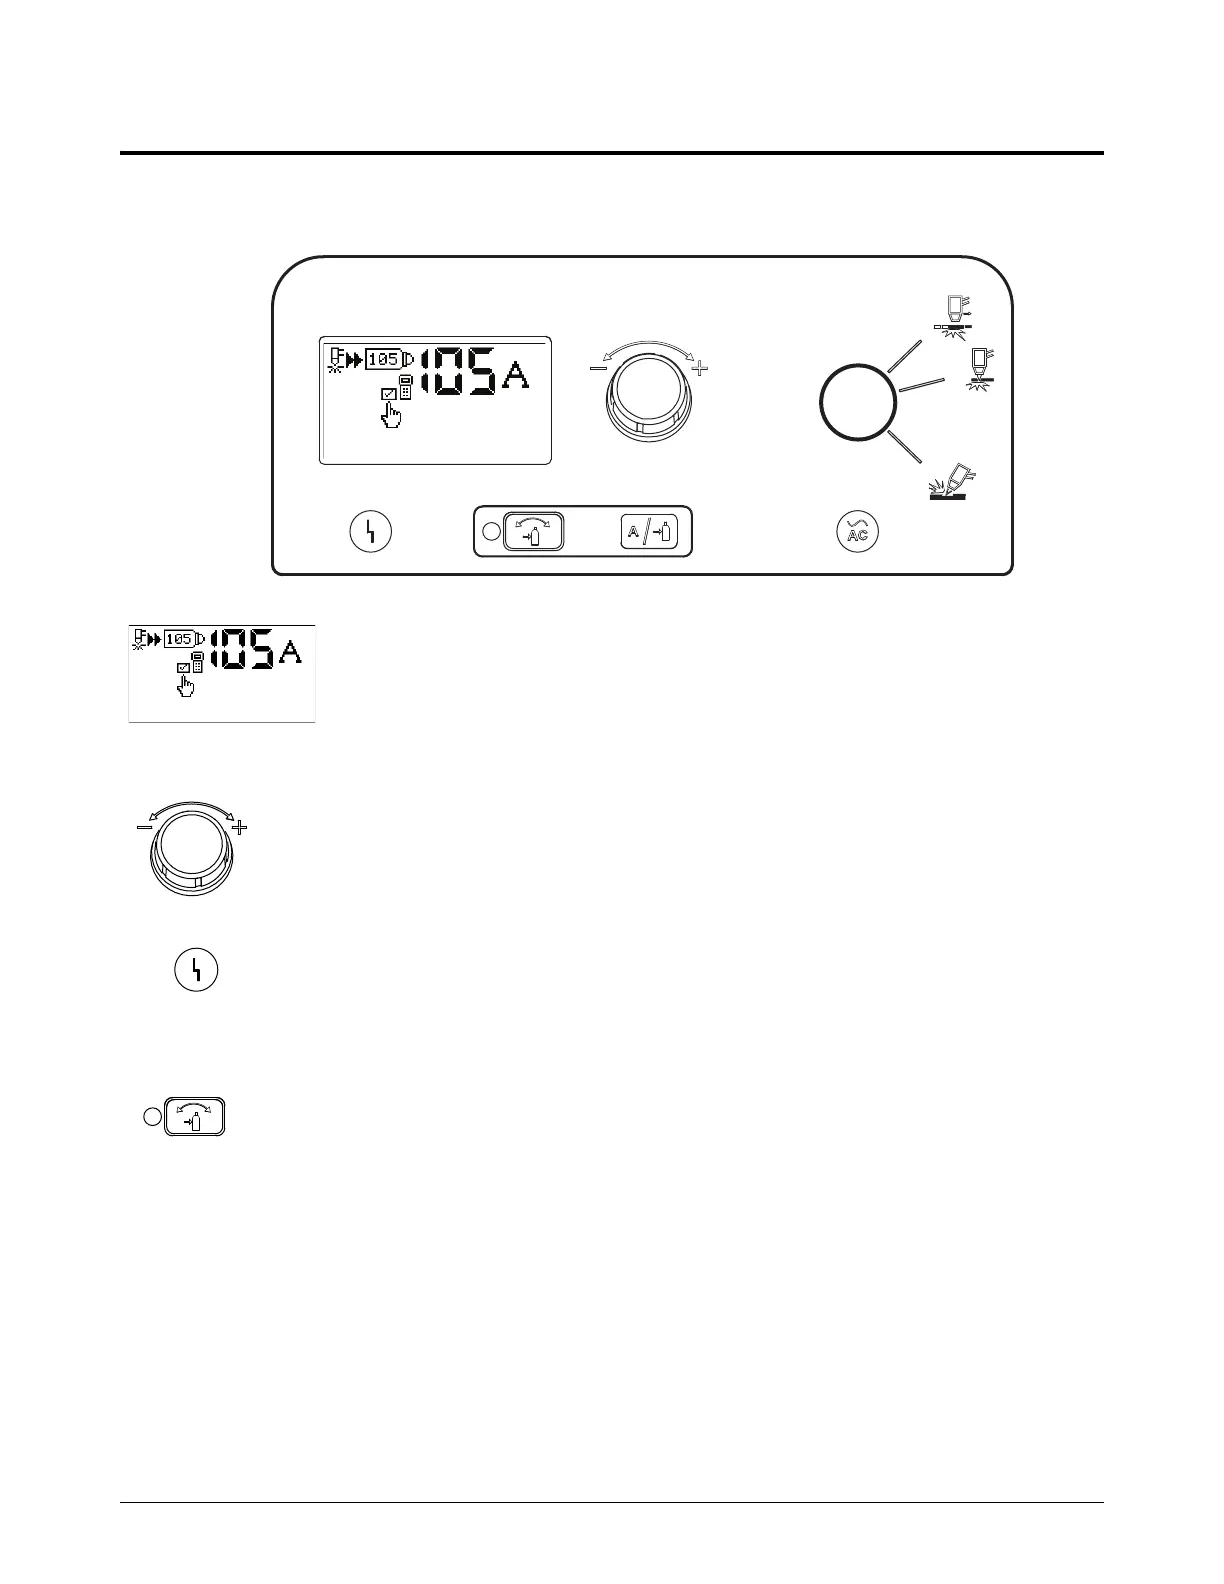
Controls and indicators on the plasma power supply
Cutting controls
Status screen – By default, this screen shows system status information. It also
shows fault codes and fault icons when faults occur.
In different modes, this screen changes to show different kinds of
information about the plasma power supply, SmartSYNC torch, and
Hypertherm cartridge.
Adjustment knob – Turn this knob to adjust the output current in increments of
1A.
You can also use this knob to increase or decrease the gas pressure. Refer
to Adjust the gas pressure manually on page 76.
Fault LED (yellow) – When this LED is on, it shows that there is a fault condition
with the plasma power supply.
This LED also comes on when the torch is set to the yellow lock (X)
position. Refer to page 67.
Automatic / manual gas pressure setting mode selector – Push and hold
this button until the green LED comes on to go into manual gas pressure
mode (approximately 2 seconds). Push the button again to go back to
automatic gas pressure mode. Refer to page 76.
Manual gas pressure mode must be used only by
experienced operators.
In some conditions, you can push this button to immediately go from the
screen that you are on to the status screen.

 Loading...