Installing the basic device
Basic devices in the power range 0.37 ... 11 kW
Mounting in ”cold plate” technique
4
4.1
4.1.3
4.1-4
EDSVF9333V EN 3.0-06/2005
a
c1
c
c
a
a
c
gg g
b1 b1 b1
dd d
bb b
LLL
210
e
<75°C
9300vec120
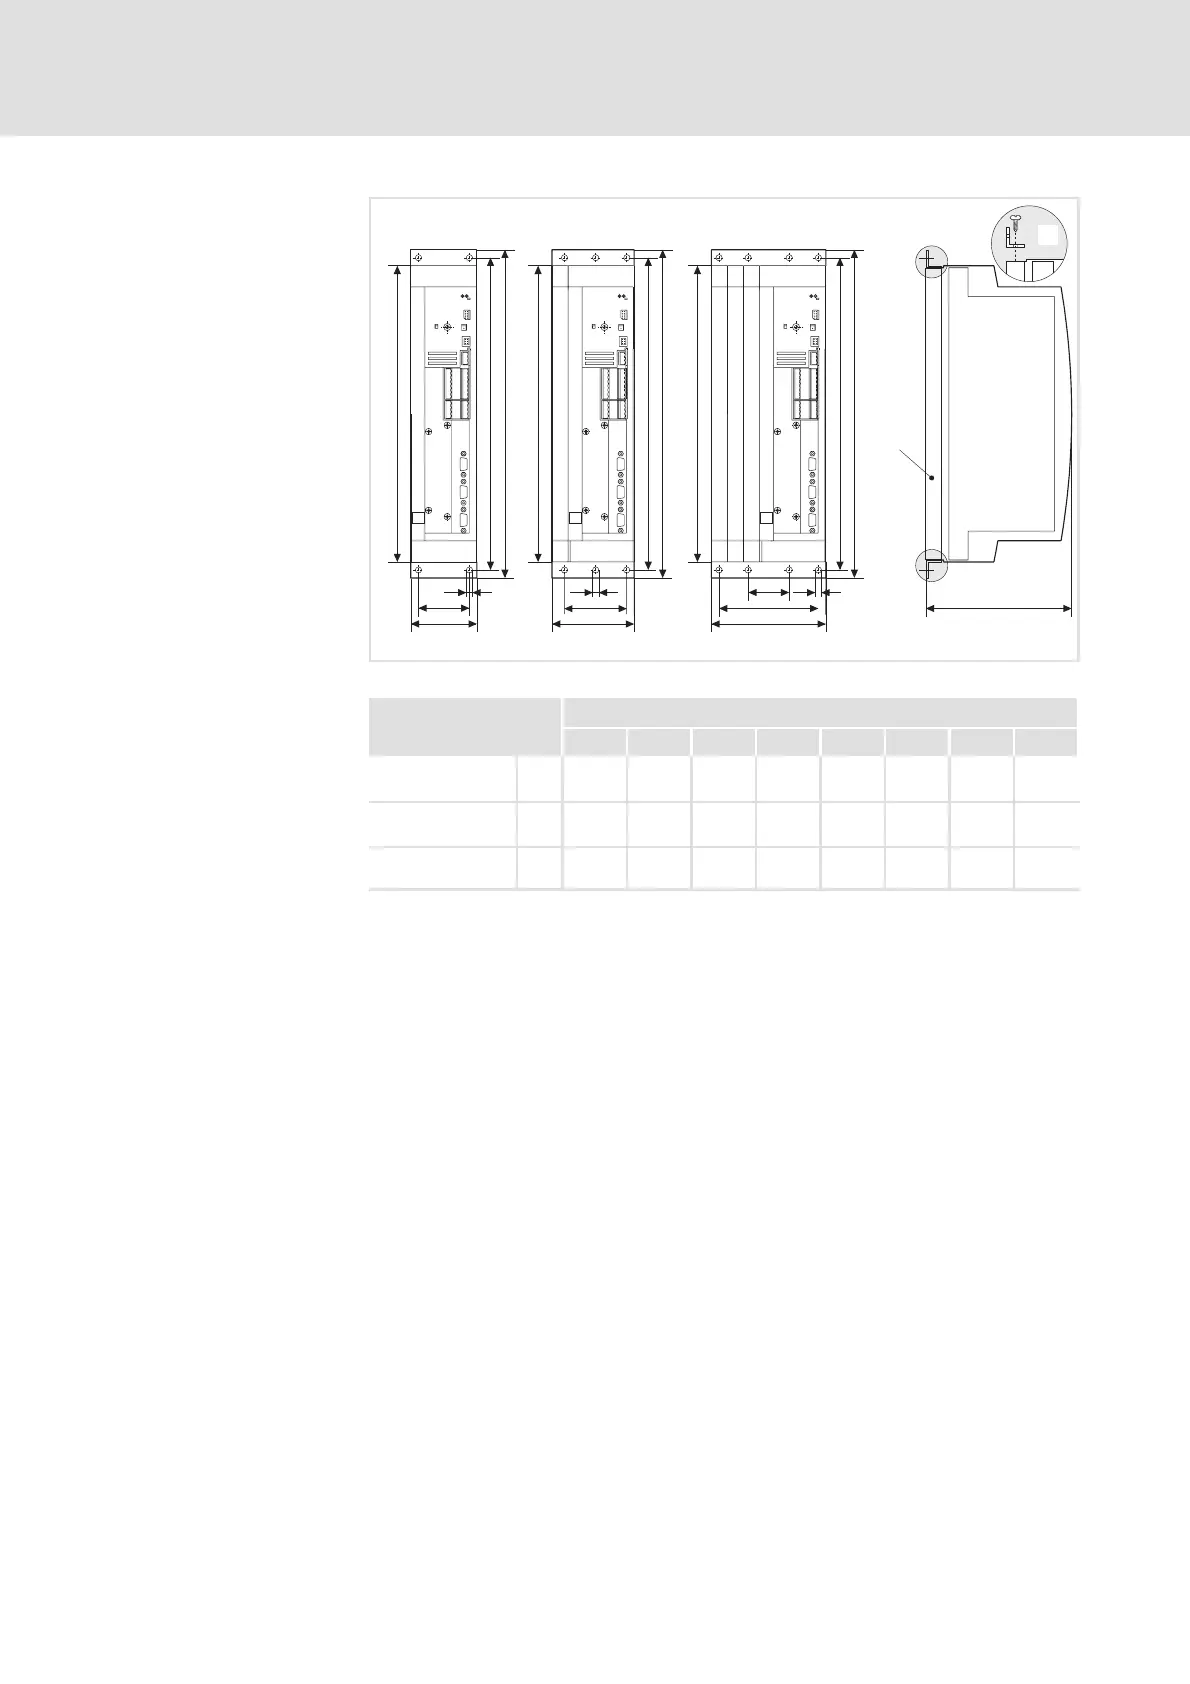
Fig. 4.1-3 Dimensions for mounting in ”cold plate” technique 0.37 ... 11 kW
9300 vector Dimensions [mm]
Type a b b1 c c1 d e
1)
g
EVF9321-CVV003
EVF9322-CVV003
78 381 350 48 – 367 168 6.5
EVF9323-CVV003
EVF9324-CVV003
97 381 350 67 – 367 168 6.5
EVF9325-CVV003
EVF9326-CVV003
135 381 350 105 38 367 168 6.5
1)
For a fieldbus module plugged onto X1, consider mounting space for connecting cables
Apply heat conducting paste before screwing together the cooler and
cooling plate of the drive controller so that the heat transfer resistance is as
low as possible.
1. Fasten the fixing bracket with sheet metal screws 3.5 × 13 mm at the
top and bottom of the drive controller .
2. Clean the contact surface of cooler and cooling plate with spirit.
3. Apply a thin coat of heat conducting paste with a filling knife or brush.
– The heat conducting paste i n the accessory kit is sufficient for an area
of approx. 1000 cm
2
.
4. Mount the drive controller on the cooler.
Dimensions
Mounting
 Loading...