6-6 Display & Cine Review
b) In Review screen, click [History] to select the exam; click to select the image to
be compared in different exams, and click [Image Compare].
6.3.2 Frame Compare
1. Freeze the image in B/C mode, click [Frame Compare] in “Cine” page on the image
menu to enter frame compare mode.
2. Review the images of different image windows (cine replaying can’t be performed for
single-frame image file), press <Update> or the user-defined <Dual> key to switch
the active image window.
3. Save the image if it is necessary.
Measurements, adding comments and body marks are allowed.
4. Click [Frame Compare] again to return to image frozen status; press <Freeze> to
enter real-time imaging.
Tips: cine compare can only be performed on single-format 2D images only.
6.4 Cine Memory
6.4.1 Cine Memory Setting
There are 2 ways of cine memory split: auto and split.
Setting path: select "Auto" or "Split" for cine memory in [Preset]→ [System Preset]→ [Image
Preset].
Where,
"Auto" for the cine memory indicates the system splits the cine memory as per the
number of B image windows.
“Split” indicates the system always splits the cine memory, even if in the single-B
window, the system splits the cine memory into two as well. You can press <B> key
to switch and display the images in either memory, so you can compare images in
Split mode.
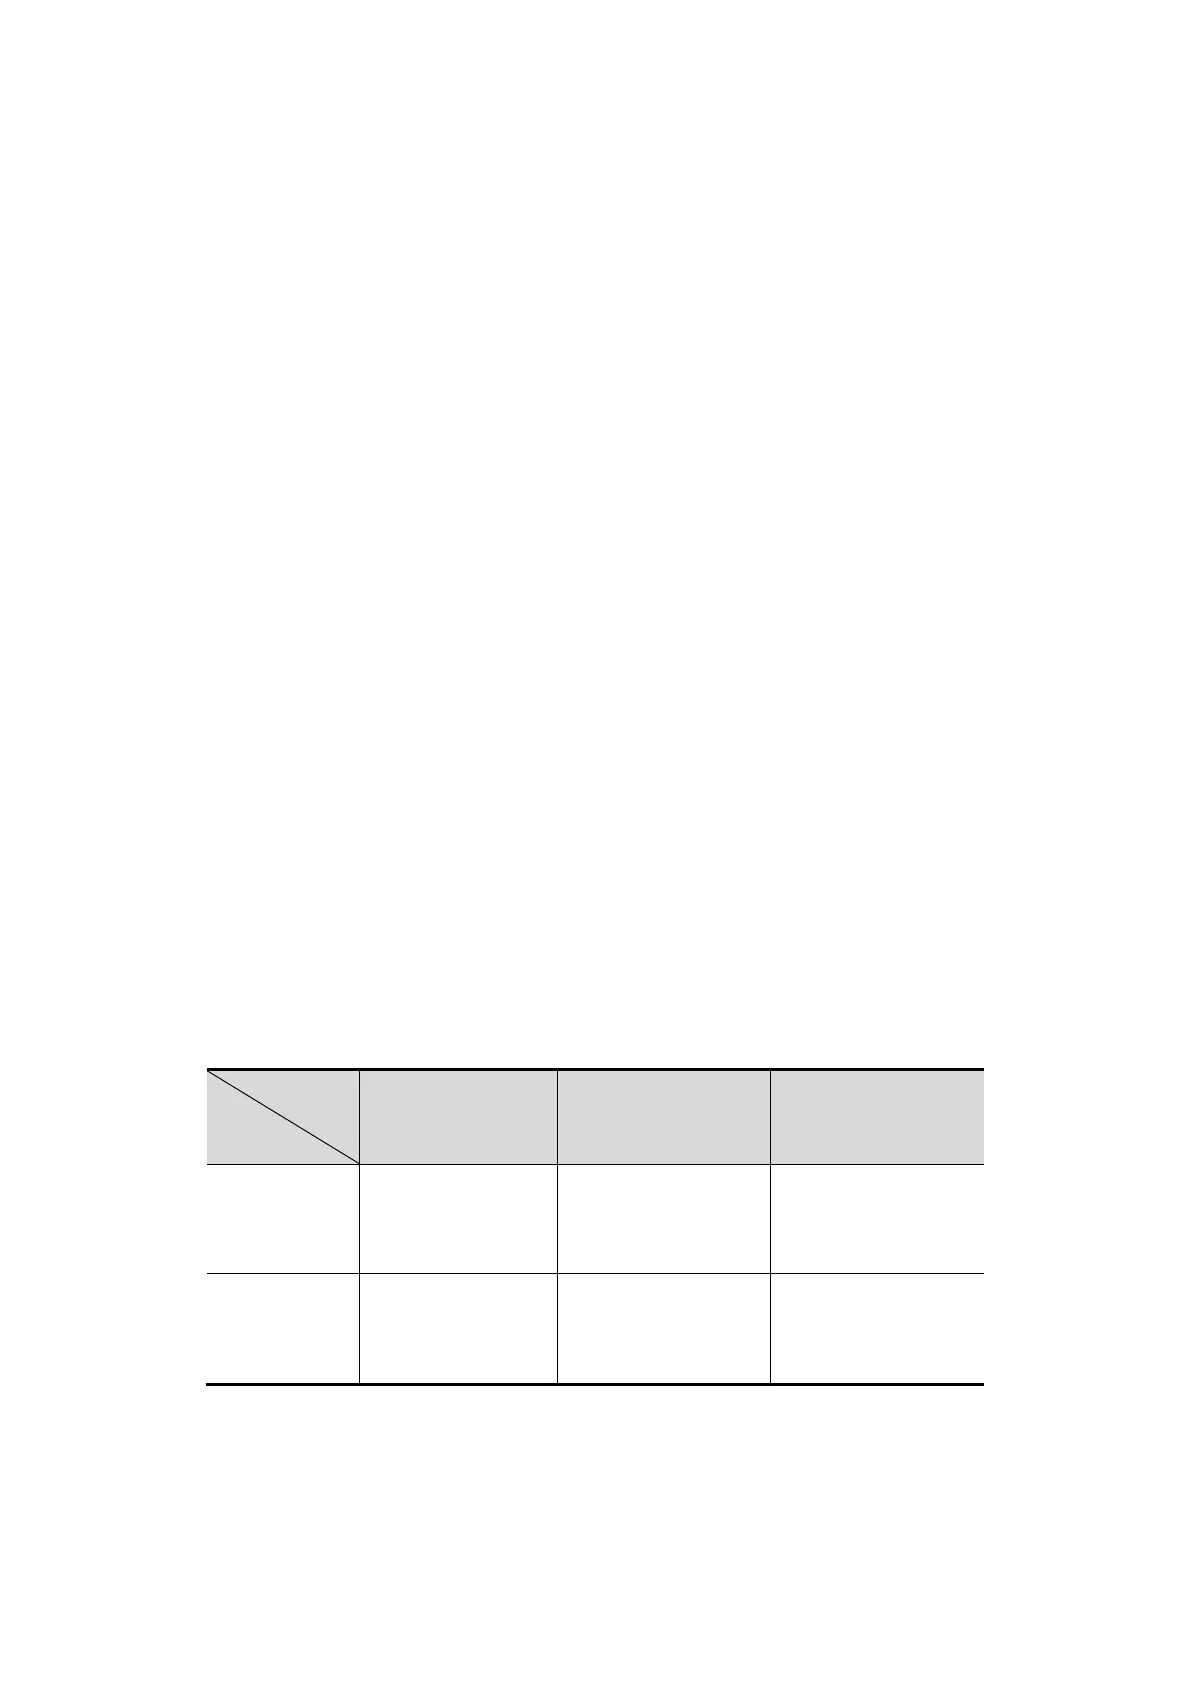
The memory capacity is evenly distributed as per splitting number, as shown in the following
table (Taking B images in low density as an example, the capacity of B cine memory is N
frames):
Mode
Split
Single-B/Color Dual Quad
Auto
One memory, with
capacity N frames.
into two, with
capacity N/2 frames
each
into four, with
capacity N/4 frames
each
Split
into two, with
capacity N/2
frames each
into two, with
capacity N/2 frames
each
into four, with
capacity N/4 frames
each
6.4.2 Cine Memory Clear
In the following conditions, the cine review memory will be cleared:
Start an exam of a new patient.
 Loading...