11-8 Setup
the multifunctional knob to change the angle, and press <Set> to confirm the orientation
of the probe.
7. Select the body mark in Selected Items and click [Default], and then the body mark will be
marked with a tick ”√”.
8. Click [Save] to complete the setting.
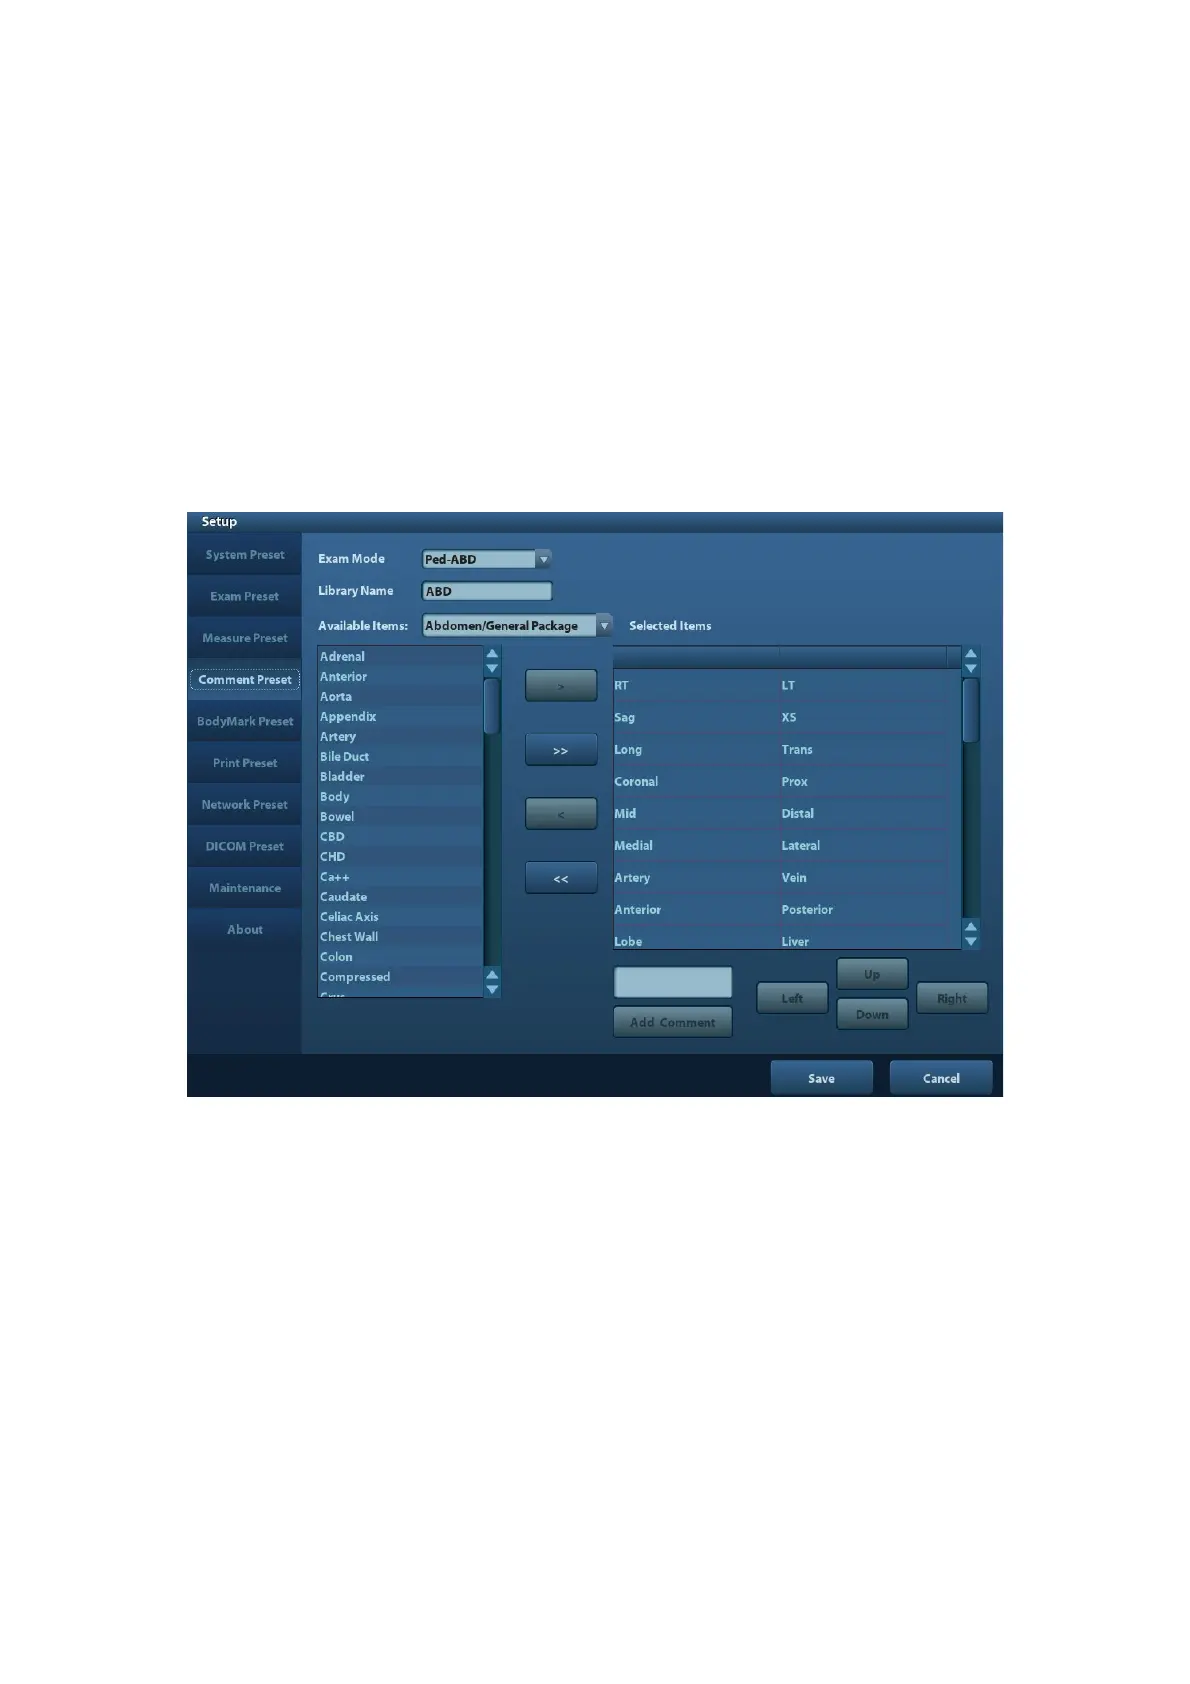
11.5 Comment Preset
You can preset the custom comments library for each exam mode to your preference. The
comments in the library are provided by the system or user-defined ones. The name of the
library, which can be set, will appear on the first page of the library.
1. To enter Comment Preset:
Open the Comment page via [Setup]-> [Comment Preset].
2. Select exam mode.
3. Enter Library Name: you can enter characters for the library name, or accept the default
name (the same as that for the exam mode).
4. Add user-defined comments: directly enter comment texts, or select comment texts for
the comment library.
Directly enter comment texts: posit the cursor in the field box above [Add Comment],
enter the text comment through the keyboard, and then click [Add Comment]. Then
the directly-entered comment will be added to the Available Items and Selected Items.
Select Available Items: First select a comment library in the drop-down list beside
“Available Items”, and then click [Set] on one item displayed below “Available Items”.
Click [>] to add the item in Available Items on the left into Selected Items on the right.
Click [>>] to add all items in Available Items on the left into Selected Items on the
right.
5. Change position of the selected items: select an item on the right side box and click [Up],
[Down], [Left] or [Right] button to change the position of the item.
6. Delete comments:
 Loading...