Home
Ricoh
All in One Printer
Parisian-C1
Ricoh Parisian-C1 User Manual
4
of 1
of 1 rating
452 pages
Give review
Manual
Specs
To Next Page
To Next Page
To Previous Page
To Previous Page
Loading...
v
❖
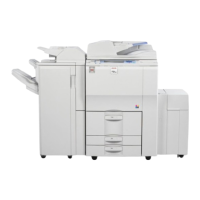
2 Sided 2 Pages
→
Combine 1 Sided 1 Page
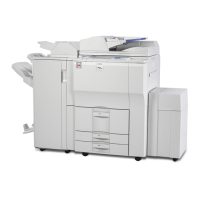
Copying Originals Such as Books
See p.61 “Series Copies”.
❖
Bound Originals
→
1 Sided 2 Pages
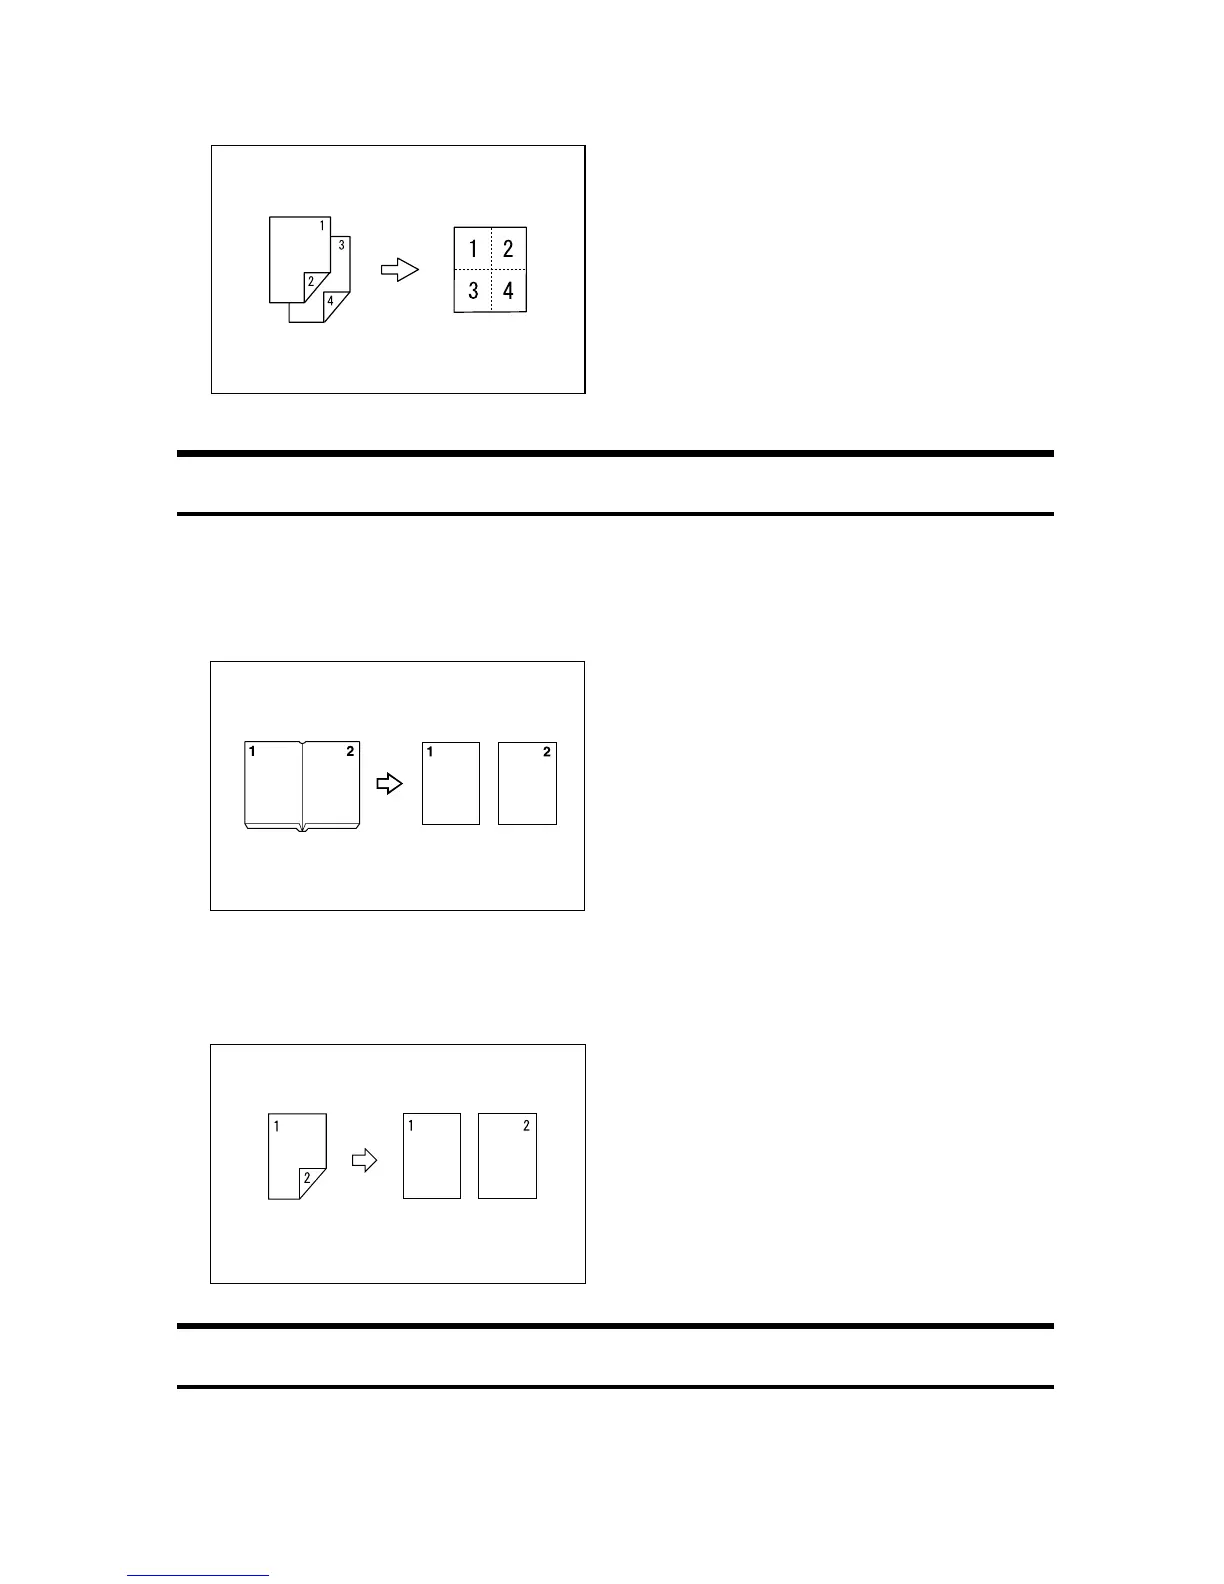
❖
2 Sided 1 Page
→
1 Sided 2 Pages
Copying onto Envelopes
❖
Envelope
See p.30 “When Copying onto Envelopes”.
GCSHVYBJ
CP2B0100
282
284
Table of Contents
Table of Contents
13
Default Chapter
1
About this Machine
1
Operating Instructions
1
Manuals for this Machine
3
What You Can Do with this Machine
6
Copier, Facsimile, Printer, and Scanner Functions
6
Paperless Fax Transmission
7
Fax Transmission and Reception through the Internet
8
Using the Scanner in a Network Environment
9
Administrating the Machine (Security Functions)
10
Monitoring the Machine Via Computer
11
What You Can Do with this Machine with the DDST Unit
12
Table of Contents
13
Notice
15
Important
15
Notes to Wireless LAN Interface (Optional) Users
15
For Users in the State of California
17
How to Read this Manual
18
Symbols
18
Name of Major Options
18
Safety Information
19
Safety During Operation
19
Positions of WARNING and CAUTION Labels
23
ENERGY STAR Program
24
Specifications
25
Recycled Paper
25
Getting Started
27
Guide to Components
27
Ventilation Holes
28
Options
30
Control Panel
32
Display
36
Reading the Display and Using Keys
36
When the Authentication Screen Is Displayed
37
User Code Authentication (Using the Control Panel)
37
User Code Authentication (Using a Printer Driver)
37
Login (Using the Control Panel)
38
Logout (Using the Control Panel)
38
Login (Using a Printer Driver)
39
Login (Using Web Image Monitor)
39
Logout (Using Web Image Monitor)
39
Changing Modes
40
Turning on the Power
41
Turning on the Main Power
41
Turning on the Power
42
Turning off the Power
42
Turning off the Main Power
43
Saving Energy
44
Security (for Machines with the DDST Unit)
45
Primary Security Functions
45
Operating Environment and Notes
46
Entering Text
47
Available Characters
47
Keys
47
How to Enter Text
48
Appendix
57
Dos and Don'ts
57
Software and Utilities Included on the CD-ROM
59
Viewing the Contents of the CD-ROM
60
Printer Drivers for this Machine
60
TWAIN Driver
61
LAN-Fax Driver
62
Desktopbinder Lite
63
Smartdevicemonitor for Admin
64
Desktopbinder-Smartdevicemonitor for Client
65
Software for Machines with the DDST Unit
66
Installing the Operating Instructions
69
PDF Manuals
70
How to Use the Operating Instructions
71
Opening from the Icon
71
Opening from the [Start] Menu
71
Opening from the CD-ROM
72
Specifications for the Main Unit
73
Specifications for Options
77
Exposure Glass Cover
77
Auto Document Feeder Capable of Scanning both Sides of a Sheet (ARDF)
77
500-Sheet Finisher
78
Upper Internal Tray (1 bin Tray)
79
Lower Paper Trays
79
Copy Paper
80
Recommended Paper Sizes and Types
80
Paper Tray
80
Bypass Tray
82
Unusable Paper
84
Paper Storage
85
Index
86
Table of Contents
94
Default Chapter
97
How to Read this Manual
97
Symbols
97
Display Panel
98
Reading the Display and Using Keys
99
Accessing User Tools
100
Changing Default Settings
100
Exiting User Tools
101
1 Connecting the Machine
103
Connecting to the Ethernet Interface
103
Connecting to the USB Interface
104
Network Settings
105
Settings Required to Use the Printer
105
Settings Required to Use Network TWAIN Scanner
106
2 System Settings
107
General Features
107
Output Tray Settings
109
Tray Paper Settings
110
Timer Settings
112
Administrator Tools
113
User Code
116
Registering a New User Code
116
Changing a User Code
117
Deleting a User Code
119
Displaying the Counter for each User Code
121
Printing the Counter for each User Code
122
Clearing the Counter
123
3 Copier Features
125
4 Printer Features
129
Paper Input
129
List/Test Print
130
Printing the Operations Test Page
131
Maintenance
132
Setting Menu Protect
132
Canceling Menu Protect
134
Temporarily Canceling Menu Protect
135
System
136
Host Interface
138
PCL Menu
139
5 Interface Settings
141
Network
141
6 Other User Tools
143
Changing the Display Language
143
Counter
144
Displaying the Total Counter
144
Index
146
Table of Contents
156
How to Read this Manual
159
Symbols
159
Names of Major Options
159
Indicators
161
1 When the Machine Does Not Operate as Wanted
161
Panel Tone
162
When the Function Status Indicator Lights up in Red
163
When You Have Problems Operating the Machine
164
This Machine
166
When a Job Is Not Performed
167
When a Message Is Displayed
169
2 Troubleshooting When Using the Copy Function
169
When You Cannot Make Clear Copies
172
When You Cannot Make Copies as Wanted
175
When Memory Is Full
177
Adjusting the Volume
179
3 Troubleshooting When Using the Facsimile Function
179
When a Message Is Displayed
182
When You Cannot Send or Receive Fax Messages as Wanted
189
When Memory Is Full
193
When an Error Report Is Printed
194
Turning off the Main Power / in the Event of Power Failure
195
When an Error Occurs Using Internet Fax
196
Error Mail Notification
196
Error Report (E-Mail)
196
Server-Generated Error E-Mail
196
When a Message Is Displayed During Installation of the Printer Driver
197
Windows 95/98/Me/2000
197
Windows XP Professional or Windows Server 2003
198
Windows XP Home Edition
198
Windows Vista
199
4 Troubleshooting When Using the Printer Function
197
When a Message Is Displayed
200
Status Messages
200
Alert Messages
201
Printing the Error Log
203
When You Cannot Print
204
Other Printing Problems
207
When Scanning Is Not Done as Expected
215
5 Troubleshooting When Using the Scanner Function
215
When You Cannot Send Scanned Files
216
When You Cannot Browse the Network to Send a Scanned File
216
When the TWAIN Driver Cannot be Started
216
The Network Delivery Function Cannot be Used
216
Operations Are Not Possible When Messages Appear
217
When a Message Is Displayed
218
When a Message Is Displayed on the Display Panel
218
When a Message Is Displayed on the Client Computer
223
The Printer Function
227
When a Message Is Displayed During Installation of the Printer Driver
227
When a Message Is Displayed
229
When You Cannot Print
233
Other Printing Problems
235
6 Troubleshooting When Using the DDST Unit
227
The Scanner Function
240
When Scanning Is Not Done as Expected
240
When a Message Is Displayed
241
Loading Paper
245
Loading Paper into the Paper Trays
246
Orientation-Fixed Paper or Two-Sided Paper
247
7 Adding Paper, Toner and Staples
245
Changing the Paper Size
250
Changing the Paper Size in the Paper Tray
251
Adding Toner
255
Replacing Toner
256
Sending Fax Messages When Toner Has Run out
257
Waste Toner
257
Adding Staples
258
Finisher
258
Replacing the Transmission Stamp Cartridge
259
Removing Jammed Paper
261
When a Is Displayed
262
When B Is Displayed
262
When C Is Displayed
262
When P Is Displayed
263
When y Is Displayed
263
When Z Is Displayed
264
When R Is Displayed (When Finisher Is Installed)
264
When D Is Displayed (When Bridge Unit Is Installed)
265
8 Clearing Misfeeds
261
Removing Jammed Staples
266
Finisher
266
Where to Put Your Machine
267
Machine Environment
267
Moving
268
Power Connection
269
Access to the Machine
270
When Not Used for a Long Time
270
9 Remarks
267
Maintaining Your Machine
271
Cleaning the Exposure Glass
271
Cleaning the Exposure Glass Cover
272
Cleaning the ARDF
272
Index
273
Types of Duplex Copies
280
Combining Multiple Pages Onto a Single Page
282
Copying Onto Envelopes
283
Table of Contents
284
How to Read this Manual
287
Symbols
287
Functions Requiring Optional Configurations
288
Display
289
Reading the Display
289
Using the Keys on the Control Panel
290
Selection Keys
290
Scroll Keys
290
User Tools Menu (Copier Features)
291
Originals
293
Sizes and Weights of Recommended Originals
293
Sizes Detectable by Auto Paper Select
295
Missing Image Area
297
1 Placing Originals
293
Placing Originals
298
Original Orientation
298
Placing Originals on the Exposure Glass
299
Placing Originals in the ARDF
300
Specifying the Original Size When a Paper Tray Is Selected
301
Specifying the Original Size When the Bypass Tray Is Selected
304
Basic Procedure
307
2 Copying
307
Copying from the Bypass Tray
309
Loading Paper on the Bypass Tray
309
When Copying Onto Regular Size Paper
311
When Copying Onto Custom Size Paper
312
When Copying Onto OHP Transparencies
314
When Copying Onto Thick Paper
315
When Copying Onto Envelopes
316
Copy Functions
320
Adjusting Image Density
320
Original Type Setting
320
Selecting Copy Paper
321
Preset Reduce/Enlarge
324
Zoom
326
Auto Reduce/Enlarge
328
Sort
329
Rotate Sort
332
Stack
334
Staple
335
Duplex
338
One-Sided Combine
341
Two-Sided Combine
344
Series Copies
347
3 Appendix
351
Combination Chart
351
Supplementary Information
353
Index
358
Table of Contents
359
Table of Contents
366
Notice
369
How to Read this Manual
371
Symbols
371
Display Panel
372
Reading the Display and Using Keys
373
Initial Display
373
Printer Features Menu
374
Setting Paper on the Bypass Tray
377
Setting the Paper Size Using the Control Panel
379
Setting the Custom Size Paper Using the Control Panel
381
Setting Thick Paper or OHP Transparencies Using the Control Panel
382
Setting Envelope Using the Control Panel
384
Confirming the Connection Method
387
Network Connection
387
USB Connection
388
1 Using the Printer Function
387
Installing the Printer Driver
389
Configure the Port
390
Using TCP/IP Port Type P10001
390
Using Standard TCP/IP Port
391
Using LPR Port
391
Using the IPP Port
392
Printing with a Print Server
394
Installing the Printer Driver Using USB
395
Windows Me - USB
395
Windows 2000 - USB
397
Windows XP, Windows Server 2003 - USB
398
Setting up the Printer Driver
399
Windows 98 / Me - Accessing the Printer Properties
399
Windows 2000 - Accessing the Printer Properties
400
Windows XP, Windows Server 2003 - Accessing the Printer Properties
402
Form Feed
404
Printing from a Selected Tray
404
Canceling a Print Job
405
Canceling a Print Job Using the Control Panel
405
Windows - Canceling a Print Job from the Computer
405
Checking the Error Log
407
Collate
408
Staple
410
Staple Position
410
Stapling Precautions
411
TWAIN Scanner
413
Process Flow
414
2 Using the Scanner Function
413
Preparation for Using the TWAIN Scanner
415
Installing the TWAIN Driver
416
Setting Originals
417
Placing Originals
417
Scanning Originals
421
Relationship between Resolution and File Size
422
When Using as a TWAIN Scanner
422
3 Appendix
423
Specifications
423
Printer
423
Scanner
424
Table of Contents
432
Default Chapter
433
How to Read this Manual
433
Symbols
433
Setting up the Machine on a Network
434
Initial Settings Overview
434
Initial Settings
434
1 Windows Configuration
437
Configuring TCP/IP
437
Configuring a Windows 98 / Me Computer
437
Configuring a Windows 2000 Computer
437
Configuring a Windows XP Computer
438
Configuring a Windows Server 2003 Computer
438
Preparing Printer Server
439
2 Using a Printer Server
439
Features
441
3 Monitoring and Configuring the Printer
441
Settings You Can Change Using a Web Browser
442
Configuring the Network Interface Board Using a Web Browser
443
4 Appendix
445
Using DHCP
445
Snmp
446
Error Messages on the Display
447
Messages Without Code Numbers
447
Messages with Code Numbers
448
Specifications
449
Other manuals for Ricoh Parisian-C1
Network Guide
24 pages
4
Based on 1 rating
Ask a question
Give review
Questions and Answers:
Need help?
Do you have a question about the Ricoh Parisian-C1 and is the answer not in the manual?
Ask a question
Ricoh Parisian-C1 Specifications
General
Brand
Ricoh
Model
Parisian-C1
Category
All in One Printer
Language
English
Related product manuals
Ricoh P311
32 pages
Ricoh P 310
32 pages
Ricoh PE-P4
218 pages
Ricoh P C300W
220 pages
Ricoh P C301W
220 pages
Ricoh Priport 1250
144 pages
Ricoh Priport HQ9000
130 pages
Ricoh PRIPORT JP1210
144 pages
Ricoh Printer/Scanner
66 pages
Ricoh Laser MFP Printer
129 pages
Ricoh Aficio MP 5500 S/P
226 pages
Printer/Scanner Unit Type 8000
907 pages
 Loading...