BRP-Rotax
Maintenance Manual
Effectivity 912/914 Series
Edition 1 / Rev. 0
72-00-00
page 55
May 01/2007
d02622
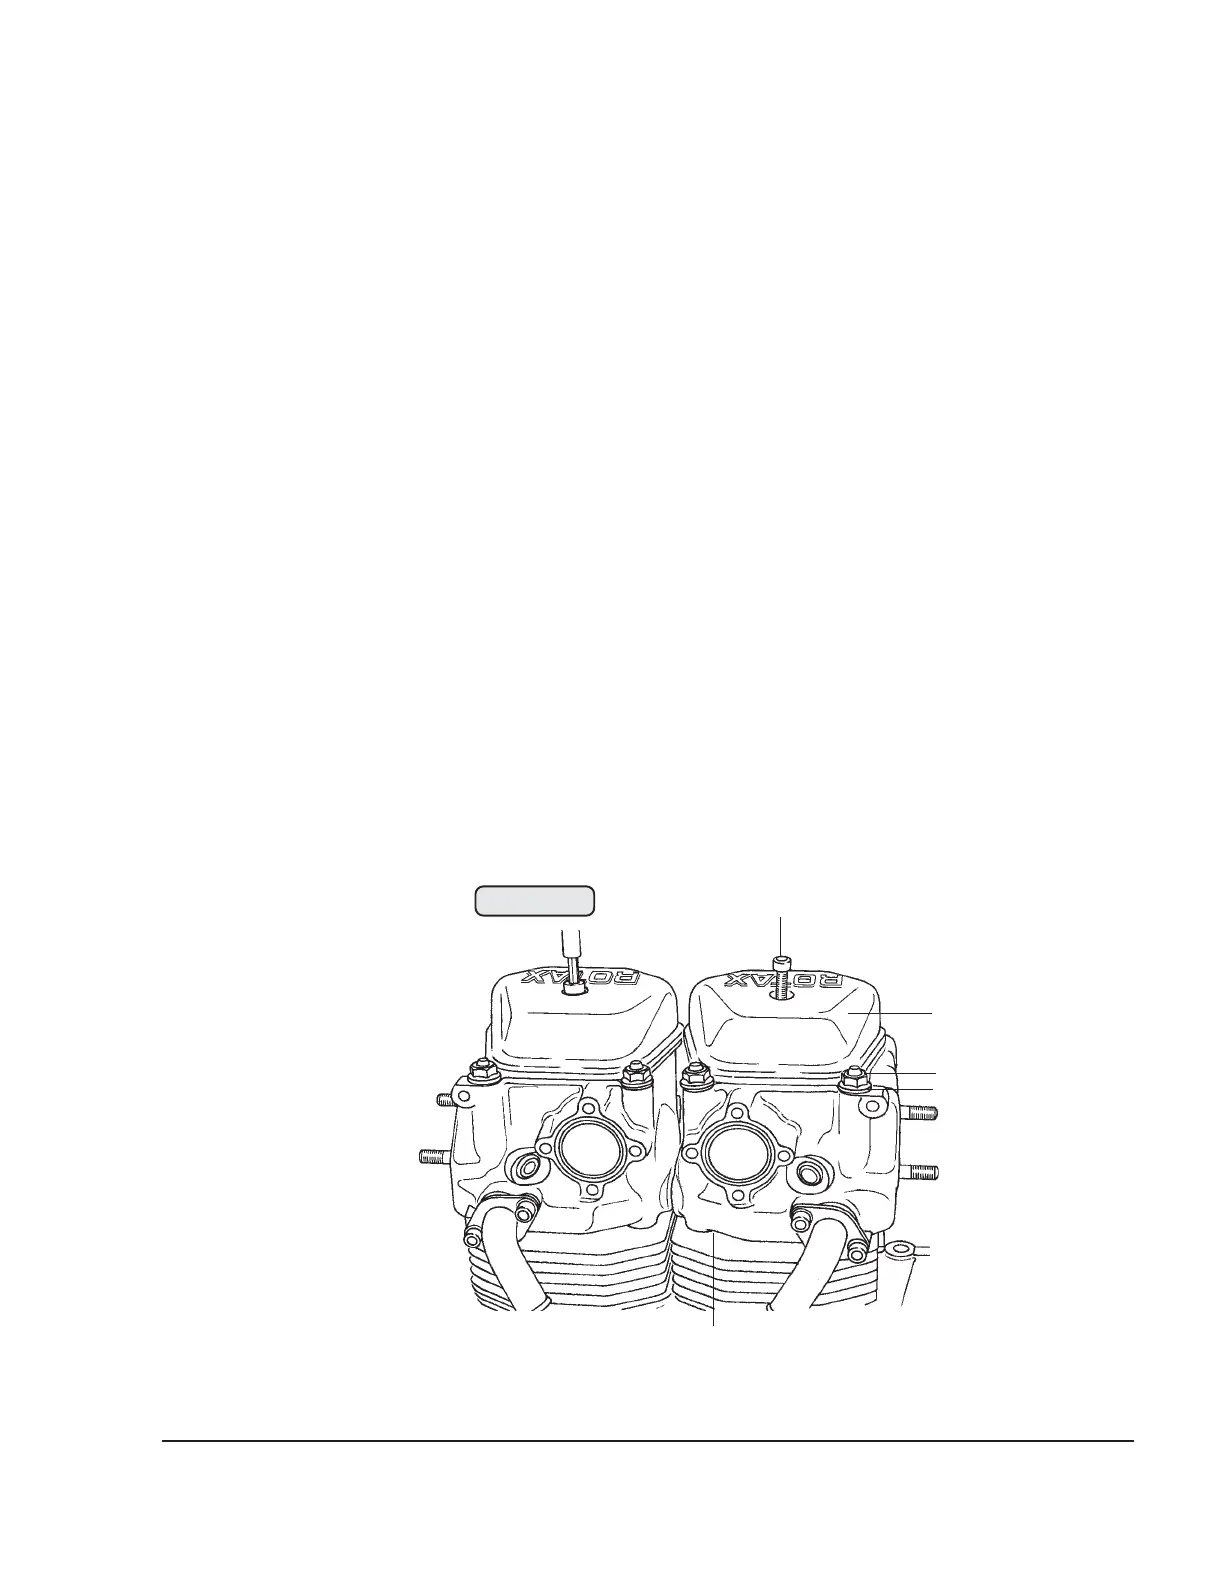
3.10) Cylinder head — removal
See Figs. 72-57 and 72-58.
If components of several cylinders are disassembled, they must be marked to
ensure correct coordination at refitting.
Remove allen screw M6x25 (1) and washer from valve cover (2) and lift off valve
cover and large and small O-ring. Remove crosswise 2 flanged nuts (3) with
washers (4) and two collar cap nuts M8. The collar cap nut is inside the valve
cover and has a sealing edge.
◆ NOTE: There is no washer required under the collar cap nut.
On newer engine versions, no washers (4) are fitted. They can
be left out during assembly on all engine versions.
■ CAUTION: Do not damage the sealing surface!
Using both hands, carefully pull the complete cylinder head off the cylinder (5).
00277
Fig. 72-57
1
2
3
4
5
 Loading...


