73-00-00
page 60
May 01/2007
Effectivity 912/914 Series
Edition 1 / Rev. 0
d02623
BRP-Rotax
Maintenance Manual
40 mm
04730
2
03884
2
5
4
3
1
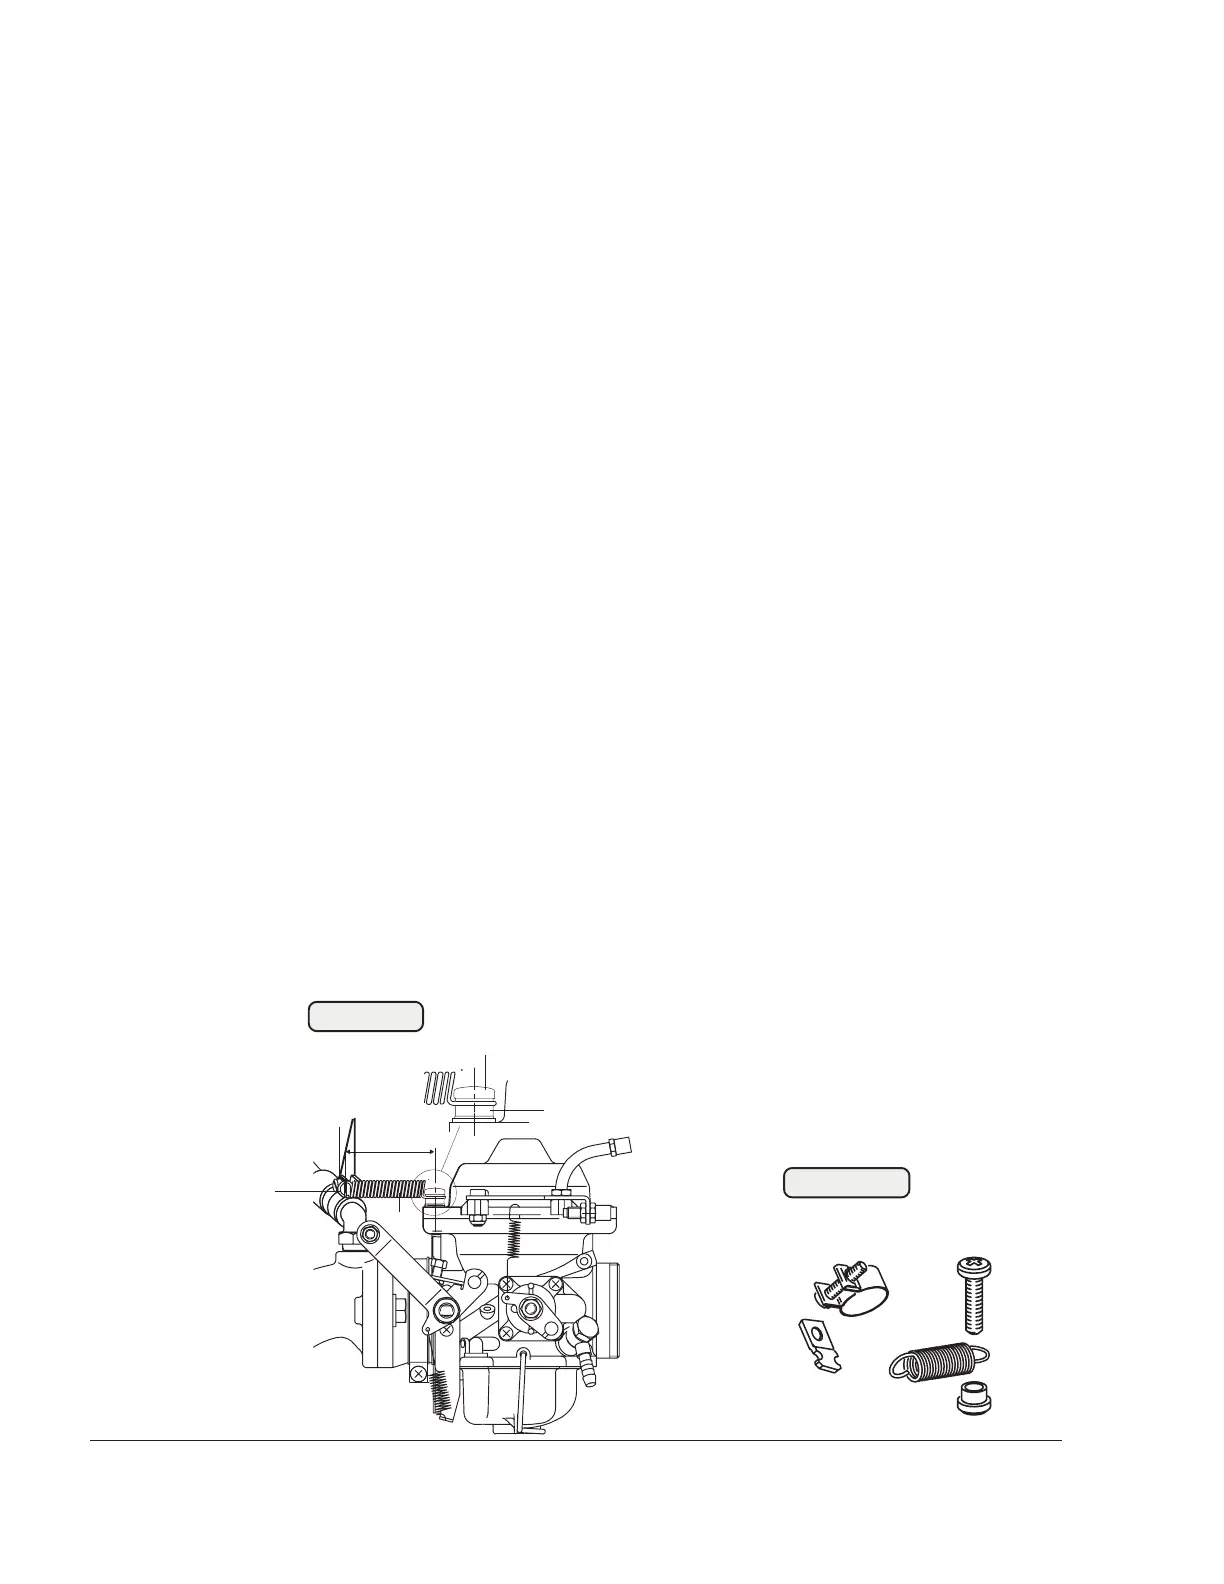
Fig. 73-53
Fig. 73-52
3.6) Intake manifolds fitting
See 72-00-00 sec. 3.17.
3.7) Engaging the carburetor support
See Figs. 73-52 and 73-53.
Check that the tension spring (1) moves freely in the allen screw (2) and in the
distance sleeve (5) and engage the tension spring in the engagement latch (3)
using a suitable tool. Ensure that the two arms (4) of the tension clamp with the
engagement latch point upwards. If necessary, correct the position of the
tension clamp.
■ CAUTION: To ensure efficient carburetor suspension, a distance of 40 mm
(1.57 in.) between the allen screw (2) and the engagement latch
(3) must be respected.
If a counter sunk screw is fitted instead of the allen screw and the distance
sleeve, support set part no. 887730, see Fig. 73-53, must be used.
Repeat procedure for second carburetor.
◆ NOTE: Only on 912 Series: On engine models from the year 96
onwards, the carburetor support is already fitted in serial
production. We recommend installing it on all engines older than
this. See Service Bulletin SB-912-010,”Fitting of a carburetor
support”, latest issue.
Engines 912 S, 912 ULS, 914 UL and 914 F have been equipped
with the carburetor support since the beginning of production.
(1.57 in.)