BRP-Rotax
Maintenance Manual
Effectivity 912/914 Series
Edition 1 / Rev. 0
72-00-00
page 17
May 01/2007
d02622
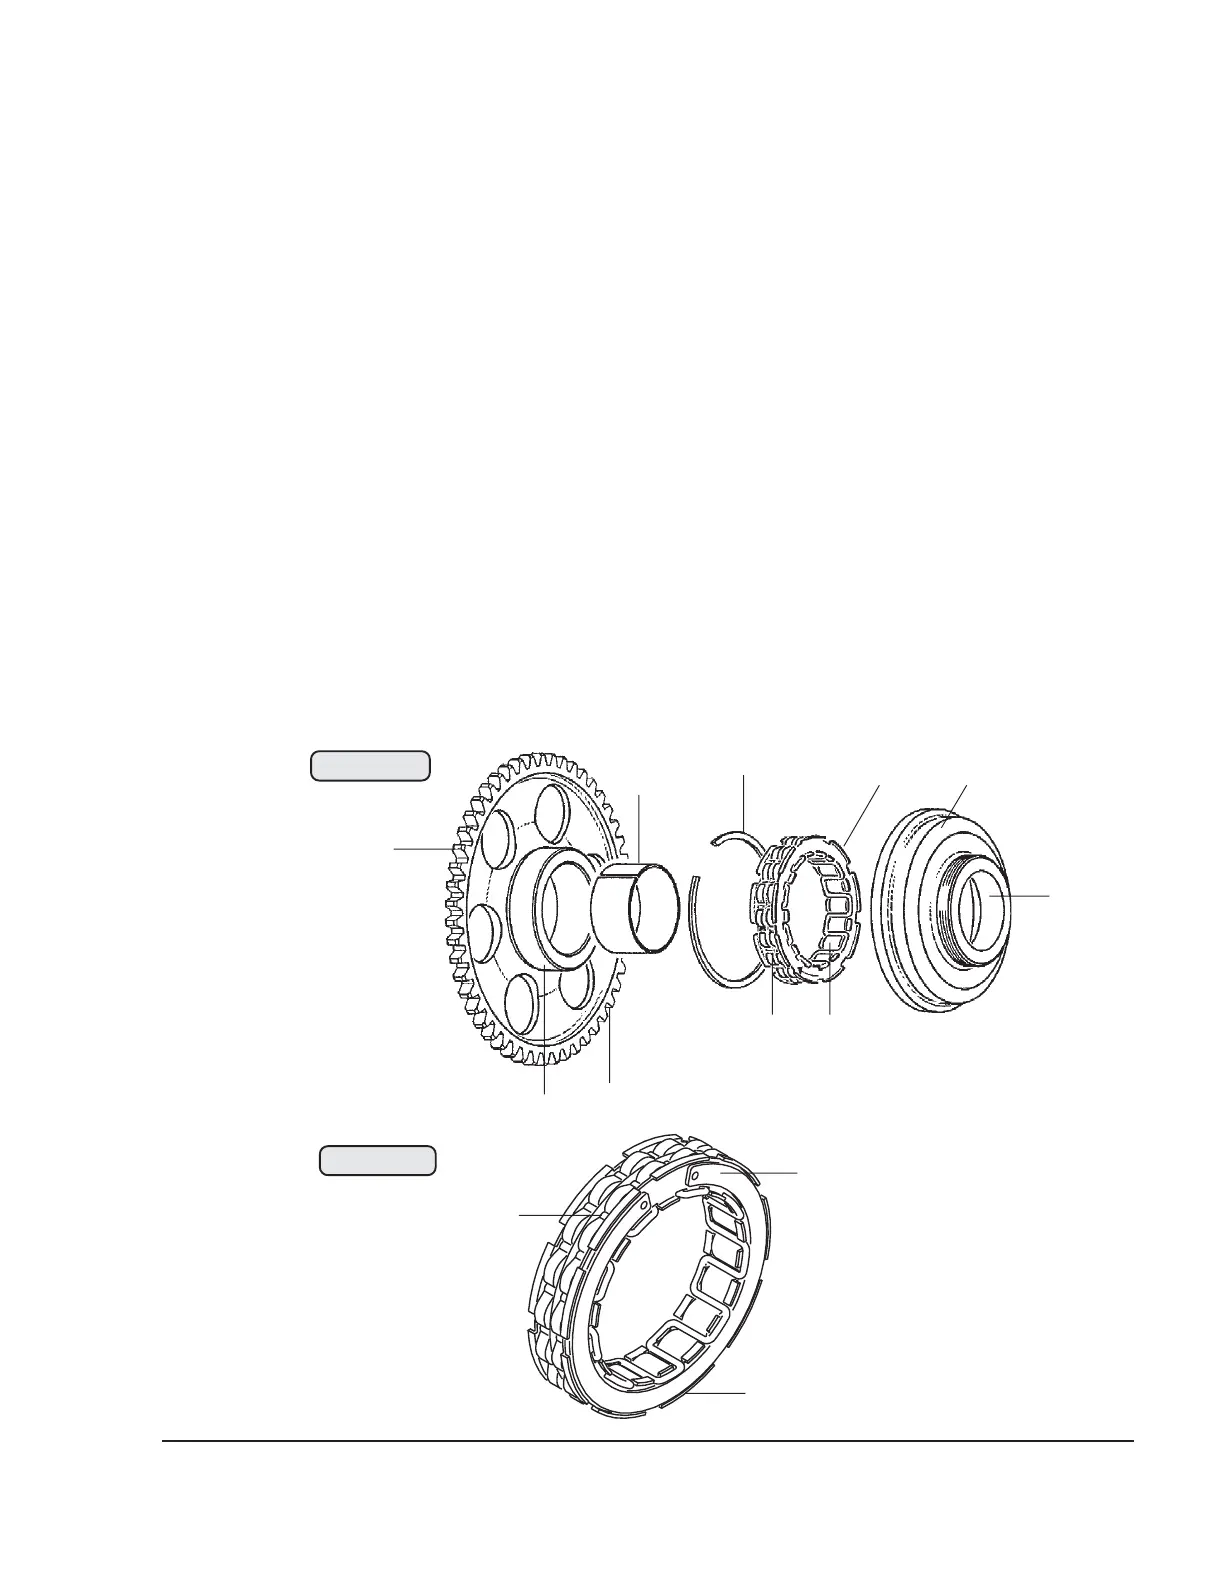
3.6.2) Sprag clutch dismantling
See Figs. 72-12 and 72-13.
Carry out a visual inspection to check whether oil sludge has been
deposited in the sprag clutch housing (5) and in in the lock (16). For
inspection/cleaning purposes, remove the circlip (14). Compress the
circlip (19) in the sprag clutch (17) slightly with circlip pliers and twist the
sprag unit out of the sprag clutch housing. Clean all parts thoroughly.
The circumferential helical spring (15) must not be loose or distorted to
a wavy form. Replace sprag clutch as required.
The cams (16) of the sprag clutch must move freely and the surface
must be free of damage. Inspect the engaging surfaces of the sprag
clutch in the sprag clutch housing.
If wear can be measured on the internal contact surfaces of the sprag
clutch housing, the affected parts must be replaced. Check the tapered
surface (18). Check the geartooth system (12), the engaging surface
of the sprag clutch (11) on the free wheel gear and the bearing bushing
(13).
00237
00238
20
6
5
14
19
17
15
12
11
13
16
18
15
Fig. 72-13
Fig. 72-12