75-00-00
page 12
May 01/2007
Effectivity 912/914 Series
Edition 1 / Rev. 0
d02625
BRP-Rotax
Maintenance Manual
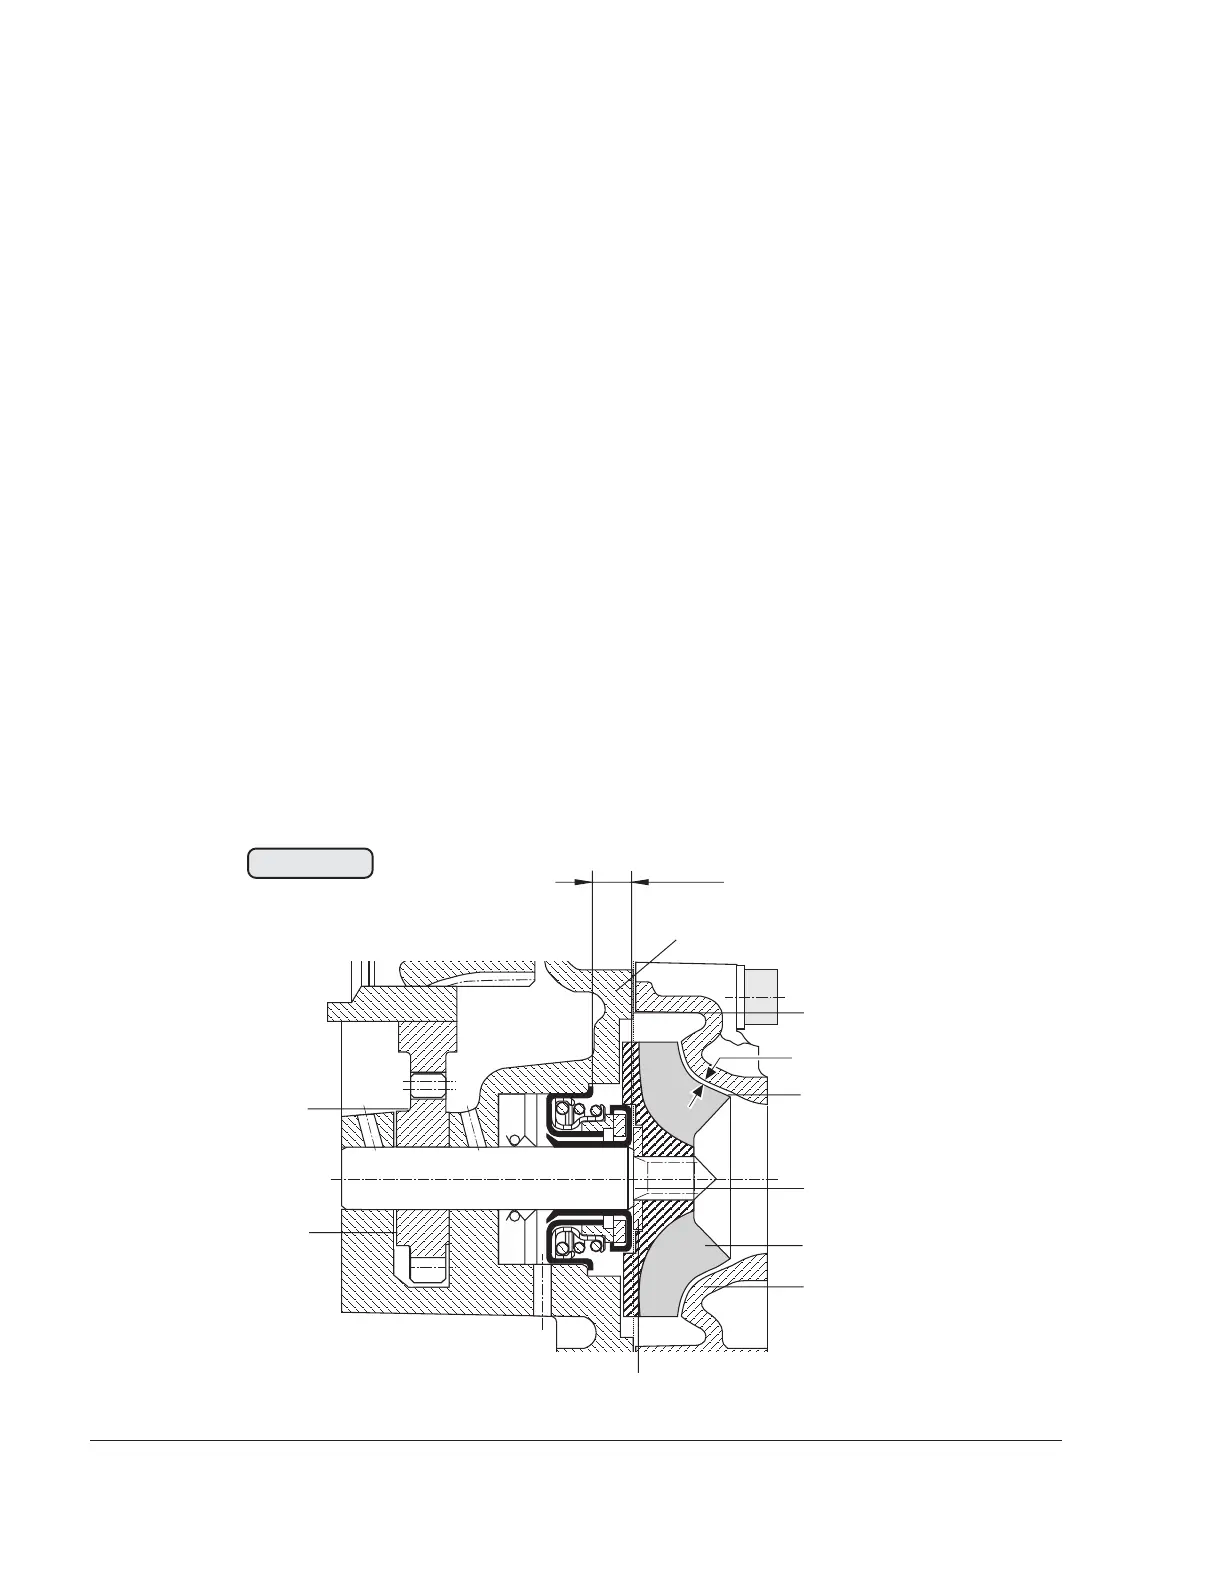
3.8) Axial position of the water pump shaft
See Fig. 75-10
Check axial position of water pump shaft and pump gear. The step (6) of the gear
points inward towards the crankcase.
◆ NOTE: To ensure the correct gap (8) (dimension WP02) between the
impeller (9) and the water pump housing (10), make sure that
the collar (7) of the water pump shaft is flush with the sealing
surface (11) of the ignition cover (12).
If necessary, turn the ignition cover around and lay it on a planed hardened sheet
with an 8 mm (0.32 in.) bore. Press the water pump shaft back as required with
a ø10 mm (0.40 in.) bolt. Trial spin the installed pump shaft.
Place stainless steel shim (13) on the shaft, fit impeller (9), turning clockwise,
and tighten with special tool, part no. 877295. Tightening torque 15 Nm (133
in.lb).
◆ NOTE: Check impeller (9) for out-of-round. If it is noticeably out-of-
round, replace impeller or if necessary also the pump shaft.
See 75-00-00 sec. 4.
00085
WP02
11
12
13
14
6
7
8
9
10
WP01
Fig. 75-10
 Loading...


