Effectivity 912/914 Series
Edition 1 / Rev. 0
80-00-00
page 11
May 01/2007
d02629
BRP-Rotax
Maintenance Manual
3.4) Electric starter — reassembly
See Figs. 80-3, 80-4, 80-5, 80-6 and 80-7.
◆ NOTE: The following work steps apply to both starter models (HD and
standard starter).
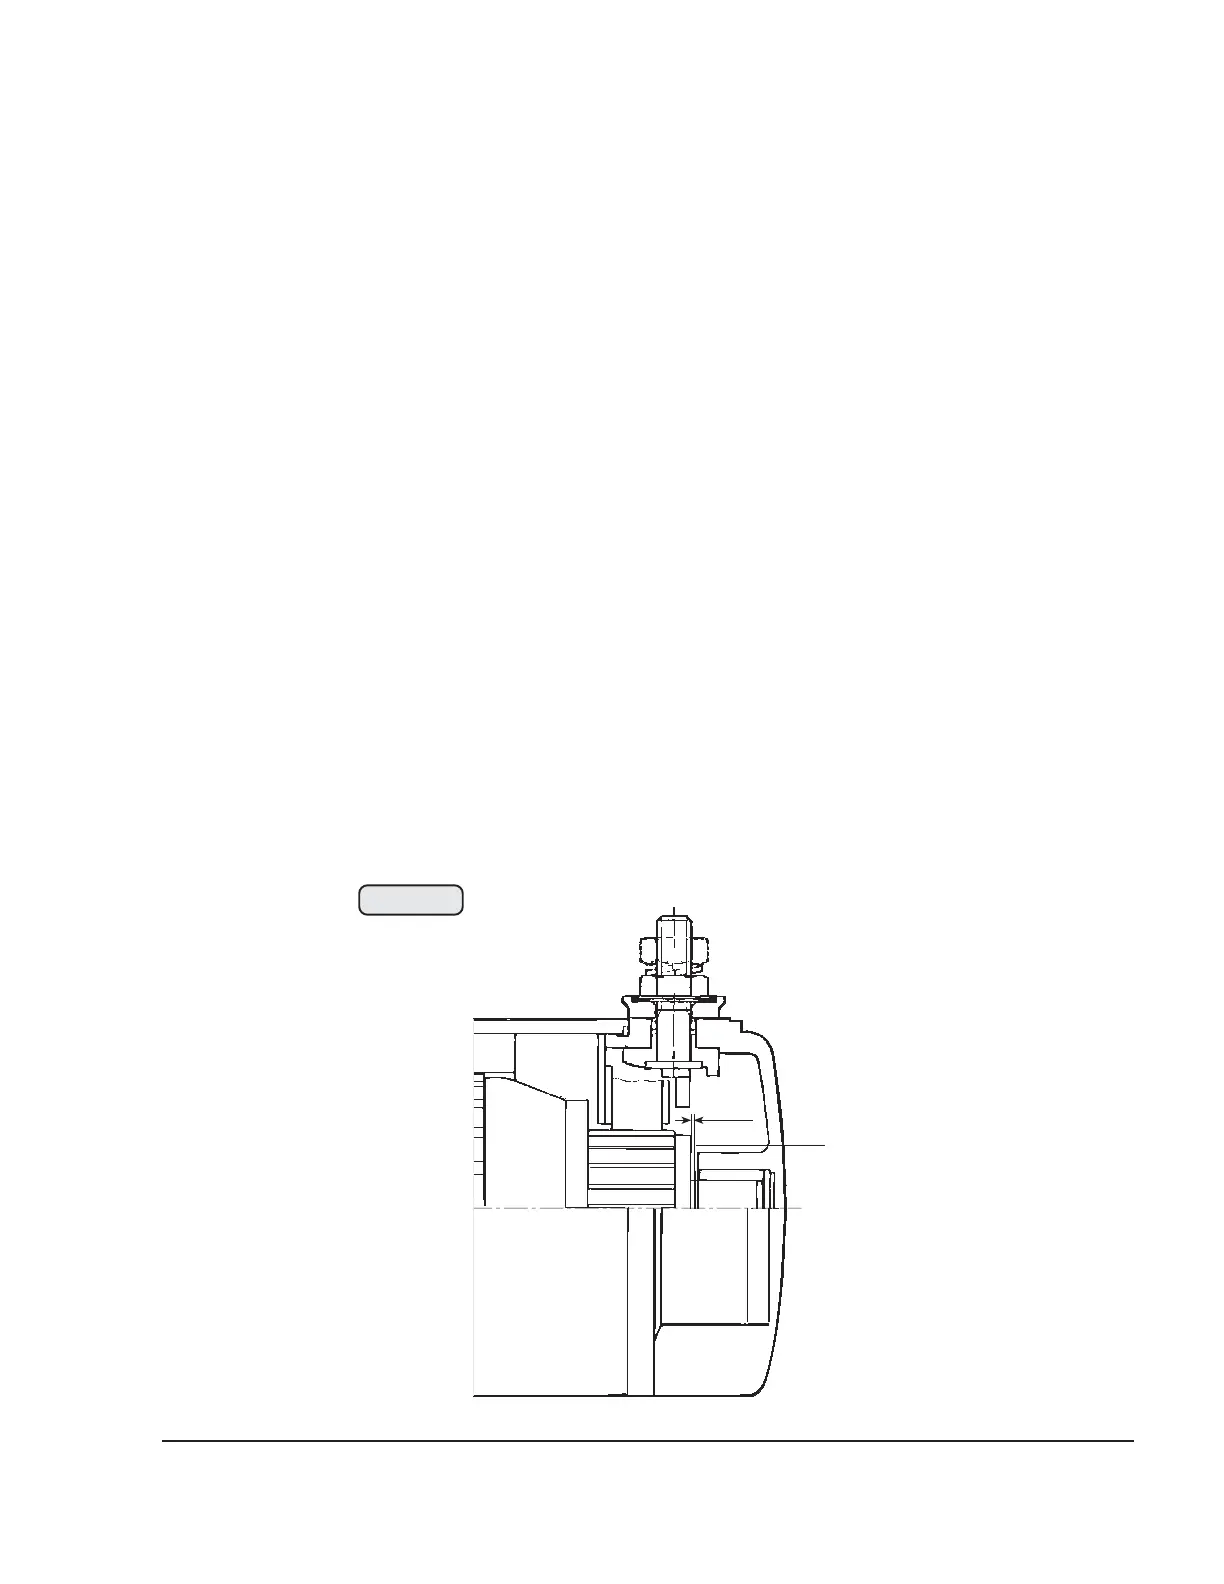
Determine the required number of compensating shims (6) for the axial
clearance, see dimension (ES08) of the rotor (5).
See 80-00-00 sec. 4.
Grease oil seal (20), the ball bearing (10) and the bearing bushing (13). Insert
rotor (5) into the bearing flange (1), fit new O-ring 62x1.5 (18) and put starter
housing (2) over rotor.
Fit the brush holder (4) with the carbon brushes (14) onto the rotor. Push the
required number of compensating shims (6) onto the rotor shaft, insert the
positive-pole carbon brush (23) into the rotor bearing and then fit the complete
rotor bearing (3) with new O-ring 62x1.5 onto the starter housing.
◆ NOTE: Ensure correct positioning and engagement of the positioning
noses.
The HD starter is screwed together with the allen screws (24) M5x180, tightened
to a torque of 6 Nm (53 in.lb).
Maß
dim.
00234
ES08
6
Fig. 80-7
 Loading...


