3-9-3. PD-1054 Board
Preparation
1. Remove the cabinet (G) assembly. (Refer to “3-2. Cabinet (G) Assembly”.)
2. Remove the heat sink (GP) assembly. (Refer to “3-3. Heat Sink (GP) Assembly”.)
3. Remove the top cabinet assembly. (Refer to “3-5. Top Cabinet Assembly”.)
4. Remove the EF-1003 board. (Refer to “3-6. EF-1003 Board”.)
5. Remove the IR cabinet assembly. (Refer to “3-7. IR-1009 Board”.)
6. Remove the inner mold (T) assembly. (Refer to “3-8. Inner Mold (T) Assembly”.)
7. Remove the cabinet (R) assembly. (Refer to “3-9-1. Cabinet (R) Assembly”.)
8. Remove the frame (R). (Refer to “3-9-2. CK-1019 Board”.)
Procedure
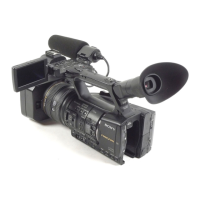
1. Remove the LCD assembly.
(1) Remove the two screws.
(2) Peel off the adhesive portion of the FP-2264 flexible board, and then remove the LCD assembly.
LCD assembly
Frame (R)
Adhesive portion of the FP-2264 flexible board
Precision screws
(P1.7 x 4)
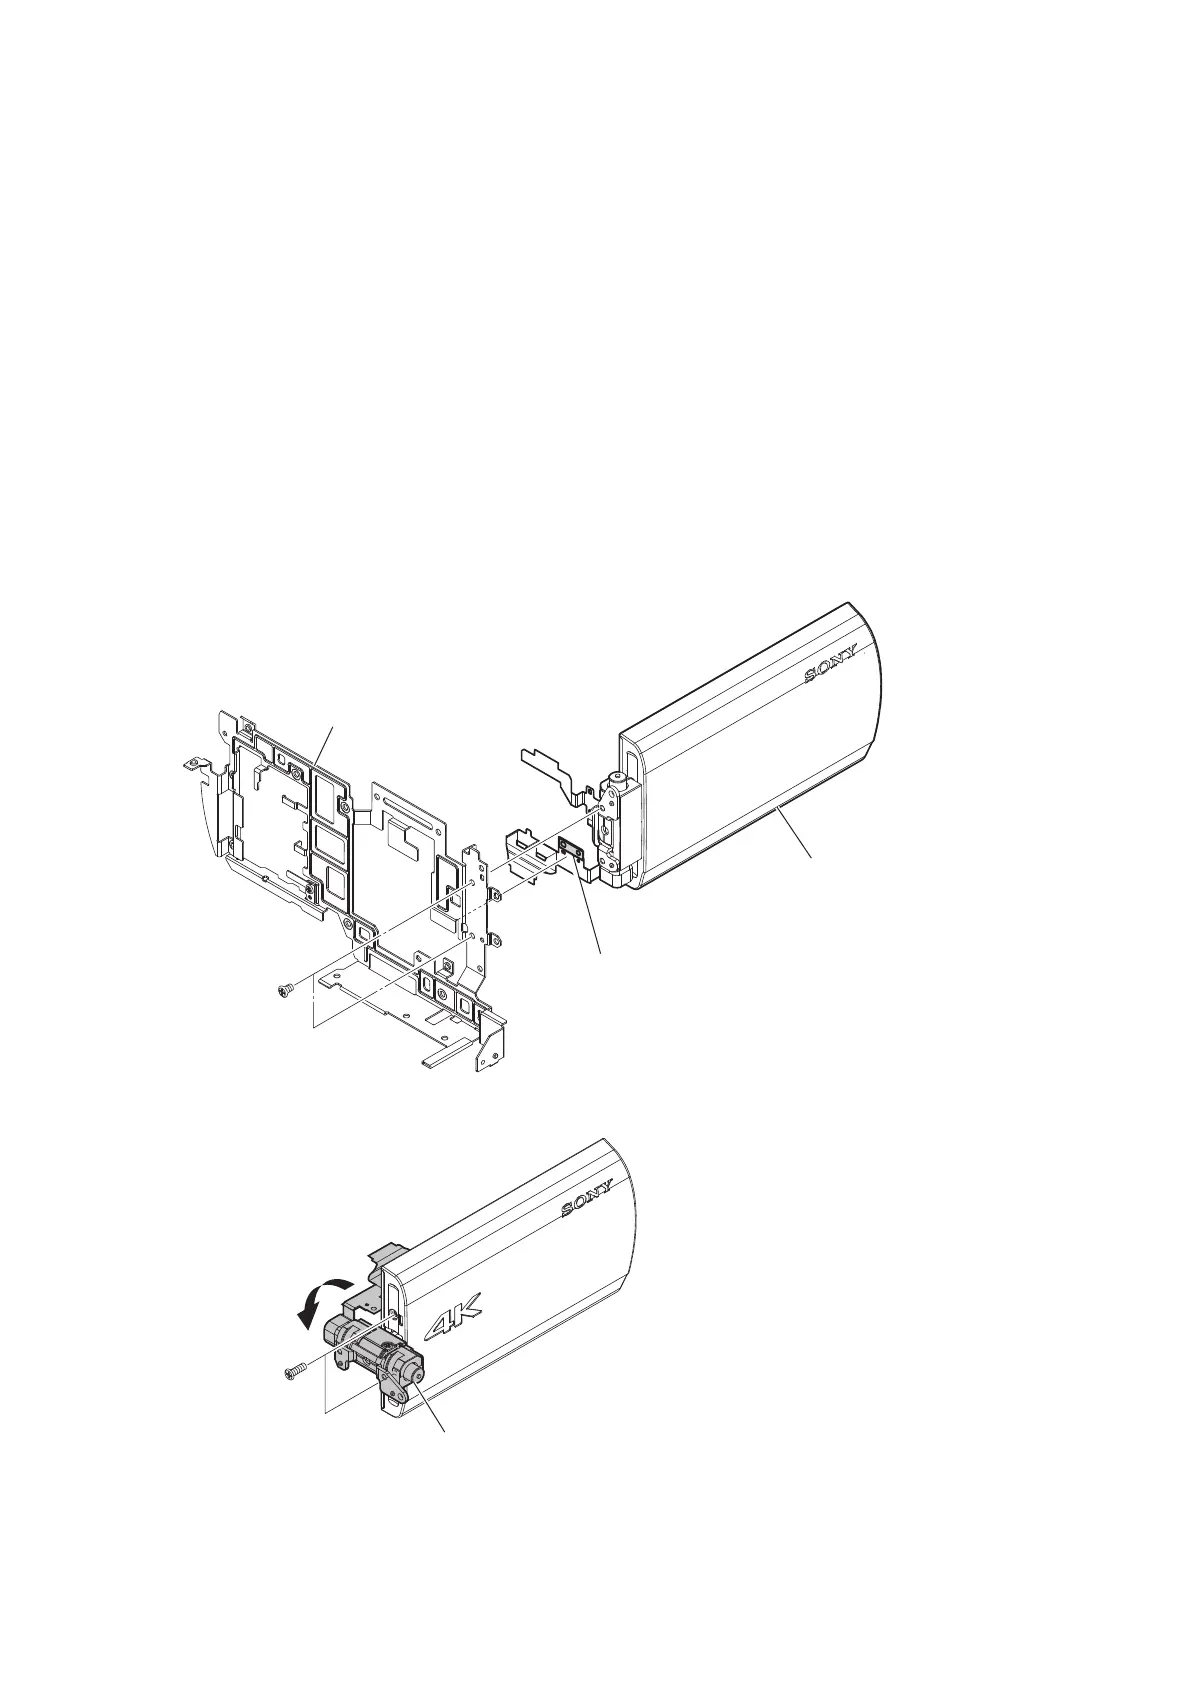
2. Rotate the hinge assembly in the direction of the arrow, and then remove the two screws.
Hinge assembly
Precision screws
(P1.7 x 5)
HXR-NX80/HXR-MC88
3-23
 Loading...