3-15-3. Z Nut (1730)
Note
Before disassembling the main unit, be sure to set the zoom to the Tele end and turn off the camera.
Preparation
1. Remove the cabinet (G) assembly. (Refer to “3-2. Cabinet (G) Assembly”.)
2. Remove the heat sink (GP) assembly. (Refer to “3-3. Heat Sink (GP) Assembly”.)
3. Remove the GR-1003 board. (Refer to “3-4. GR-1003 Board”.)
4. Remove the top cabinet assembly. (Refer to “3-5. Top Cabinet Assembly”.)
5. Remove the EF-1003 board. (Refer to “3-6. EF-1003 Board”.)
6. Remove the IR-1009 board. (Refer to “3-7. IR-1009 Board”.)
7. Remove the inner mold (T) assembly. (Refer to “3-8. Inner Mold (T) Assembly”.)
8. Remove the cabinet (R) assembly. (Refer to “3-9-1. Cabinet (R) Assembly”.)
9. Remove the BT panel assembly. (Refer to “3-10-1. BT Panel Assembly”.)
10. Remove the ZM-1005 board. (Refer to “3-11. ZM-1005 Board”.)
11. Remove the VF assembly. (Refer to “3-12. VF Assembly”.)
12. Remove the MS-1037 board. (Refer to “3-13. MS-1037 Board”.)
13. Remove the VC-1045 board. (Refer to “3-14. VC-1045 Board”.)
14. Remove the lens assembly. (Refer to “3-15-1. Lens Assembly”.)
15. Remove the 1 group lens assembly. (Refer to “3-15-2. 1 Group Lens Assembly”.)
Procedure
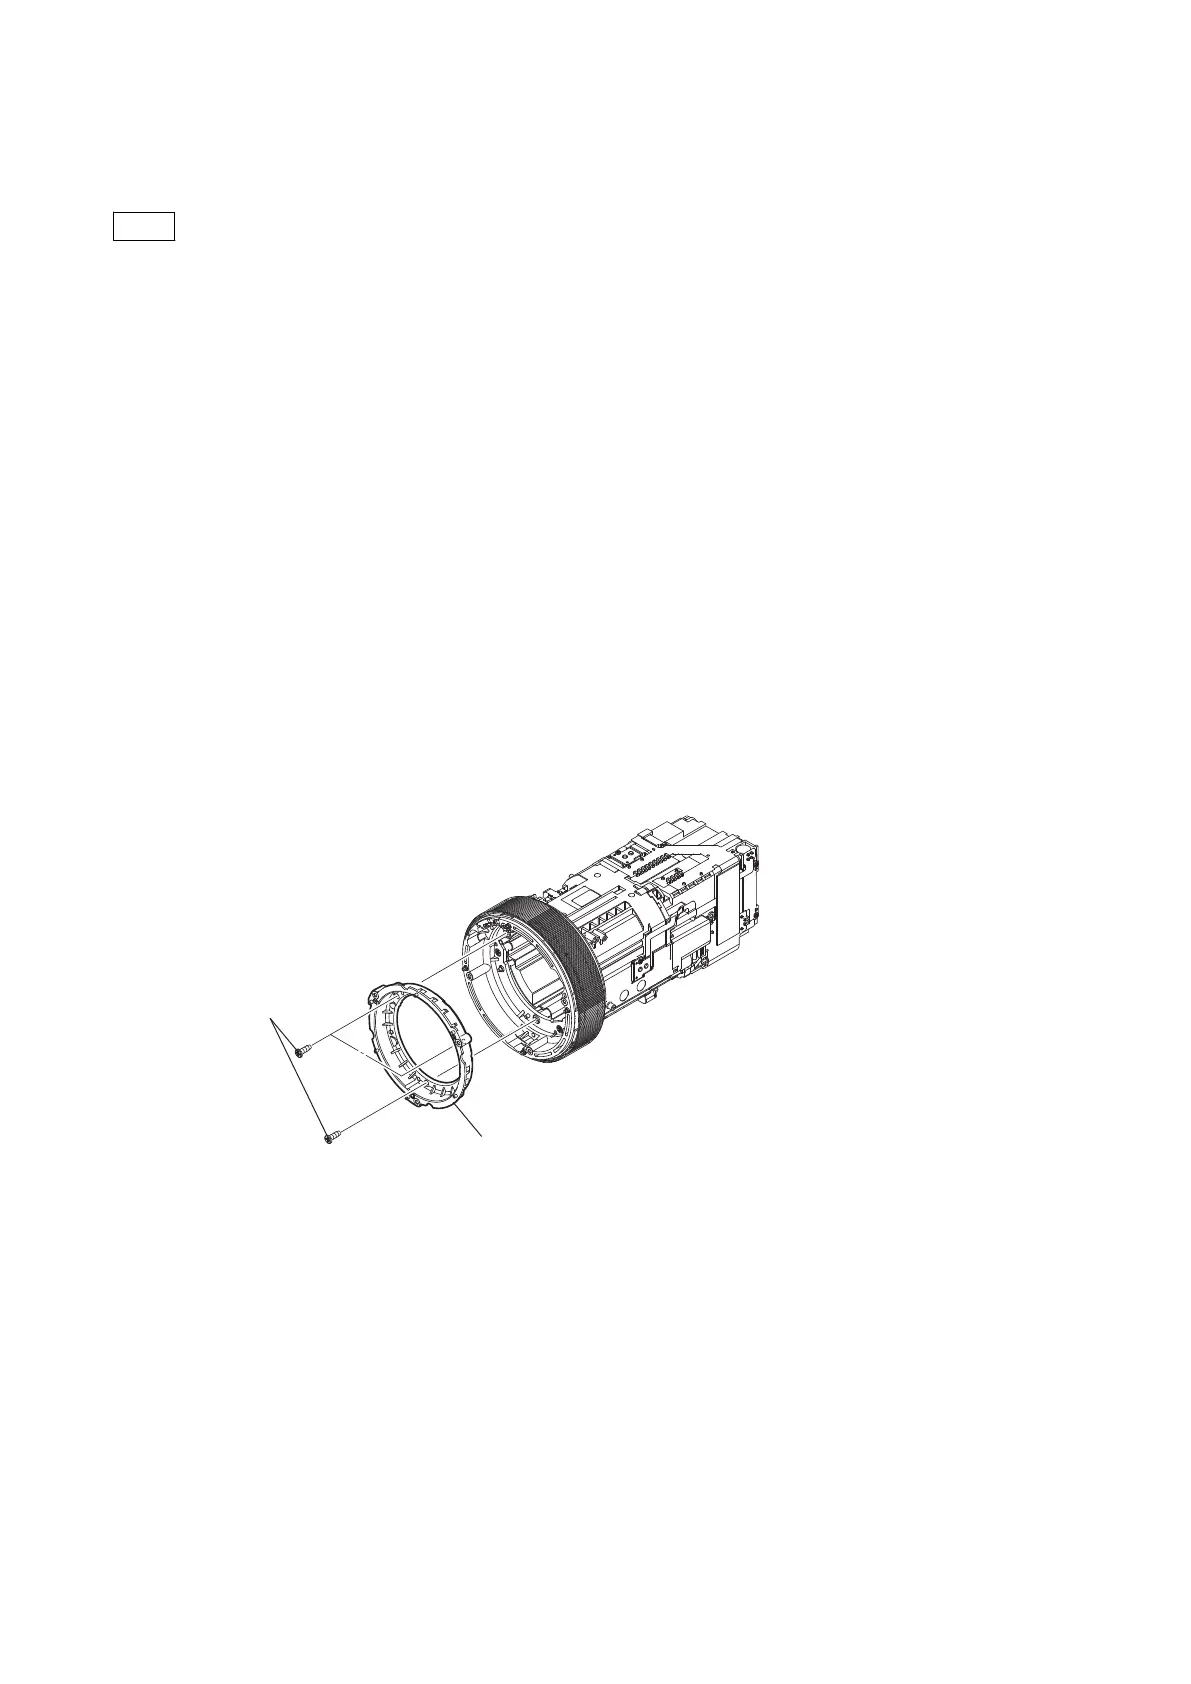
1. Remove the three screws, and then remove the front frame (1730).
Tapping screws (P1.7 x 5)
Front frame (1730)
2. Remove the flexible board from the filter base (1730).
HXR-NX80/HXR-MC88
3-53
 Loading...