425
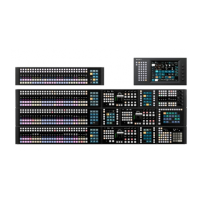
Ports on boards 2 and 3 can be used when an
MKS-X1700 Legacy Interface Board (option) is
installed.
3
In the list on the right, select the GPI input to assign.
4
Press the [Set] button.
To release a GPI input assignment
Select the target parallel input port to release and press the
[
No Assign] button.
Setting a GPI Input
You can configure the trigger type and action for each
GPI input.
GPI input via a network
On GPI inputs via a network, GPI control is performed
usi
ng serial tally protocol commands.
GPI inputs can be configured in the same way as parallel
in
put ports.
This uses a serial tally port, hence the network port must
be co
nfigured for a serial tally port.
For details, see “Setting a Serial Tally” (page 439).
1
Open the Home > Setup > External Device > GPI
Input Assign > GPI Input Assign menu (19105.21).
2
Select the target GPI input to set.
3
Press the [Target Device] button and select a control
panel (Panel 1, Panel 2) to handle the GPI input from
t
he pull-down list.
4
Press the [Trigger Type] button and select a trigger
type from the pull-down list.
Rising Edge: Tr
igger on the rising edge of the input
pulse.
Falling Edge: Tr
igger on the falling edge of the input
pulse.
Any Edge: T
rigger on an inversion of the input pulse.
Level: T
rigger the specified action when the level of
the input pulse is low or high.
NOP (No Operation): Not
triggered by an input
pulse.
5
Press the [Edit Action] button for [Action].
The [GPI Input Assign] window appears.
6
Select an action to set.
When the trigger type is other than [Level]
Select a tab to change the action type to display.
[PP/ME Cut] tab: Cut
transition actions
[PP/ME Auto Transition] tab: Au
to transition
actions
[FTB/Effect/SS/SB/Macro] tab: F
TB, effect
timeline, snapshot, shotbox, and macro actions
[PP/ME Key SS Recall] tab: Key
snapshot actions
[Aux Bus Override] tab: AU
X bus override actions
Set the button for the target action to the on state.
Note
Note
 Loading...