6-14
n
Whirlpool 2014 CABRIO
®
Direct Drive Washer
TESTING
For Service Technician Use Only
TEST #7: Drain & Recirculaon Pump
Perform the following checks if washer does not drain.
IMPORTANT: Drain water from tub before accessing boom of
washer.
1. Check for obstrucons in the usual areas. Clean and then
perform step 2.
2. Check the drain pump (and recirculaon pump, on some
models) and electrical connecons by turning on the
drain pump (and recirculaon pump, on some models)
in Service Load Control Mode on page 5-5. The following
steps assume that this step was unsuccessful.
3. Unplug washer or disconnect power.
4. Remove console to access main control.
5. Visually check that the J4 connector is inserted all the way
into the main control.
¾ If visual check passes, go to step 6.
¾ If connector is not inserted properly, reconnect J4 and
repeat step 2.
6. Remove connector J4 from main control. With an
ohmmeter, verify resistance values shown below across
the following J4 connector pinouts:
Component J4 Connector Pinout Correct Resistance
Drain Pump J4, 1 & 3 12-15 W
Recirc. Pump* J4, 1 & 5 26-32 W
*on some models
¾ If values are open or out of range, go to step 7.
¾ If values are correct, go to step 11.
7. Tilt washer back to access drain pump (and recirculaon
pump, on some models). Verify pump is free from
obstrucons.
8. Visually check the electrical connecons at the drain
pump (and, on some models, the recirculaon pump).
¾ If visual check passes, go to step 9.
¾ If connecons are loose, reconnect the electrical
connecons and repeat step 2.
9. With an ohmmeter, check harness for connuity between
the drain pump (and recirculaon pump, on some models)
and main control.
See chart below.
Main Control to Drain Pump (and Recirculaon Pump)
Drain Pump Pin 1 to Main Control J4-1 (White Wire)
Drain Pump Pin 2 to Main Control J4-3 (Blue Wire)
Recirc. Pump* Pin 1 to Main Control J4-1 (White Wire)
Recirc. Pump* Pin 2 to Main Control J4-5 (Lt Blue Wire)
*on some models
¾ If there is connuity, go to step 10.
¾ If there is no connuity, replace the lower washer
harness and repeat step 2.
10. With an ohmmeter, measure the resistance across the two
pump terminals. Resistance should be as shown in the
chart below:
Component Correct Resistance
Drain Pump 12-15 W
Recirculaon Pump* 26-32 W
*on some models
¾ If values are open or out of range, replace the pump
motor.
¾ If the resistance at the pump motor is correct, go to
step 11.
11. If the preceding steps did not correct the drain problem,
replace the main control.
a. Unplug washer or disconnect power.
b. Replace the main control.
c. Reassemble all parts and panels.
d. Plug in washer or reconnect power. Perform Service
Diagnoscs to verify repair.
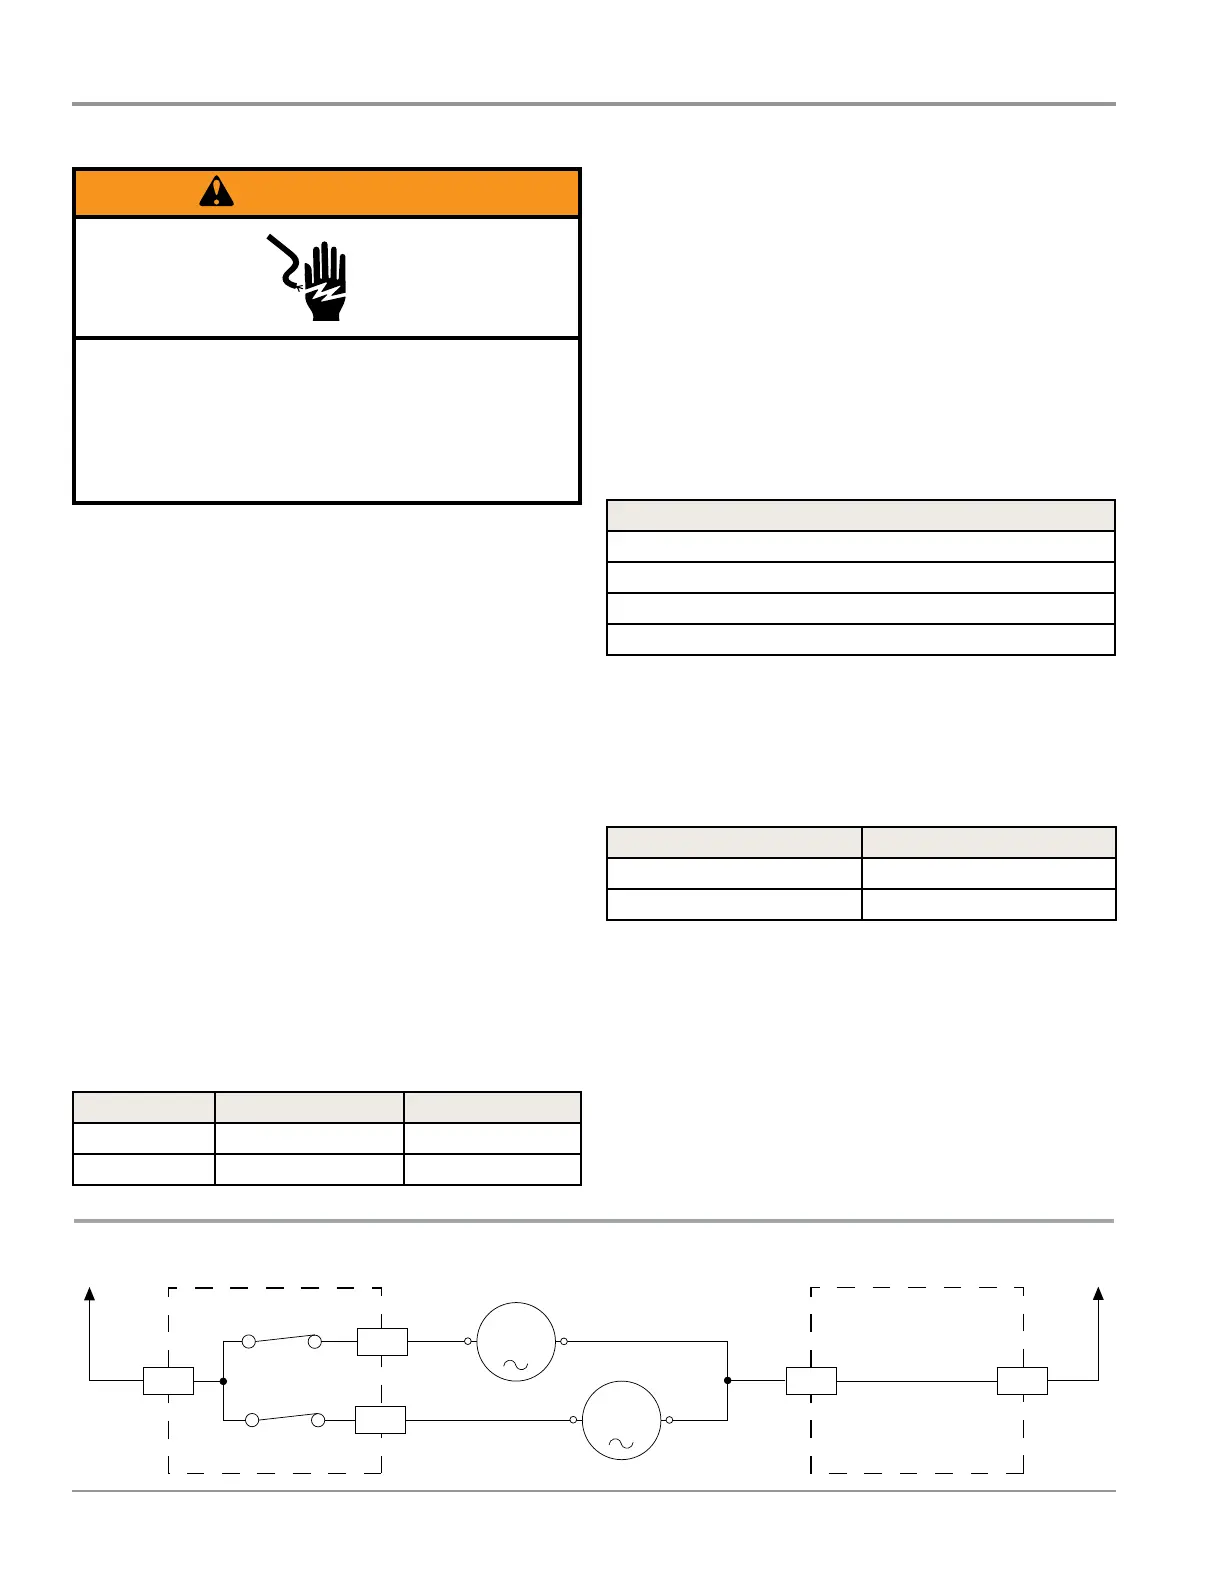
L1
N
12-15 Ω
DRAIN PUMP
P
J4-1
J12-3
BK
W
PUMP
RELAYS
J12-1
J4-3
J4-5
P
BU
LBU
W
W
W
A
BA
B
26-32 Ω
DRAIN & RECIRCULATION PUMPS
Figure 1
WARNING
Electrical Shock Hazard
Disconnect power before servicing.
Failure to do so can result in death or
electrical shock.
Replace all parts and panels before operating.
 Loading...