Home
Xantrex
Inverter
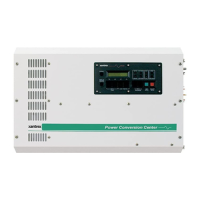
SW Plus 2524
Xantrex SW Plus 2524 User Manual
5
of 1
of 1 rating
344 pages
Give review
Manual
Specs
To Next Page
To Next Page
To Previous Page
To Previous Page
Loading...
7
Advanced Setup
Chapter 7, “
Advanced Setup”
explains how
to program the
Sine W
ave
Plus Inverter/Charger
to
oper
a
te under special,
advanced conditions,
such as
a
ut
omatic gene
rator st
a
r
ting,
ener
gy management
and auxiliary load a
pplications.
178
180
Table of Contents
Default Chapter
5
About this Manual
5
Related Information
8
Important Safety Instructions
9
Explosive Gas Precautions
10
FCC Information to the User
10
Table of Contents
11
Introduction
27
Basic Features
28
Front Panel
29
AC Side
30
Certification Label
31
Emergency Power off (EPO) Option
31
Figure 1-4 Certification Label
31
DC Side
32
Battery Temperature Sensor (BTS)
33
Figure 1-6 Battery Temperature Sensor (BTS)
33
Top
34
Figure 1-7 External Output Circuit Breaker
34
System Configuration
35
Pre-Configuration Planning
36
Types of Applications
36
System Considerations
36
System Output Requirements
38
System Input Requirements
38
Location Considerations
39
Mounting Considerations
40
Ventilation Requirements
40
Grounding Considerations
41
DC System Grounding
41
Inverter Grounding
42
Table 2-1 Recommended Minimum Safety Ground Wire and DC Disconnect
42
Equipment or Chassis Grounding
43
Grounding Electrodes/Ground Rods
43
Bonding the Grounding System
44
Battery Considerations
45
Battery Bank Requirements
46
Battery Cable Requirements
46
Figure 2-1 AWG Wire Size Reference Chart
47
Table 2-2 Recommendced Battery Cable Size Versus Length
48
Battery Requirements for Dual Inverter Systems
49
Table 2-3 Battery Cable to Maximum Breaker/Fuse Size
49
Battery Temperature
51
Figure 2-2 Sample Warning Sticker for Backfeed Conditions
51
Wiring Considerations
52
Generator Considerations
53
Generator Start Types
54
Types of Generators
54
Additional/Optional Equipment Considerations
56
AC Conduit Box (ACCB)
56
Figure 2-3 AC Conduit Box
56
DC Conduit Box (DCCB)
57
Figure 2-4 DC Conduit Box
57
Figure 2-5 Sine Wave Plus with AC and DC Conduit Boxes Installed
57
Fuse Block
58
DC Disconnect Boxes (DC175/DC250)
58
Figure 2-6 Fuse Blocks
58
Battery Status Meter (TM500A)
59
Figure 2-7 DC250 Disconnect Box and TM500A Battery Status Meter
59
Remote Monitors
60
Figure 2-8 Accessories for Remote Monitoring
60
Figure 2-10 Inverter Communications Adapter
61
Figure 2-9 Inverter Control Module
61
Inverter Communications Adapter (ICA)
61
Inverter Control Module (ICM)
61
Generator Start Module (GSM)
62
Auxiliary Load Module (ALM)
62
Figure 2-11 Generator Start Module
62
Figure 2-12 Auxiliary Load Module
62
Vac Application Requirements
63
Autotransformer for 240 VAC Applications (T240)
63
Inverter Stacking Control - Series (ISC-S) Cable
63
Figure 2-13 T240 Autotransformer
63
Figure 2-14 ISC-S Cable
63
Renewable Energy DC Input Sources
64
Figure 2-15 Xantrex C-Series Charge Controllers
65
Figure 2-16 PV Ground Fault Protection (PVGFP)
65
Off-Grid Applications
66
Renewable Energy Systems With/Without Generator Backup
66
Single-Inverter Configurations (120 Vac)
66
Single-Inverter Configurations (120/240 Vac)
66
Figure 2-17 Off-Grid Application - Renewable Energy System Using a Single Inverter
67
Dual-Inverter Configurations (240 Vac)
68
Figure 2-18 Off-Grid Application - Renewable Energy System Using Dual Inverters
69
Generator-Only Systems
70
Single-Inverter Configurations
70
Figure 2-19 off Grid Application - Generator-Only System Using a Single Inverter
71
Dual-Inverter Configurations
72
Vac-Only Input Source
72
Figure 2-20 off Grid Application - Generator-Only System Using Dual Inverters
73
On-Grid Applications
74
Backup Systems
74
Single-Inverter Configurations (120 Vac)
74
Single-Inverter Configurations (240 Vac)
74
Figure 2-21 On-Grid Application - Backup System Using a Single Inverter
75
Dual-Inverter Configurations (240 Vac)
76
Figure 2-22 On-Grid Application - Backup System Using Dual Inverters
77
Energy Management
78
Peak Load Management
78
RE Backup with Utility (SB Mode)
78
Figure 2-23 Time-Of-Use Metering
79
Time-Of-Use (TOU) Metering
79
AC Load Support
80
Figure 2-24 AC Support Mode
81
Renewable Energy with Grid Backup (BX Mode)
81
Installation
83
Pre-Installation
84
Tools Required
84
Hardware / Materials Required
85
Optional System Accessories
85
Battery Bank Preparation
86
Unpacking and Inspecting the Inverter
87
Figure 3-1 Certification Label Location
88
Knockout Preparation
89
Figure 3-2 Serial Number Sticker and Knockout Locations and Sizes
89
Mounting
90
Shelf-Mounting
90
Figure 3-3 Dimensional Drawing
91
Wall-Mounting
92
Figure 3-4 Wall-Mounting Method Using 2 X 4'S
93
Figure 3-5 Wall Mounting Using Plywood
95
DC Wiring
96
Preparing the Battery Bank
96
Grounding the DC System
97
Figure 3-6 Chassis Ground Lug Location on Inverter DC End
97
Figure 3-7 DC Grounding of a Single Inverter
98
Figure 3-8 DC Grounding of Dual Inverters
99
Connecting DC Input Sources - Renewable Energy Configurations
100
Installing the Battery Temperature Sensor (BTS)
100
Figure 3-9 BTS (RJ11) Port Location and Installation
101
Connecting the Batteries to the Inverter
102
Figure 3-10 DC Terminal Connections on the Inverter
102
Figure 3-11 Battery Cable Connection
103
Figure 3-12 Battery Terminal Covers and Associated Hardware
103
Procedure for Single Inverter Systems
104
Figure 3-13 DC Connections to a Single Inverter
105
Procedure for Dual-Inverter Systems
106
Figure 3-14 DC Connections to Dual Inverters
107
AC Wiring
108
Table 3-1 AC Disconnect and Wire Sizing
109
Accessing the AC Terminal Block and Ground Bar
110
Figure 3-15 AC Wiring Access Cover Plate
110
Figure 3-16 AC Input/Output Wiring Terminals
111
AC Wiring for Single Inverter Systems
112
Manual and Auto Start Generators
112
Figure 3-17 Connecting the GSM Communications Cable to the Figure 3-18 AC Input and Output Wiring to a Single Inverter
113
Install AC Output Wiring to the Inverter AC Distribution Panel
115
Figure 3-19 AC Output Wiring to the Inverter AC Panel
116
Install Generator Wiring to the Inverter
117
Figure 3-20 Generator Input Wiring to a Single Inverter
119
Install Utility Wiring to the Inverter Input (On-Grid Applications Only)
120
Optional Equipment
121
Stacking Dual Inverter Systems
121
Figure 3-21 Utility Wiring to the Inverter Input
121
Figure 3-22 Series-Stacked Inverters with ISC-S Cable
122
Installing the ISC-S Cable
122
Remote Monitoring Options
123
Figure 3-23 Remote Monitor Port Locations
123
Auxiliary Load Module (ALM)
124
Figure 3-24 Connecting the ALM Communications Cable to the Figure 3-25 Connecting the EPO
124
Emergency Power off (EPO)
125
EPO Port
125
Functional Test
127
Basic Functional Test
128
Confirm All Connections
128
Applying Battery Power to the Inverter
128
Turning on the Inverter
129
Figure 4-1 Power up Display
129
AC Voltage Check
130
Confirming Battery Charger Operation
130
Confirming Inverter Operation
131
Navigation
133
Navigating the Sine Wave Plus
134
Table B-5 Advanced Setup Default and User Settings for the Sine Wave Plus 2524 and 2548 Models
134
The Inverter Control Module (ICM)
135
Inverter Control Module Features
135
Figure 5-1 ICM Display Location
135
The Cursor
135
The Display
135
Display Contrast
136
Figure 5-2 ICM Display and Contrast Adjustment
136
Figure 5-3 ICM ON/OFF Push-Buttons
136
ON/OFF Menu Buttons
136
Push-Buttons
136
Figure 5-4 ICM Menu Heading Push-Buttons
137
Figure 5-5 ICM Menu Item Push-Uttons
137
Menu Heading Buttons
137
Menu Item Buttons
137
Figure 5-6 ICM Set Point Push-Buttons
138
Figure 5-7 ICM Reset Defaults Button
138
Reset Factory Defaults
138
Set Point Buttons
138
Menu Map
139
Figure 5-8 Menu Structure
139
Figure 5-15 Complete User Menu Map
146
Figure 5-16 Complete Basic Setup Menu Map
147
Figure 5-17 Complete Advanced Setup Menu Map
148
Basic Setup Programming
149
Basic Setup Summary
150
Table 6-1 Basic Setup Menu Default Settings for the Sine Wave Plus 2524 and 2548 Models
150
Table 6-2 Basic Setup Menu Default Settings for the Sine Wave Plus
151
Table 6-3 Basic Setup Menu Default Settings for the Sine Wave Plus
152
Table 6-3 Basic Setup Menu Default Settings for the Sine Wave Plus 5548 Model
154
Before You Begin Programming
156
DC Amps Verses AC Amps
156
Basic Setup Process
157
Accessing the Basic Setup Menu
158
Figure 6-1 Accessing the Basic Setup Menu
158
Menu Item Descriptions
159
Time of Day Setup Menu
159
Set Hour
159
Set Minute
159
Set Seconds
160
Inverter Setup Menu
160
High Battery Cut out VDC
160
Low Battery Cut in VDC
160
LBCO Delay Minutes
161
Low Battery Cut out VDC
161
Search Watts
162
Battery Charger Functions
163
Figure 6-2 Multi-Stage Battery Charging Process
164
Multi-Stage Charging Process
164
Equalize Charging the Batteries
166
Battery Charging Menu
167
Finish Stage
167
Bulk Volts DC
168
Equalize Volts DC
168
Float Volts DC
168
Table 6-4 Battery Voltages for Setting Charging Parameters
169
Table 6-5 Battery Charging Current and Timer Default Settings
169
Max Charge Amps AC
170
Table 6-6 Calculating the Maximum Charge Amps for a 24-Volt
170
Bulk Done Amps AC
171
Table 6-7 Calculating the Maximum Charge Amps for a 48-Volt
171
EQ VDC Done Timer
172
Table 6-8 Calculating the Bulk Done Amps for a 24-Volt, 700 Amp-Hour Battery - -
172
Table 6-9 Calculating the Bulk Done Amps for a 48-Volt, 350 Amp-Hour Battery - -
172
Max Bulk/Eq Timer H:M
173
Temp Comp
173
AC Inputs Menu
174
Table 6-10 Inverter Temperature Compensation Calculation Using the BTS
174
Gen (AC2) Amps AC
175
Grid (AC1) Amps AC
175
Input Lower Limit VAC
176
Input Upper Limit VAC
176
Save/Restore Settings Menu
177
Push GEN to Restore Settings
177
Push INV Now to Save Settings
177
Push GEN for Factory Defaults
178
End Basic Setup Menu
178
Advanced Setup
179
Advanced Setup Summary
180
Table 7-1 Advanced Setup Default Settings for the
180
Table 7-2 Advanced Setup Default Settings for the
181
Table 7-3 Advanced Setup Default Settings for the
182
Before You Begin Advanced Programming
188
Accessing the Advanced Setup Menu
189
Menu Item Descriptions
191
Silent Setup Menu
191
Float Done Amps AC
193
Refloat High Volts DC
193
Refloat Low Volts DC
193
Must Float Time Min
194
Grid (AC1) Usage Menu
194
Grid Usage
195
Grid Usage Begin H:M
195
Grid Usage End H:M
196
Battery Xfer (BX) Menu
196
High Xfer (HBX) VDC
197
Low Xfer (LBX) VDC
197
ALM Relays Menu
197
RY10 VDC Energized
198
RY9 Delay at Deengz. Min
198
RY9 VDC Deenergized
198
RY9 VDC Energized
198
RY10 Delay at Engz. Min
199
RY10 VDC Deenergized
199
RY11 Mode
199
Figure 7-3 Relay 11 Wiring Example to Dual Inverters with Cooldown Selected
200
Generator Starting Scenarios
201
Manual Generator Control
201
Automatic Generator Control
202
Generator Timers Menu
204
Gen Run Time Start H:M
205
Gen Run Time Stop H:M
205
Quiet Time Begin H:M
205
Gen Cooldown Timer Min
206
Gen Exercise Period Days
206
Gen Exercise Timer Min
206
Quiet Time End H:M
206
Rn2/Max Gen Run H:M
207
Gen Starting Details Menu
207
Figure 7-4 Generator Control Mode (GS and RN1)
207
Generator Start Module (GSM)
207
Figure 7-5 Generator Control Mode (RN2)
208
RY7 Mode
208
Figure 7-6 Ry7'S COM and N.O. Contacts Close (Energize) to Run Generator
209
Figure 7-7 Wiring Examples of Honda™ and Onan™ Generators
211
Figure 7-8 RY7 and RY8 Timing Diagram
212
Figure 7-9 RY7/RY8 Sequence of Events for RN1 or RN2 Selection
213
Figure 7-10 RY7/RY8 Sequence of Events for GS Selection
214
Gen Warm-Up Seconds/Minutes
215
Max Cranking Seconds
215
Post Crank Seconds
215
Pre Crank Seconds
215
Gen Auto Run Setup Menu
216
24 Hr Start Volts DC
216
Load Start Amps AC
216
Load Start Delay Min
216
Load Stop Delay Min
216
15 Min Start Volts DC
217
Read LBCO 30 Sec Start
217
Save/Restore Settings Menu
217
Push INV Now to Save Settings
217
Push GEN for Factory Defaults
218
Push GEN to Restore Settings
218
End Advanced Setup Menu
218
Operation
219
Operating the Sine Wave Plus
220
Operational Status Indicators
221
LED Indicators
221
Figure 8-1 LED Indicators
221
Figure 8-2 Inverter Operation Status Leds
222
Inverter Operation Status (Yellow)
222
AC Input Status (Green)
223
Figure 8-3 AC Status Leds
223
Charge Status (Yellow and Green)
224
Figure 8-4 Charge Status Leds
224
Operational Status Indication (Red and Yellow)
225
Figure 8-5 Error and Status Leds
225
Error LED Reset
226
LED Summary
227
Table 8-1 LED Summary Table
227
The User Menu Summary
229
Table 8-2 User Menu
229
Accessing the User Menu
232
Figure 8-6 Inverter ON/OFF Display
232
Figure 8-7 Generator ON/OFF Display
232
User Menu Description
233
Inverter ON/OFF Menu
233
Inverter
233
EQ Charge off on
234
Search Watts (SRCH)
234
Bypass Mode
235
Generator ON/OFF Menu
235
Generator
236
Days Left to Gen Exercise
237
Gen Start Exercise Run
237
Gen Start Load Amps
237
Gen Start Run Time
237
Gen Start Volts/Manual
237
Time of Day Menu
238
City, State, and Zip Code
238
Company Name and Address
238
SW Plus Software Level
238
System Information
238
Xantrex Phone Numbers
238
Figure 8-8 Resetting Factory Default Settings
239
Press Reset for Factory Defaults
239
Meters Menu
240
Battery Actual VDC
240
Battery Comp VDC
241
Input Amps AC
241
Inverter Volts AC
241
Inverter/Charger Amps AC
241
Load Amps AC
241
Battery Temp Degrees C
242
Fan Speed
242
Frequency Hertz
242
Gen (AC2) Volts AC
242
Grid (AC1) Volts AC
242
Max Bulk/Eq Time H:M
242
Error Causes Menu
243
Over Current
243
Transformer Overtemp
243
Heatsink Overtemp
244
Low Battery Voltage
244
External Err (Stacked)
245
High Battery Voltage
245
Input Relay Failure
245
Gen Failed to Start
246
Gen Stopped Due to V/F
246
Status Menu
246
Bypass Mode Selected
247
Chr Selected (no Backup)
247
Gen in Cooldown
247
Gen Signaled to Run
247
Battery VDC < LBCO
248
Battery VDC > HBCO
248
EPO Shutdown
248
EQ Charge Selected
248
GSM/ALM Options Menu
248
RY7 (GSM) Energized
248
RY10 (ALM) Energized
249
RY10 Engz. Time Minute
249
RY11 Energized
249
RY8 (GSM) Energized
249
RY9 (ALM) Energized
249
RY9 Deengz. Time Minute
249
Troubleshooting
251
Inverter Troubleshooting
252
Battery Charger Troubleshooting
254
Error Causes
257
Inverter Specifications
259
Electrical Specifications
260
Mechanical Specifications
262
Theory of Operation
264
Power Versus Efficiency
266
Figure A-3 Power Versus Efficiency Curves for All Models
267
Figure A-4 Sine Wave Plus Efficiency Curve for the SW Plus 2524
267
Figure A-5 Sine Wave Plus Efficiency Curve for the SW Plus 2548
268
Figure A-6 Sine Wave Plus Efficiency Curve for the SW Plus 4024
268
Figure A-7 Sine Wave Plus Efficiency Curve for the SW Plus 4048
269
Figure A-8 Sine Wave Plus Efficiency Curve for the SW Plus 5548
269
Inverter Capacity Versus Temperature
270
Table A-1 Derating from Continuous Power (VA) at Elevated Ambient Temperatures
270
Time Versus Current
271
Figure A-9 Time Versus Current for the Sine Wave Plus 2524
271
Figure A-10 Time Versus Current for the Sine Wave Plus 2548
272
Figure A-11 Time Versus Current for the Sine Wave Plus 4024
272
Figure A-12 Time Versus Current for the Sine Wave Plus 4048
273
Figure A-13 Time Versus Current for the Sine Wave Plus 5548
273
B Configuration Settings
275
User Menu Settings
276
Table B-1 User Menu Default and User Settings
276
Basic Setup Menu
279
Table B-2 Basic Setup Default and User Settings for the Sine Wave Plus 2524 and 2548 Models
279
Table B-3 Basic Setup Default and User Settings for the Sine Wave Plus 4024 and 4048 Models
280
Table B-4 Basic Setup Default and User Settings for the Sine Wave Plus 5548 Model
282
Advanced Setup Menu
284
Table B-6 Advanced Setup Default and User Settings for the Sine Wave Plus 4024 and 4048 Models
288
Table B-7 Advanced Setup Default and User Settings for the Sine Wave Plus 5548 Model
288
Battery Information
291
Introduction
292
Battery Types
292
Deep-Cycle Flooded Lead Acid (FLA
292
Sealed Batteries (Gel and AGM
293
Nicad and Nife Batteries
293
Understanding Battery Capacity Ratings
294
Battery Bank Sizing
294
Understanding Amp-Hour Requirements
295
Calculating Amp Hours
296
Amp Hour Example Worksheet
297
Table C-1 Determining Average Daily Load in Amp-Hours
297
Battery Bank Size Worksheet
298
Table C-2 Determining Battery Bank Size
298
Table C-3 Typical Appliance Wattage
298
Battery Configurations
299
Figure C-1 6-Volt Battery Wiring - "Series" Configuration
299
Wiring Batteries in Series
299
Figure C-2 12-Volt Battery Wiring - "Series" Configuration
300
Figure C-3 Battery Wiring in Parallel (Example Only
300
Wiring Batteries in Parallel
300
Figure C-4 Step 1 - Wiring Batteries in "Series
301
Figure C-5 Step 2 - Two Series Strings Wiring in "Parallel
301
Wiring Batteries in Series-Parallel
301
Battery Connections for Stacked Inverters
302
Figure C-6 "Series-Parallel" Configuration Wired to the Inverter
302
Figure C-7 Example of Battery Connections for Stacked Inverters (24 VDC Shown
302
Battery Maintenance
303
Battery Charging
303
Table C-4 Variances in Charging Voltage Based on Battery Temperature
304
Table C-5 Temperature Compensation Calculation
304
Equalization Charging
305
General Maintenance
306
Table C-6 Battery State-Of-Charge
307
500 D Generators
310
Two-Wire Start Circuits
310
Three-Wire Start Circuits
310
Honda™ 3-Wire Type Generators
310
Onan™ 3-Wire Type Generators
311
Wire Converters
311
E Over-Charge Protection
313
Overvoltage Protection Using a Charge Controller
314
Figure E-1 Overvoltage Using a C-Series Charge Controller
314
Diversion Load Control
315
Figure E-2 Diversion Load Control
315
F Multi-Wire Branch Circuit Wiring
317
Multi-Wire Branch Circuits
318
Figure F-1 Conventional Home-Type Wiring
318
Figure F-2 Multi-Wire Branch Circuit Wiring and Current Flow
319
Figure F-3 120 Vac Inverter Incorrectly Wired in a Multi-Wire Branch Circuit
319
Identifying Multi-Wire Branch Circuits
320
Figure F-4 Multi-Wire Branch Circuit Wiring
320
Correcting Multi-Wire Branch Circuit Wiring
321
Figure F-5 Using a Step-Down Autotransformer in Multi-Wire Branch Circuit Wiring
322
G Emergency Power off Switches
323
The Purpose of an EPO Switch
324
Figure G-1 Emergency Power off Disconnect Switch
324
How to Use the EPO Port for an EPO Switch
326
Figure G-2 Modifying a 6-Conductor Cable to Connect to the EPO Port
326
Glossary of Terms
327
Abbreviations and Acronyms
331
Warranty and Product Information
333
Warranty
333
Return Material Authorization Policy
335
Return Procedure
336
Out of Warranty Service
336
Information about Your System
337
5
Based on 1 rating
Ask a question
Give review
Questions and Answers:
Need help?
Do you have a question about the Xantrex SW Plus 2524 and is the answer not in the manual?
Ask a question
Xantrex SW Plus 2524 Specifications
General
Brand
Xantrex
Model
SW Plus 2524
Category
Inverter
Language
English
Related product manuals
Xantrex SW Series
152 pages
Xantrex PROwatt SW 700i
38 pages
Xantrex PROWATT SW SW 1000
38 pages
Xantrex Freedom SW Series
122 pages
Xantrex Freedom SW 815-3012
122 pages
Xantrex Freedom SW 815-3024
122 pages
Xantrex XPower 150
28 pages
Xantrex Freedom HF
58 pages
Xantrex PROwatt 600
66 pages
Xantrex PROsine 2.0
164 pages
Xantrex Prosine PS2.5
117 pages
Xantrex Freedom X 1200 120VAC
78 pages
 Loading...