Accounting
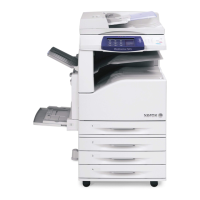
WorkCentre 7120/7125 Multifunction Printer
System Administrator Guide
130
Xerox Standard Accounting
Xerox Standard Accounting (XSA) tracks the number of copy, print, scan, and fax jobs for each user.
You can set limits to restrict the total number of jobs by type that a user can produce. You can then
generate reports listing usage data for individual users and groups.
When XSA is enabled, users must log in to the printer before accessing services. They must also provide
their account details in the print driver before printing documents from a computer.
Note: If XSA is enabled, you cannot enable other accounting modes.
You can create a maximum of:
• 2499 unique XSA user IDs
• 500 General Accounts
• 499 Group Accounts
All user IDs must be assigned to one or more group accounts.
Note: XSA settings and account data are stored in the printer. Xerox recommends that you back-
up settings using the Cloning feature. If XSA settings are lost or deleted, you can restore them
using the cloning backup file. For details, see Cloning on page 147.
Before you begin:
• Install Print and Fax Drivers on all user computers.
Configuring Xerox Standard Accounting
1. In CentreWare IS, click Properties > Accounting > Accounting Configuration.
2. Next to Accounting Type, select Xerox Standard Accounting.
3. Select Enabled next to the features that you want to track.
4. Next to Verify User Details, select Yes to authenticate users at the control panel. Local
authentication must be configured. For details, see Local Authentication on page 49.
5. Next to Verify User Details for Printer / Direct Fax Jobs, select Yes to authenticate users at the
control panel. Local authentication must be configured. For details, see Local Authentication on
page 49.
6. Next to Customize User Prompts, select how you want to prompt users for their credentials.
7. Next to Color Tracking Only, select Enabled if you only want to track color impressions.
8. Click Apply.
9. Click Reboot Machine.
10. Refresh your browser and navigate back to the Accounting Configuration page.
11. Click Next.

 Loading...


