Battery Life and Replacement
167
MVP-9000i 9" Modero® ViewPoint® Touch Panel with Intercom
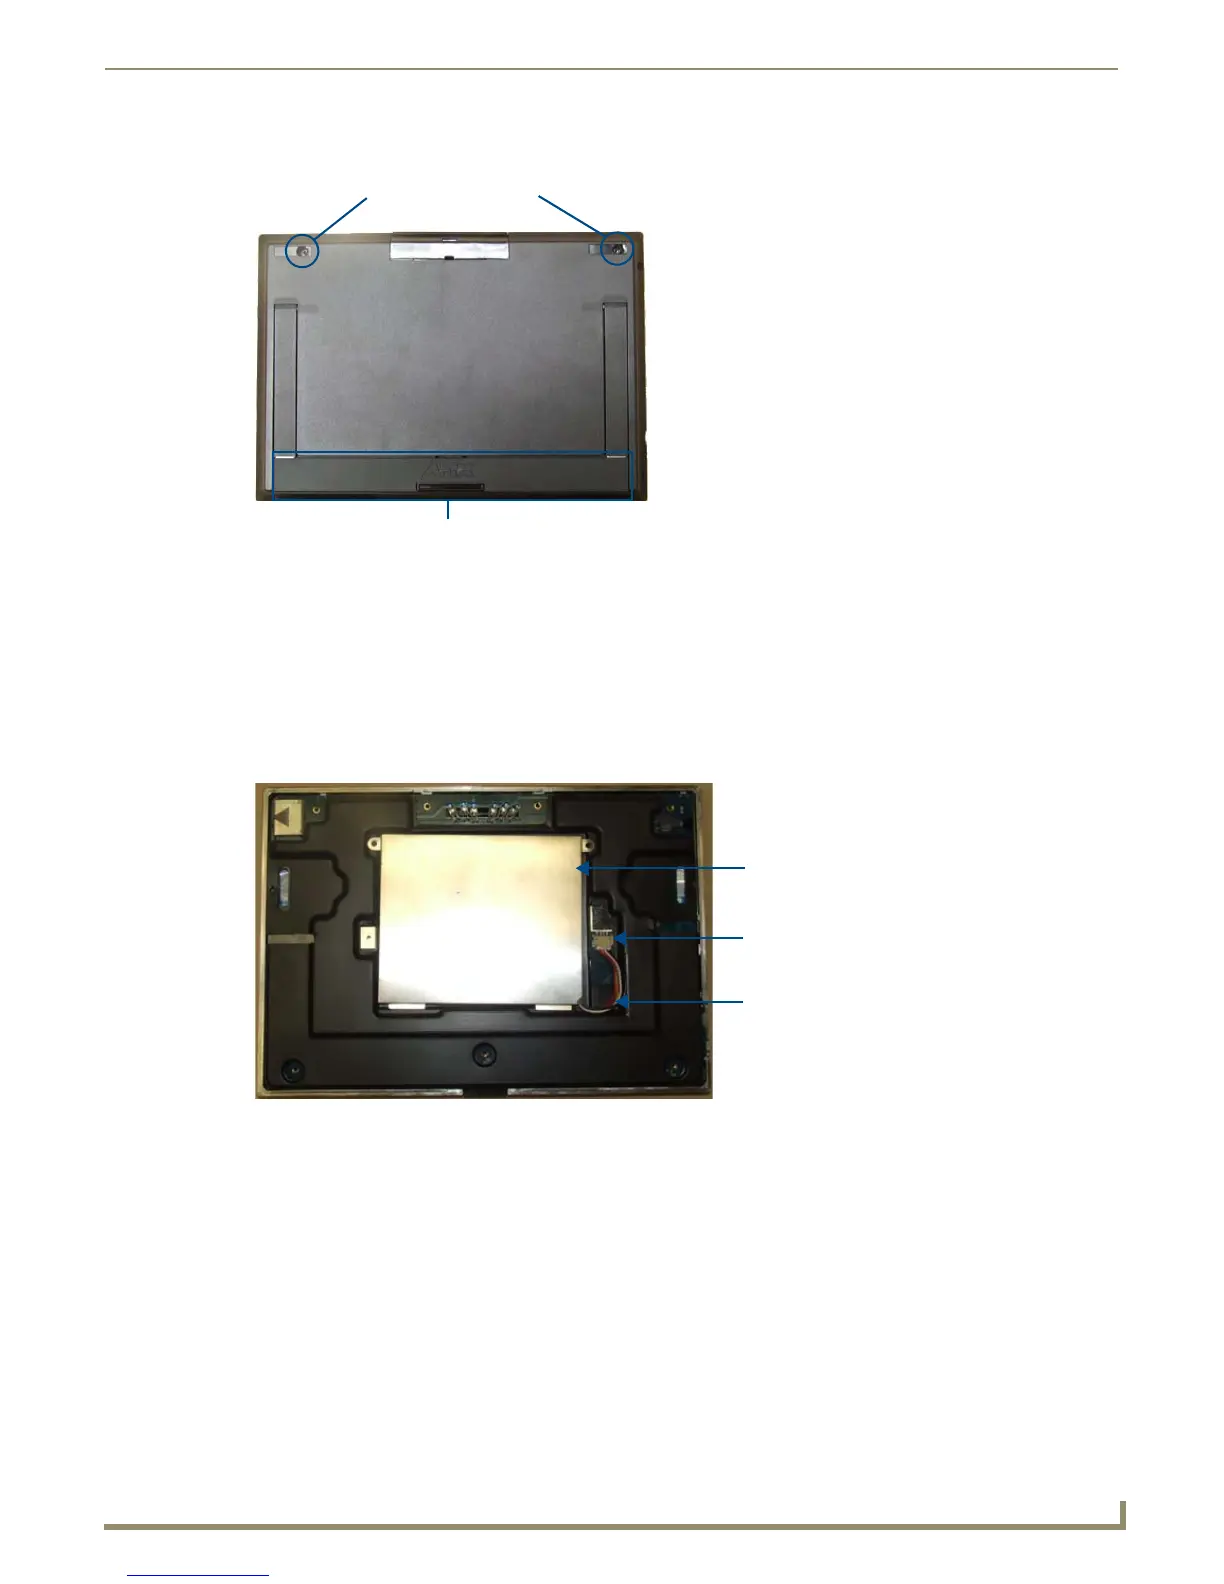
5. Remove the five screws from the back of the device (FIG. 123).
Two of the screws are at the upper corners of the device, underneath rubber feet that also act as screw covers.
Remove the rubber feet to access the screws.
Lift up the kickstand and remove the label to reach the remaining three screws.
6. Discharge all static electricity that may have built up on your body, either by using a static discharge strap or by
touching a nearby piece of metal.
7. Carefully remove the back of the device and detach the battery lead at the battery connector (FIG. 124). This will
allow the back cover to be detached from the device.
Remove the old battery
1.
Remove the two screws holding the battery case to the back cover. Carefully remove the battery from the back
cover. Please dispose of the battery in a proper fashion as required by municipal or federal regulations.
Installing the new battery
1.
Open the plastic bag containing the MVP-BP-9 kit, taking care not to use sharp instruments near the battery itself.
2. Remove the protective film on the battery case. DO NOT install the battery without removing this film.
3. Attach the new battery to the back cover, either using the two screws used to hold the previous battery to the cover
or with the two replacement screws included with the MVP-BP-9 kit.
Reconnecting the battery to the device
1.
On the back cover, make sure that the battery connector wiring runs to the left.
FIG. 123 Placement of screws on the back of the MVP-9000i
FIG. 124 Interior of MVP-9000i, including female battery connector
Two screws under upper screw covers
3 screws under label
(beneath kickstand)
Battery (shown on
Battery connector
Battery lead
device for clarity)
 Loading...