Setup Pages
52
MVP-9000i 9" Modero® ViewPoint® Touch Panel with Intercom
Date/Time Page
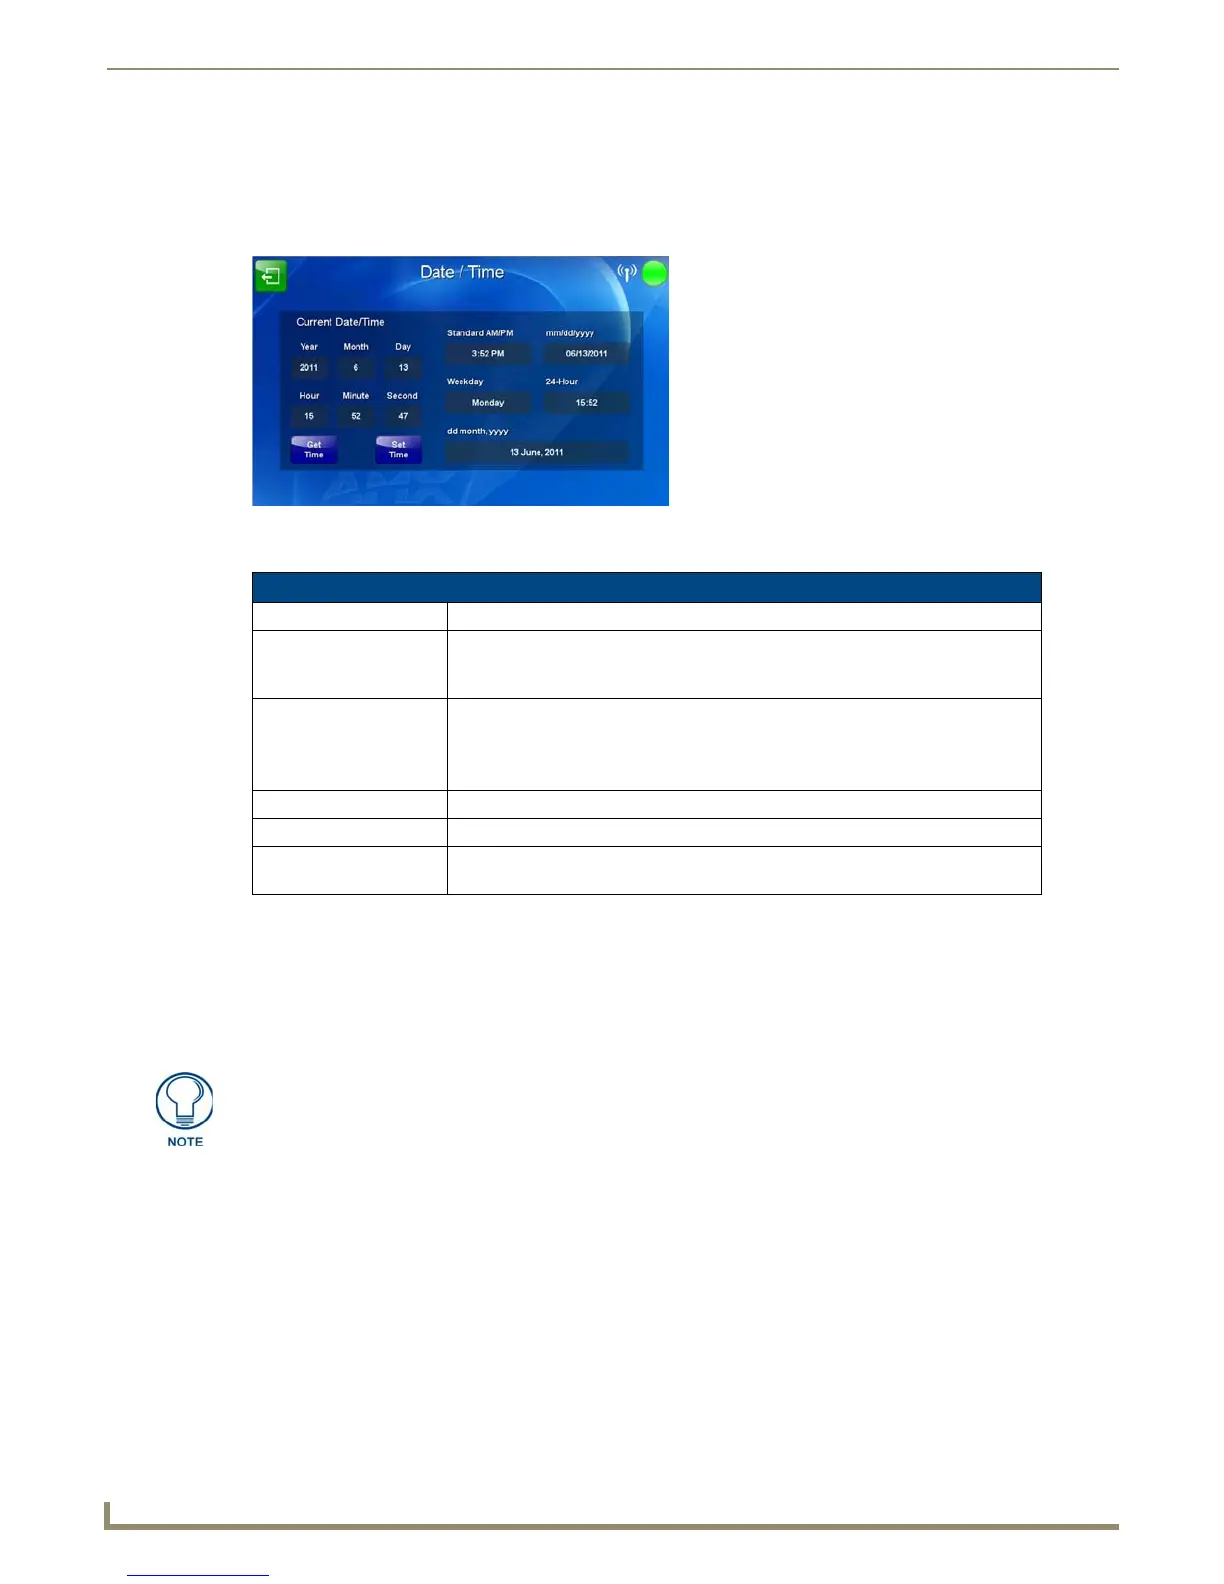
The options on the Date/Time page (FIG. 60) allows setting and adjusting of time and date information on the MVP-
9000i. If the time and/or date on the Master is modified, all connected devices will be updated to reflect the new
information.
Features on this page include:
The current date and time may be retrieved from the NetLinx Master, or it may be updated manually. To retrieve the date
and time from the Master:
1. From the Date/Time page, press the Get Time button.
2. The new time and date will be added.
3. Press the Back button to save the changes.
To set the date and time manually on an MVP-9000i:
1. From the Date/Time page, press the Set Time button to open the Set Date/Time popup window (FIG. 61).
2. Touch the field to be changed to highlight it.
3. Use the Up/Down arrows to change the information in the field.
4. To return to the Date/Time page without saving any changes, press Cancel.
5. To save all changes and return to the Date/Time page, press Save.
FIG. 60 Date/Time page
Date/Time Page
Back: Saves all changes and returns to the previous page.
WiFi/Wired icon: The icon to the left of the Connection Status Icon displays whether the current
connection to the Master is Wireless (image of a radio antenna) or Wired (image of
three networked computers).
Connection Status icon: The icon in the upper-right corner of each Setup page provides a constant visual
indication of current connection status.
Note: a Lock appears on the icon if the panel is connected to a secured NetLinx
Master.
Current Date/Time: These fields display the calendar date information in several different formats.
Get Time: The Get Time button retrieves Time and Date information from the Master.
Set Time: The Set Time button retains and saves any time/date modifications made on the
panel.
If the panel is not connected to a Master, the Get Time function will not work.
 Loading...