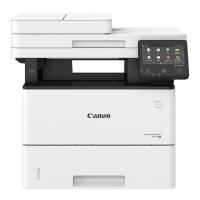
Conguring the Default Settings (Setup Guide) (5 Lines
L
CD Model)
8WFY-018
When you turn ON the machine for the rst time, the scr
een (Setup Guide) for setting the items required for using the
machine is displayed. Congure the settings using the procedure below by following the instructions on the screen.
Step 1: Setting the Display Language and Country or Region(P. 49)
Step 2: Setting the Date and Time(P. 49)
Step 3: Setting Remote UI(P. 50)
Step 4: Connecting to a Wireless LAN(P. 50)
Step 5: Conrming the Specied Date and Time ar
e Stored(P. 51)
● These settings can only be congur
ed one time using the Setup Guide when starting the machine for the
rst time. To change the settings congured with the Setup Guide at a later time, set the items in Steps 1 to
4 individually. For the details of each setting, see the following.
Setting the Date and Time(P. 391)
Setting the PIN to Use for Remote UI(P. 382)
Connecting to a Wireless LAN(P. 57)
Step 1: Setting the Display Language and Country or Region
Set the language displayed on the contr
ol panel screen and reports to be printed. Next, set the country or region
where the machine is used.
1
On the [Language] screen, select the display language and press
.
2
Select [Yes], and then press .
➠ The display language is set, and the [Select Country/Region] scr
een is displayed.
Depending on the country or region, the [Select Country/Region] screen is not displayed and the [Time
Zone] screen is displayed. When the [Time Zone] screen is displayed, proceed to "Step 2: Setting the Date
and Time."
Step 2: Setting the Date and Time(P. 49)
3
On the [Select Country/Region] screen, select the country or region, and press .
➠ The country or region is set, and the [Time Zone] screen is displayed.
Step 2: Setting the Date and Time
The date and time ar
e used as the reference for the functions using date and time information, and therefore, they
need to be set accurately.
1
On the [Time Zone] screen, select your time zone and press
.
Setting Up
49
 Loading...
