Parallel Adjustments for
the Auto Take-up Reel
Unit
In the following situations, do parallel adjustments to
the Auto Take-up Reel Unit.
❏ When there are problems with take-up, such as it
creating large misalignments with the roll
❏ The printer has been moved
Have two people do parallel adjustment work because
there is work to be done to the front and back sides of the
printer at the same time.
Preparations for Parallel
Adjustment
Perform parallel adjustment using the provided shorter
roll core and adjustment tools. Get the following items
ready before beginning adjustment.
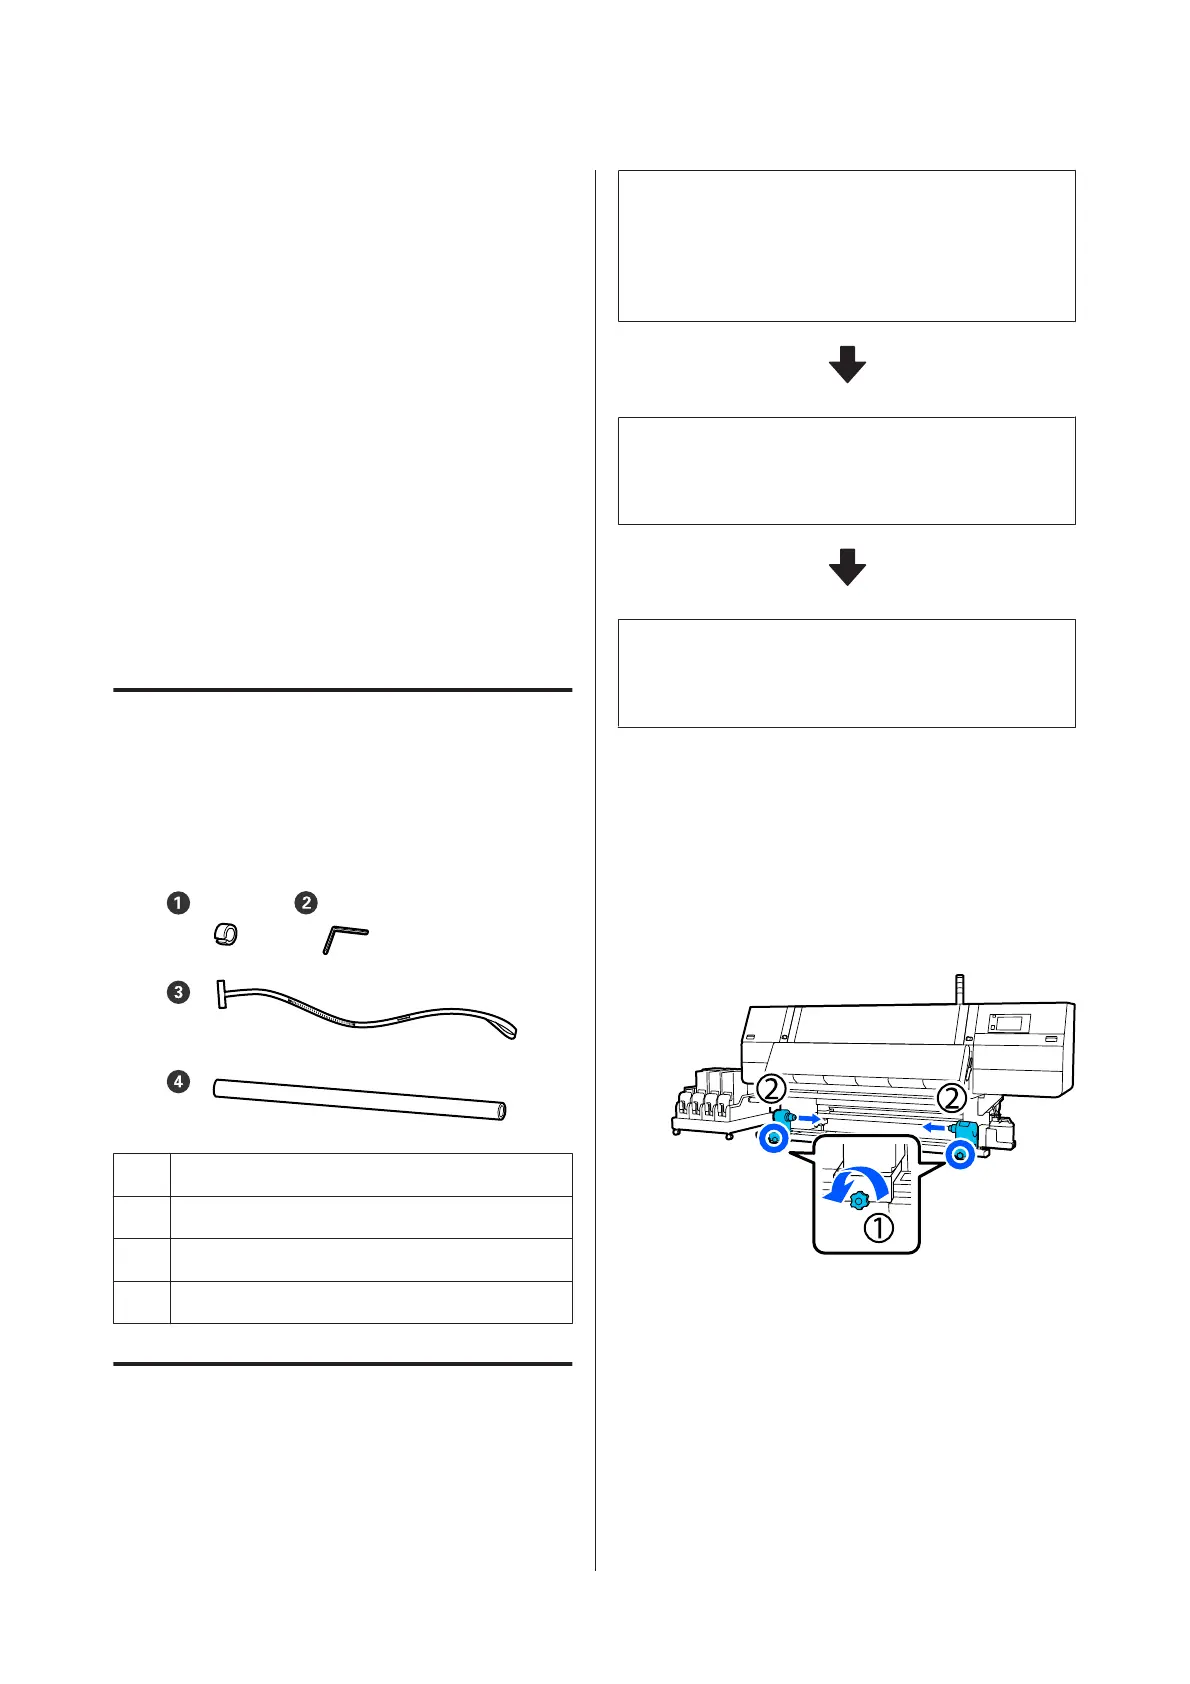
A Weight
B Hex wrench
C Film
D Roll core (shorter roll)
How to Adjust
Do adjustment work in the following order.
1. Checking the Parallelism
Attach the adjustment tool to confirm there is no
misalignment in the parallelism of the Auto Take-up Reel
Unit. If there is no misalignment, then adjustment is not
necessary.
2. Adjustments
Visually confirm as you do adjustments until any
misalignment in the parallelism is eliminated.
3. Completing Adjustments
Remove the adjustment tool, and set up the printer so you
can use it again.
Checking the Parallelism
A
Confirm that the printer is off.
B
Loosen both the left and right media holder
locking screws and move the media holders
inward.
SC-F10000 Series User's Guide
Appendix
191
 Loading...