Connecting to Cameras with FLIR Cloud™ CMS
7
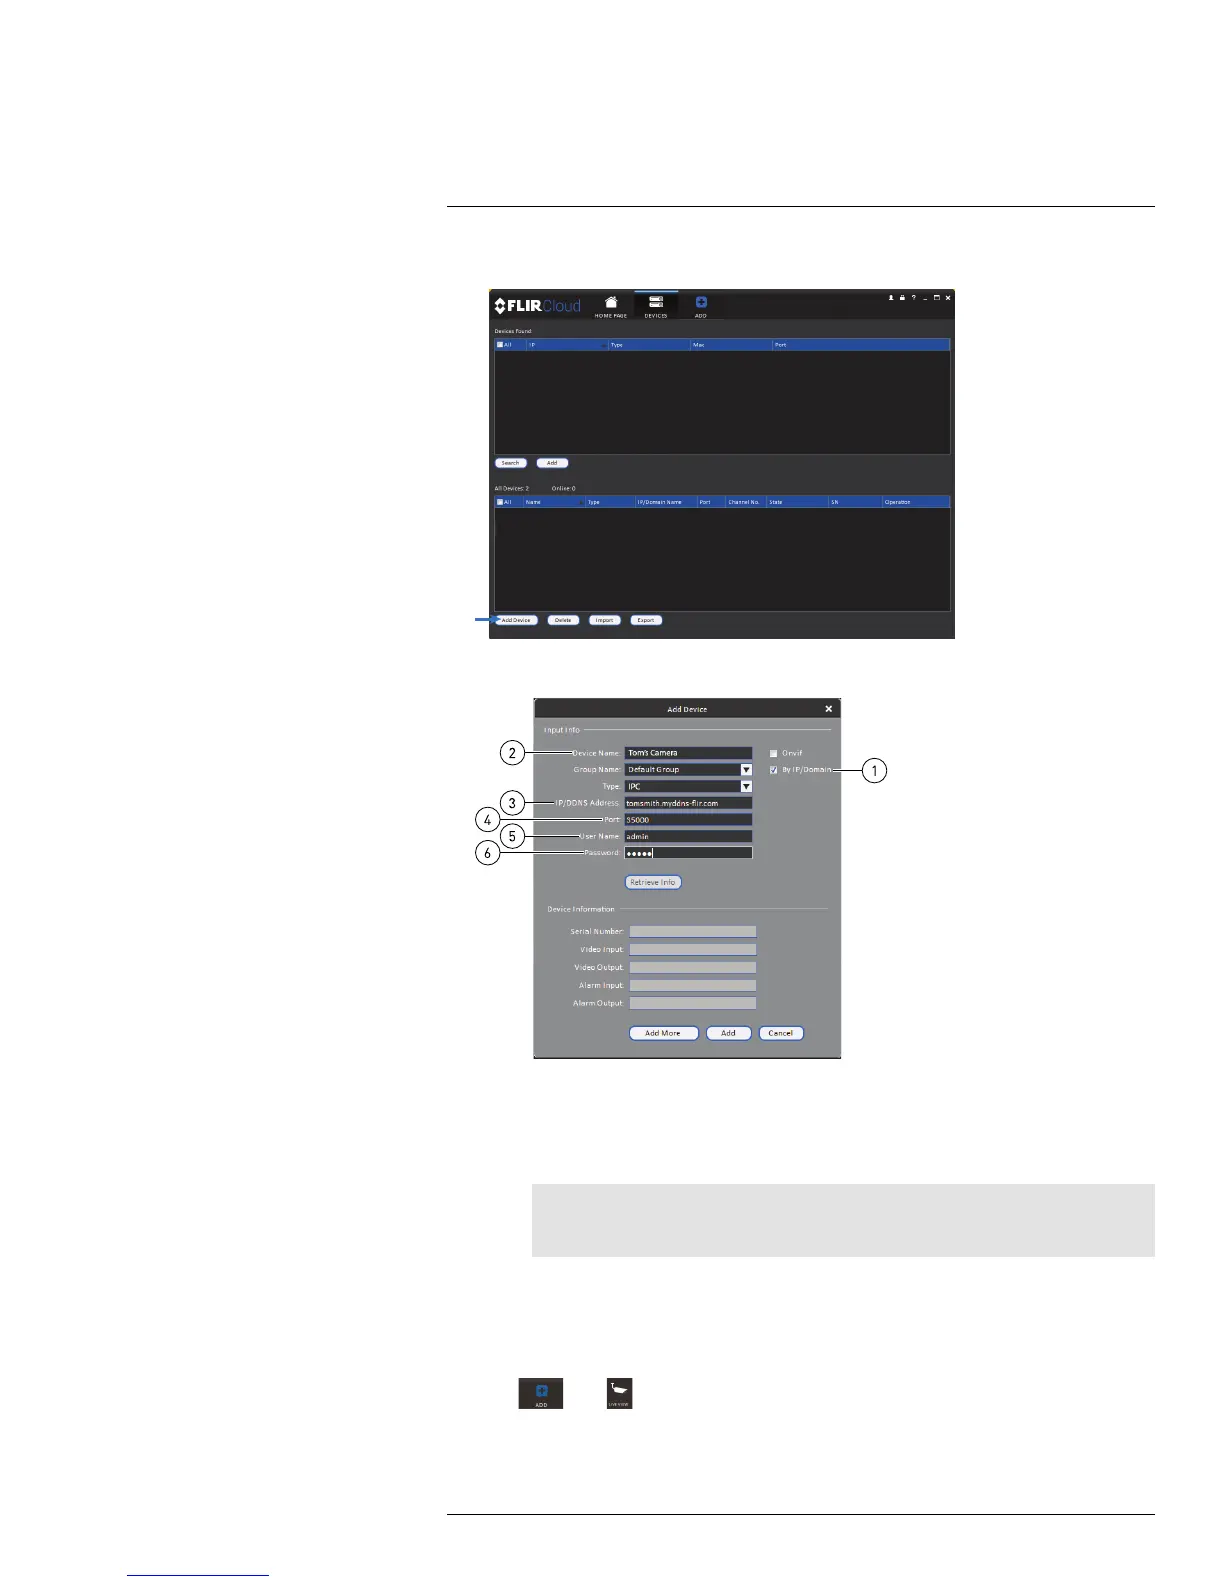
2. Click Add Device.
3. Enter the following:
3.1. Check By IP/Domain to add a camera using the DDNS address.
3.2. Device Name: Choose a name for your camera of your choice.
3.3. IP/DDNS Address: Enter the Domain Name/URL Request you received in the
email when you registered for DDNS followed by .myddns-flir.com.
Note
For example, if your Domain Name/URL Request is tomsmith, enter tomsmith.myddns-flir.
com
3.4. Client Port: Enter the camera’s Client Port.
3.5. User Name: Enter the camera’s User Name (default: admin).
3.6. Password: Enter the system’s Password (default: admin).
4. Click Add.
5. Click
then .
#LX400038; r. 1.0/18537/18537; en-US
61

 Loading...