PanaFlow™ LC User’s Manual 47
Chapter 3. Programming
3.5.3 Standard Digital Output
3.5.3a Setting up Pulse Output
To program a Pulse Output, use steps as in section “Log-in and Primary Pages” to navigate to the
Input/Output settings page:
1. In Meter Menu highlight [Digital Output (Std)] and press [ENTER]. Then select [Pulse] option.
2. Setup the [Polarity], [Measurement], [Pulse Value], [Pulse width] and [Error Handling] options to suit
your needs. The Figure 58 below, shows the available options. Also refer to the Table 6 below to
understand each option.
For measurement options available on Pulse Output refer to Table 7.
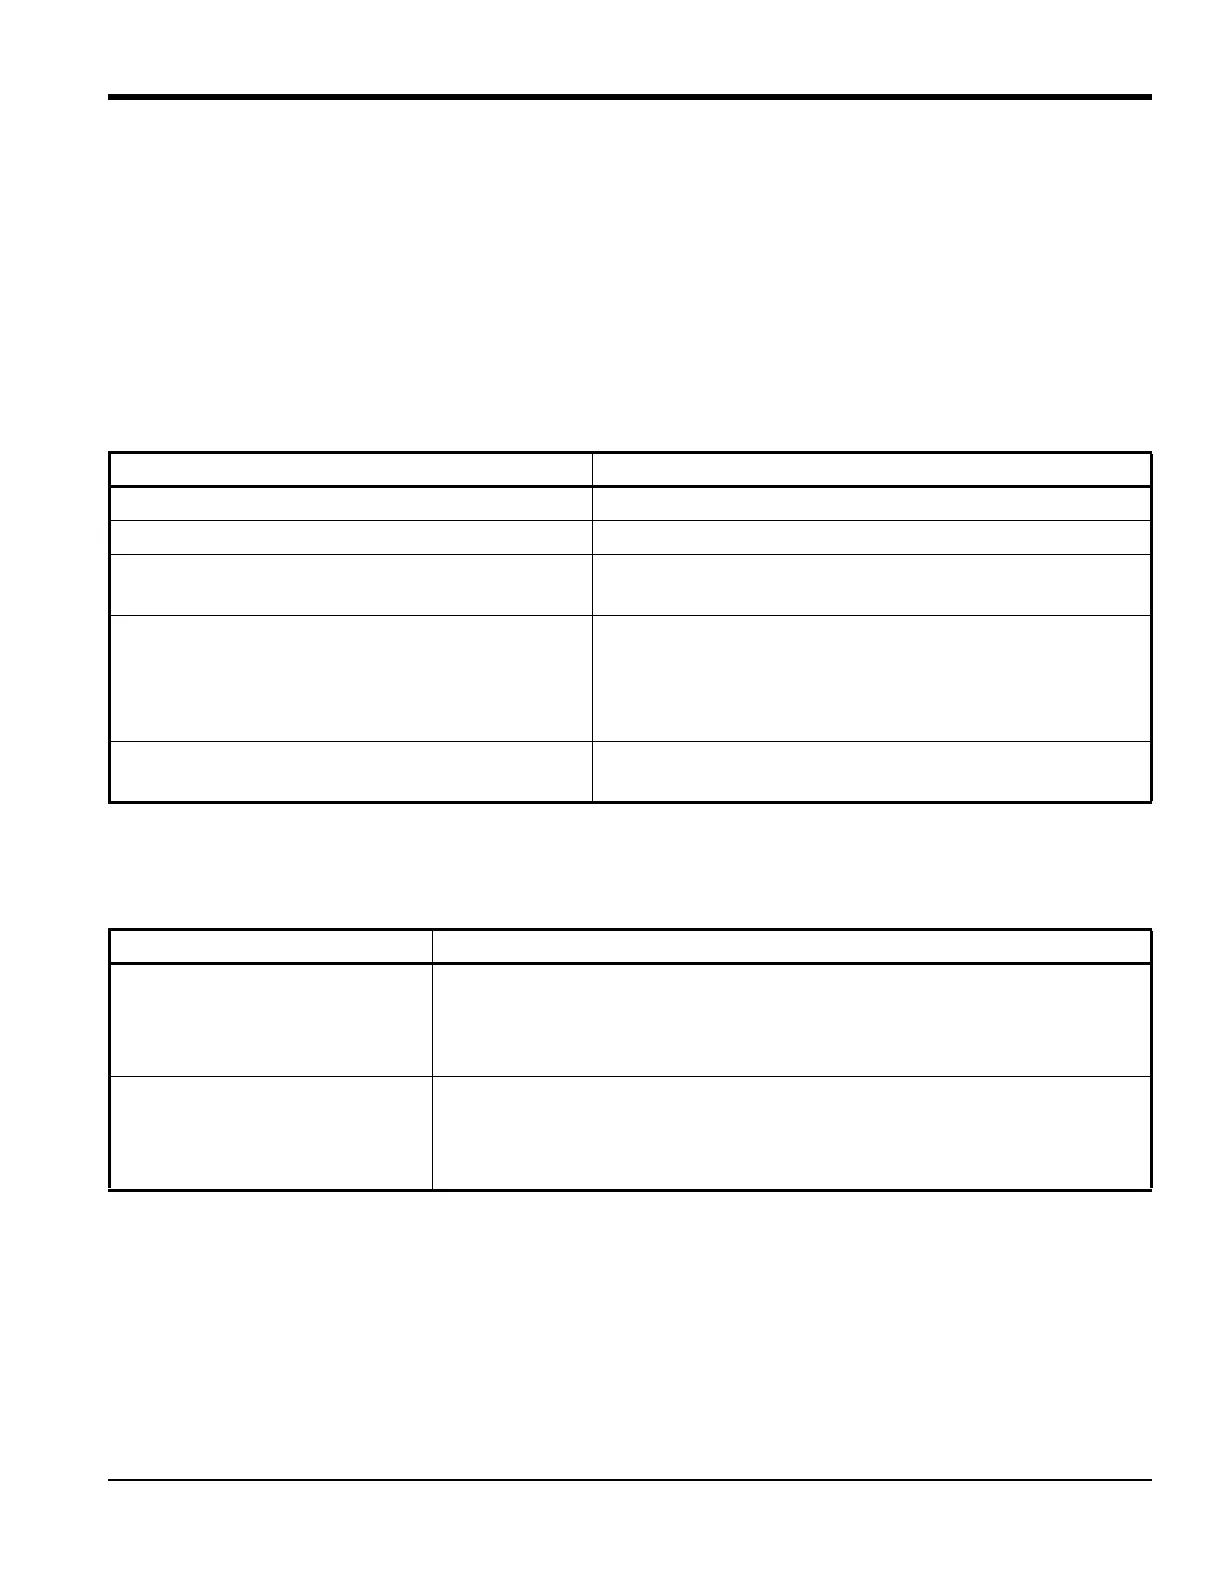
Table 6: Pulse Output Options
Option Functional Description
Polarity Choose the Negative or Positive edge of the pulse
Measurement Choose the channel and Measurement to output
Pulse Value Choose how many units of the chosen measurement is
accumulated before a pulse is output
Pulse Width Choose the duration of each pulse that is output
IMPORTANT: Make sure the meter is not configured to
output more than one pulse during this
time, as this could lead to missed pulses.
Error Handling Choose the Pulse output response during an error
condition
Table 7: Measurement options for Pulse Output
Measurement Channel Measurement Options for Pulse Output
Composite Forward Volumetric Totals, Reverse Volumetric Totals, Net Volumetric
Totals, Forward Mass Totals, Reverse Mass Totals, Net Mass Totals,
Forward Std Volumetric Totals, Reverse Std Volumetric Totals, Net Std
Volumetric Totals
Channel x Forward Volumetric Totals, Reverse Volumetric Totals, Net Volumetric
Totals, Forward Mass Totals, Reverse Mass Totals, Net Mass Totals,
Forward Std Volumetric Totals, Reverse Std Volumetric Totals, Net Std
Volumetric Totals

 Loading...