GE H
EALTHCARE
D
IRECTION
GA091568, R
EVISION
5 VIVID E9 S
ERVICE
M
ANUAL
Chapter 8 - Replacement procedures 8 - 165
8-6-32-2 Handle Left Top / Handle Right Top removal
Hatches are used to attach the Handle Left Top and Handle Right Top to the Lower UI.
NOTE: Be careful when doing this procedure. It is easy to break the plastic hatches.
NOTE: The screwdriver positions in Figure 8-173 "Release Hatches" on page 8-165 indicates where
the hatches are located.
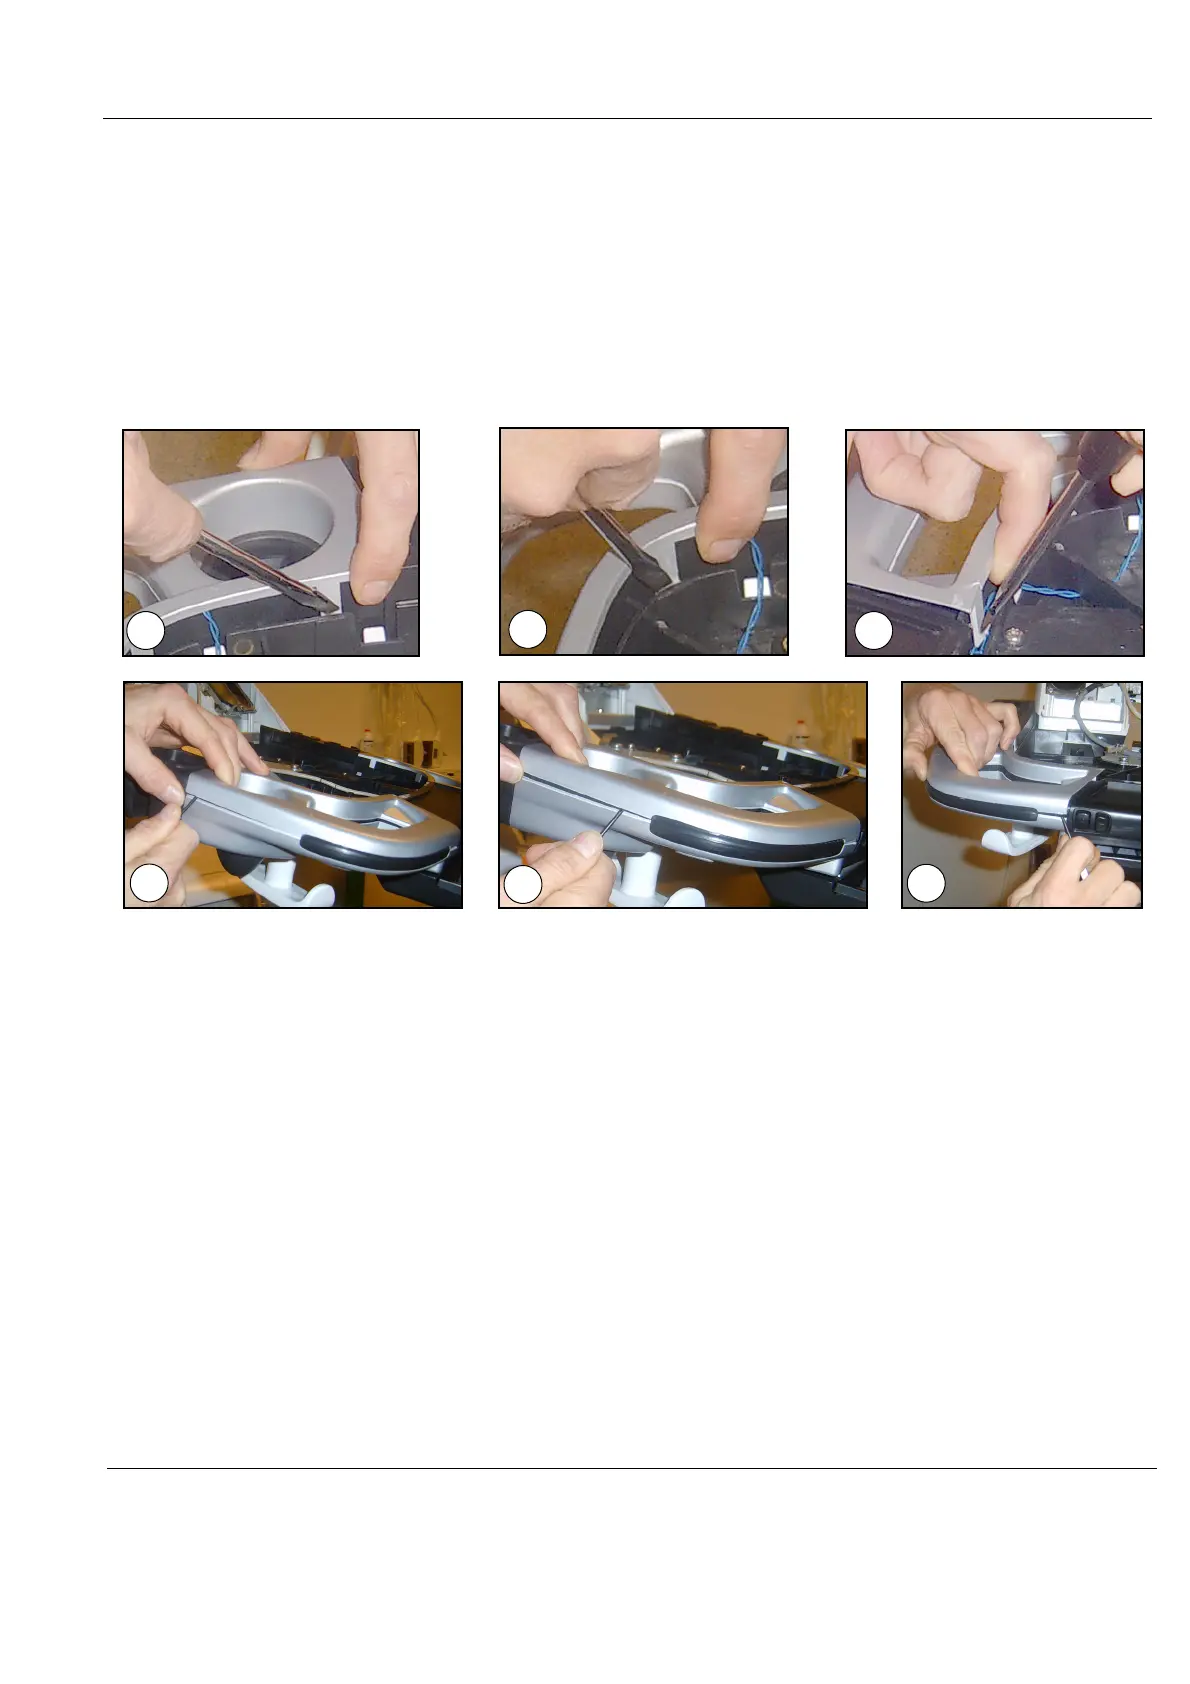
1.) Use a thin screwdriver to release the hatches, one by one as illustrated in Figure 8-173 "Release
Hatches" on page 8-165, until you can remove the Handle Left Top or Handle Right Top.
2.) Remove the Handle Left Top or Handle Right Top.
3.) If needed, repeat the previous steps for the other handle.
8-6-32-3 Handle Left Top / Handle Right Top installation
1.) Remove the Gel Cups (if present).
2.) Install the Handle, Left Top / Handle, Right Top by pressing them into the UI Frame, Lower.
3.) Install the Gel Cups you removed in step 1.
Figure 8-173 Release Hatches
1
2
3
4
5
6

 Loading...


