PX940 User Guide 43
If your verifier is not calibrated, follow these steps:
Note: Do not power off the printer during verifier calibration.
Calibrating the Printer
1. From the front touch panel, go to: Wizards > Calibration > Verifier and follow
the instructions.
2. Open the verifier arm and print head arm.
3. Remove any media and ribbon from the printer media path.
4. Clean the printhead, platen roller, and verifier glass with a soft, lint-free cloth
soaked in isopropyl alcohol.
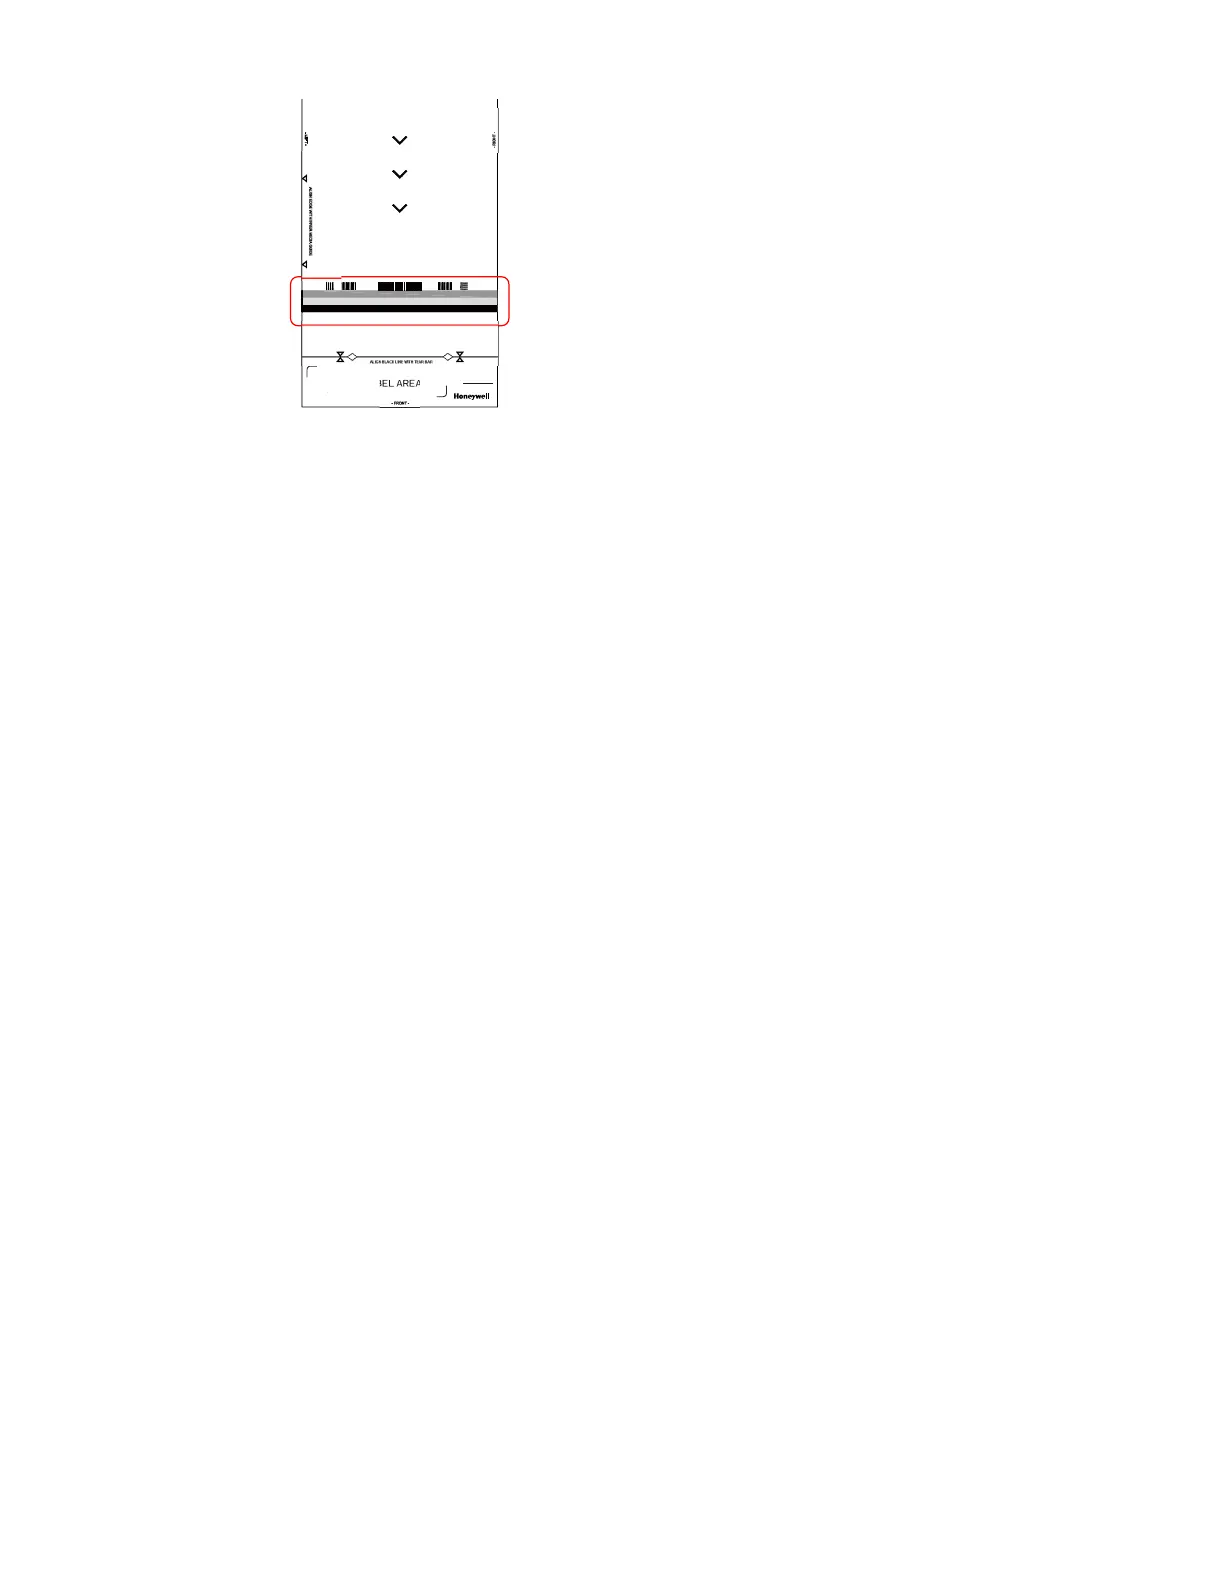
5. Place the calibration card on the printer media path, according of the
instructions written on the calibration card.
• The three chevrons on the card indicating the orientation. The "FRONT" text
on the card placed outside of the verifier
• Align the black line with the printer tear bar. Use the diamond cut out on the
calibration card black line to align to the tear bar.
Note: You should see the tear bar through the diamond cut on the calibration card black
line.
• Align the card evenly toward the printer spine and resting against the media
guide.
6. Close the verifier arm and then the printhead.
7. Press NEXT on the touch screen.
• The card will move forward as the calibration process is running.
8. Once completed, the front panel will show if the calibration pass or fail.
Note: If Calibration fails, see Verifier Error Alerts and Solutions, beginning on page 65.
HPN: 50144664-001
ALIGN BLACK LINE WITH TEAR BAR
PASTE LABEL AREA

 Loading...