76 PX940 User Guide
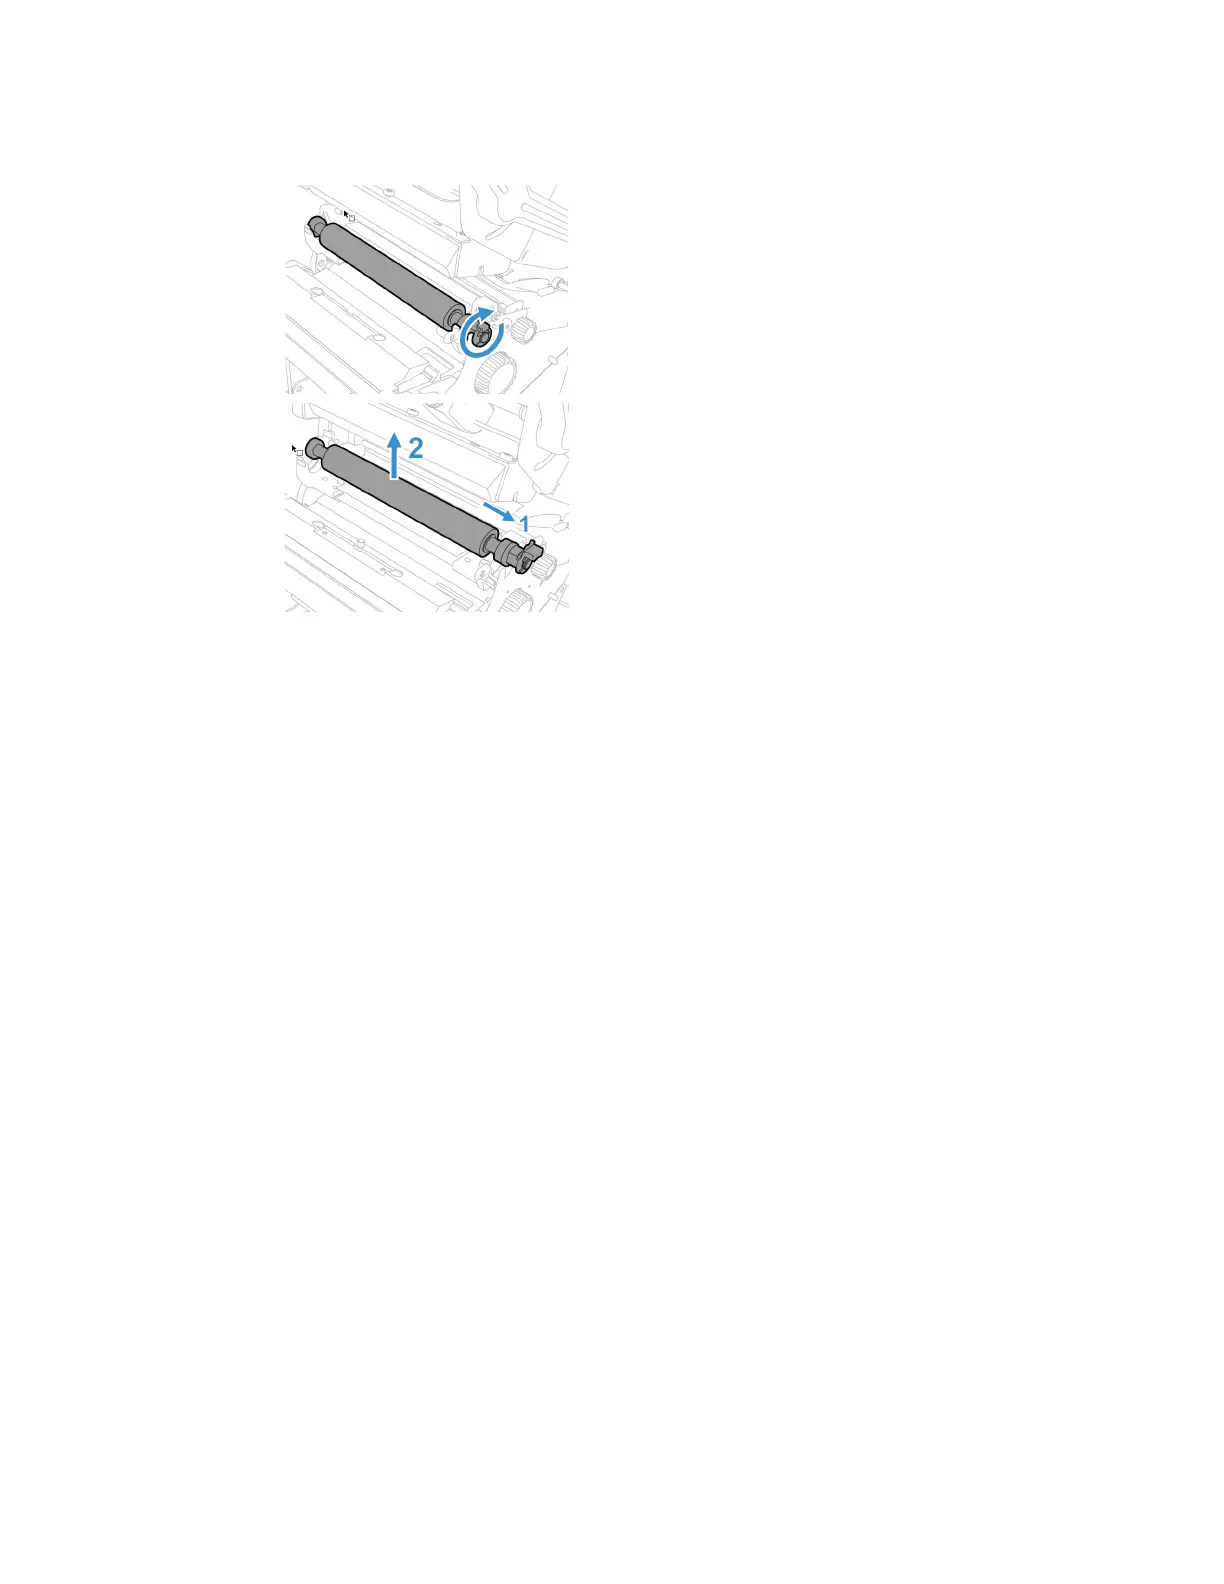
7. Rotate the platen roller latch clockwise to detach it from the printer and pull the
platen roller away from the printer.
8. Insert the new platen roller and slide it into the printer.
9. Lock the platen roller by rotating the latch clockwise.
Label Taken Sensor Calibration
If your printer has the optional label taken sensor or the label dispenser (which
includes the sensor), use the wizard to calibrate the sensor for your media.
Note: For best results, calibrate the sensor each time you load media or move the printer to
a different environment. If you installed the label taken sensor module or the label
dispenser in the printer, calibrate the sensor before you begin printing.
Before you calibrate the sensor, load media and ribbon in the printer as necessary.
1. In the Main Menu, select Wizards > Calibration > Label Taken Sensor.
2. Follow the prompts to calibrate the sensor.
Label Gap and Black Mark Sensor Adjustments
The label gap sensor is a transmissive sensor that controls how the printer feeds
media by detecting gaps between the labels. The black mark sensor is a reflective
sensor that detects black marks on continuous media.
The sensor contains a blue LED that is strong enough to see through media. You
can use the blue LED to help determine the proper location for the sensor.
1. Open the media cover.
2. Adjust the label gap and black mark sensor:
 Loading...