indicators to determine PSU status. For details about the indicators, see 2.4
Indicators and Buttons.
Data
● You have obtained the cabinet number and chassis number of the RH8100 V3.
● You have located the RH8100 V3 based on the preceding information, and
labeled its panel to prevent misoperations.
● You have determined the position on the RH8100 V3 for removing an AC PSU.
Tools
● ESD gloves
● Packaging materials, for example, an ESD bag
Procedure
Step 1 Wear an ESD wrist strap or ESD gloves. For details, see 1 Safety Instructions.
Step 2 (Optional) If only two PSUs are
congured, power o the RH8100 V3. For details,
see 6.2 Powering O the RH8100 V3.
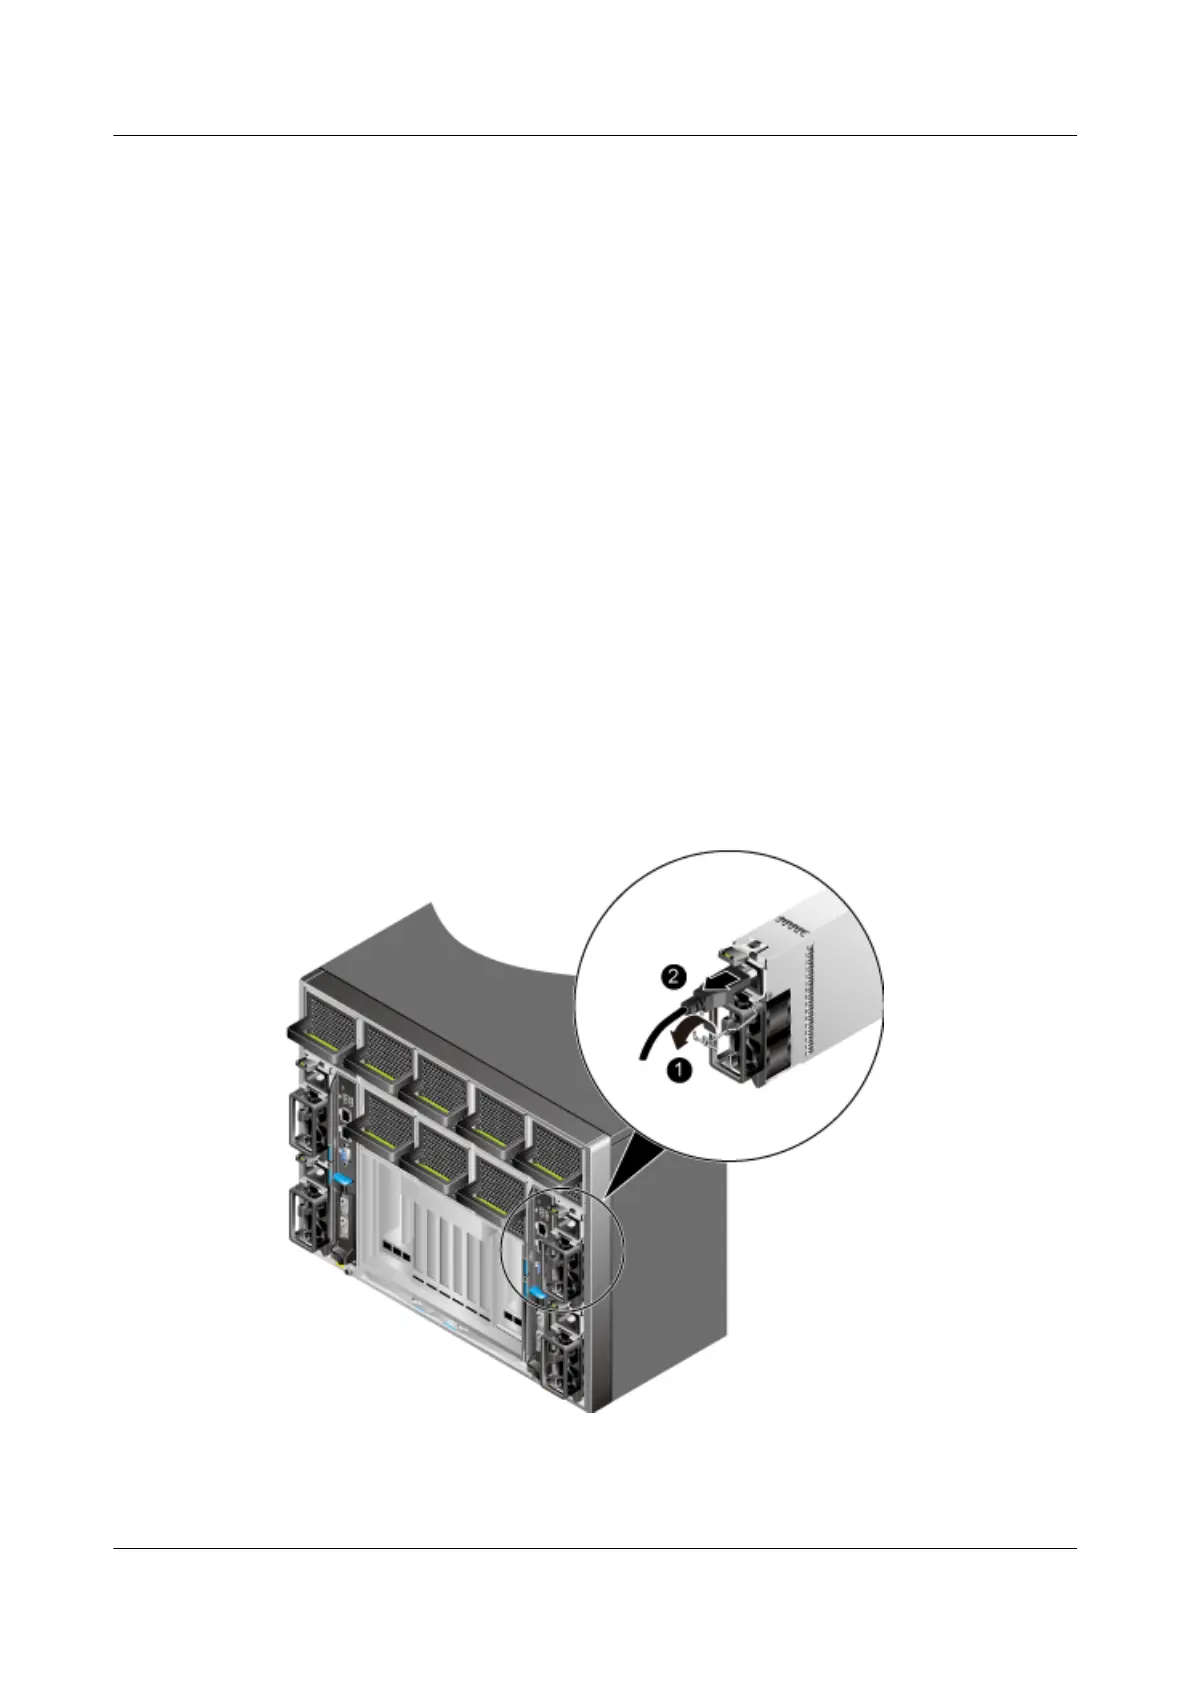
Step 3 Open the power cable clip. See step (1) in Figure 5-131.
Step 4 Remove the power cable from the PSU to be replaced. See step (2) in Figure
5-131.
Figure 5-131 Removing a power cable
Step 5 Press the latch on the PSU, and pull out part of the PSU while holding the handle.
See step (1) in Figure 5-132.
RH8100 V3 Server
User Guide 5 Removing and Installing Parts of the RH8100 V3
Issue 30 (2019-12-19) Copyright © Huawei Technologies Co., Ltd. 255

 Loading...


