72
Chapter 2 Printing Adjustments
3. Press the ↵ key to start the Grey test pattern. The pattern will start and
continue to print.
4. Press ↵ again to stop printing.
5. Check the test pattern. If necessary reposition the pressure blocks to
obtain a uniform print density across the media width. In most cases, only
the right pressure block may need to be adjusted.
6. Whenever you reposition a pressure block, run the Grey test pattern to
verify the print pattern is acceptable.
Positioning The Media Sensors
Your printer is equipped with upper and lower media sensors that detect the
top-of-form position on media with label length indicators (gaps, notches,
holes, or black marks). These sensors also detect when a Paper Out
condition exists.
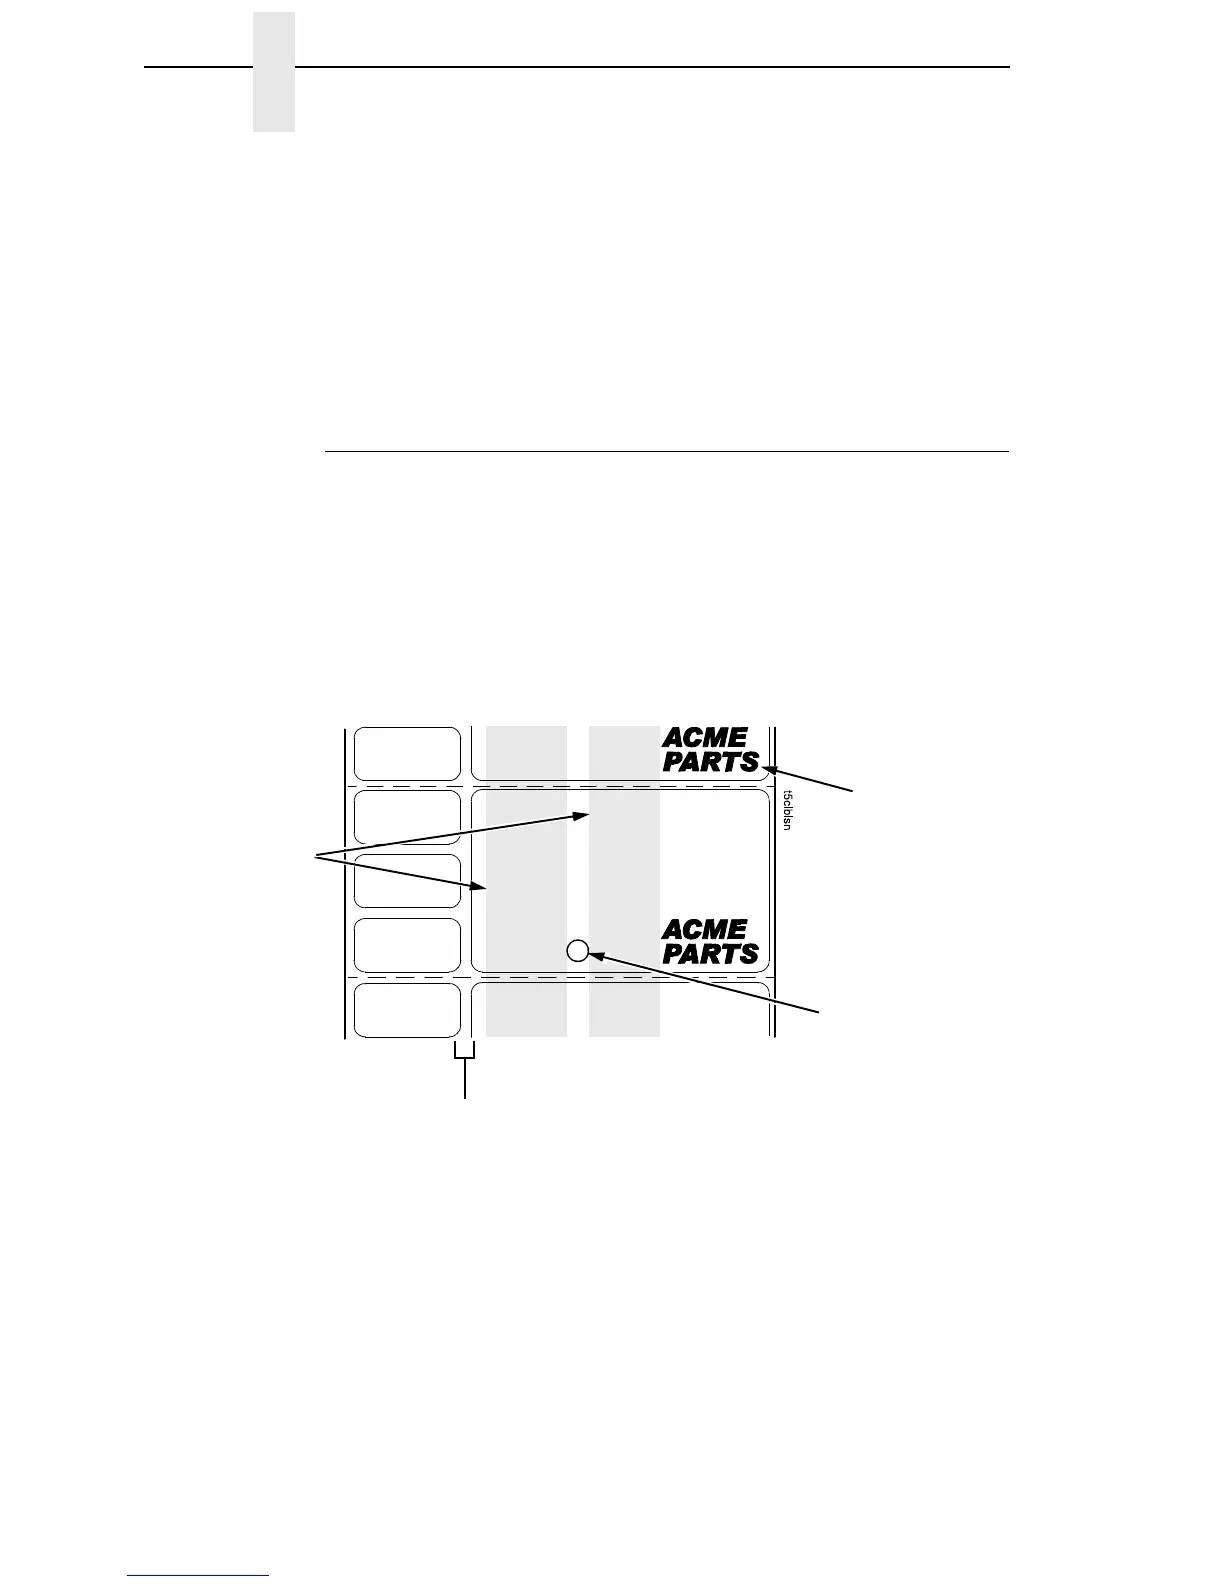
The media sensors should not be placed in the path of media features that
could cause false gap detection or paper out faults. Such features are dark
pre-printing, rounded die-cut label corners, vertical gaps associated with
side-by-side labels, and extraneous cut-outs, as shown below.
Vertical Gap and
Rounded Die-cut
Label Corners
Extraneous Cut-out
Dark Pre-printing
Position the media
sensors in either of
the grey shaded
areas.
 Loading...