Running Manual Calibrate
81
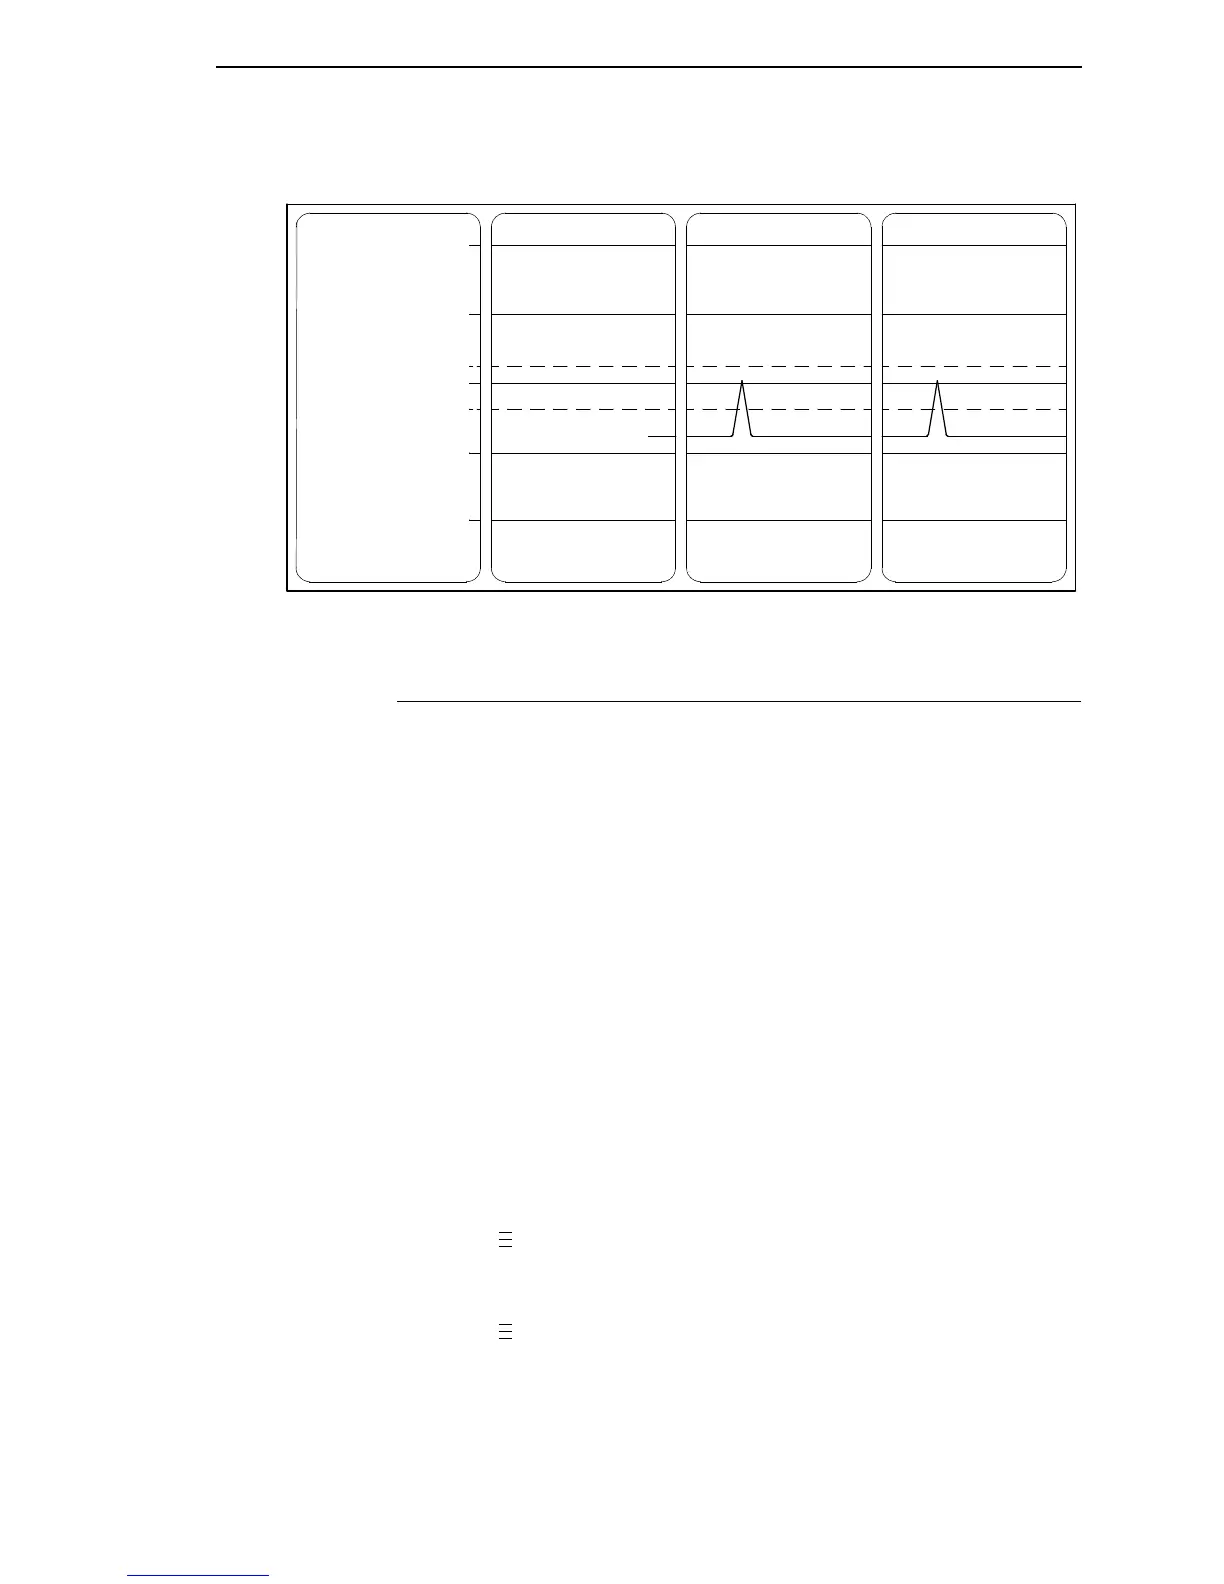
Figure 1. Media Profile Printout
Running Manual Calibrate
Manual Calibrate should be performed only when the values derived from
Auto Calibrate fail to improve the media sensors’ ability to sense label length
indicators on the installed media. You must first enable “Admin User” in the
PRINTER CONTROL menu before accessing or initializing Manual Calibrate
in the CALIBRATE CTRL menu.
NOTE: Verify the Gap/Mark Sensor option (Gap, Mark, Advanced Gap,
Advanced Notch, or Disable) matches the installed media. See
“Sensing Different Media Types” on page 77.
Ensure the media sensors are horizontally positioned to permit
sensing of the label length indicators. See “Positioning The Media
Sensors” on page 72.
Ensure the Print Mode option selected in the QUICK SETUP menu
matches the media installed. Select “Direct” for heat sensitive media
(no ribbon required) or “Transfer” for thermal transfer media (ribbon
required).
If you try to do a Manual Calibrate when Peel-Off Media Handling is
enabled, the LCD will display, “CANNOT CALIBRATE/Disable Peel-
Off.” Before you can do a Manual Calibrate, you must select another
media handling mode.
1. Press to place the printer in Menu mode.
2. Press the ↓ and
↵ keys together until “ENTER SWITCH UNLOCKED”
displays.
3. Press
until “PRINTER CONTROL” displays.
4. Press ↑ until “Admin User” displays, then press
+ until “Enable” displays.
5. Press
↵ to select Enable. An asterisk (*) appears next to “Enable.”
255
191
127
063
000
Paper Out(144)
Gap Mark(105)
.
.
.
.
.
.
 Loading...