1 Monitoring with WindO/I-NV3
24-4 SmartAXIS Touch User's Manual
1.2 Debugging in WindO/I-NV3
This section describes the procedure for monitoring values of devices and debugging in WindO/I-NV3.
1 Change the communication setting to match the connection method between computer and Touch.
For details, refer to Chapter 23 “1.3 Change Communication Settings” on page 23-5.
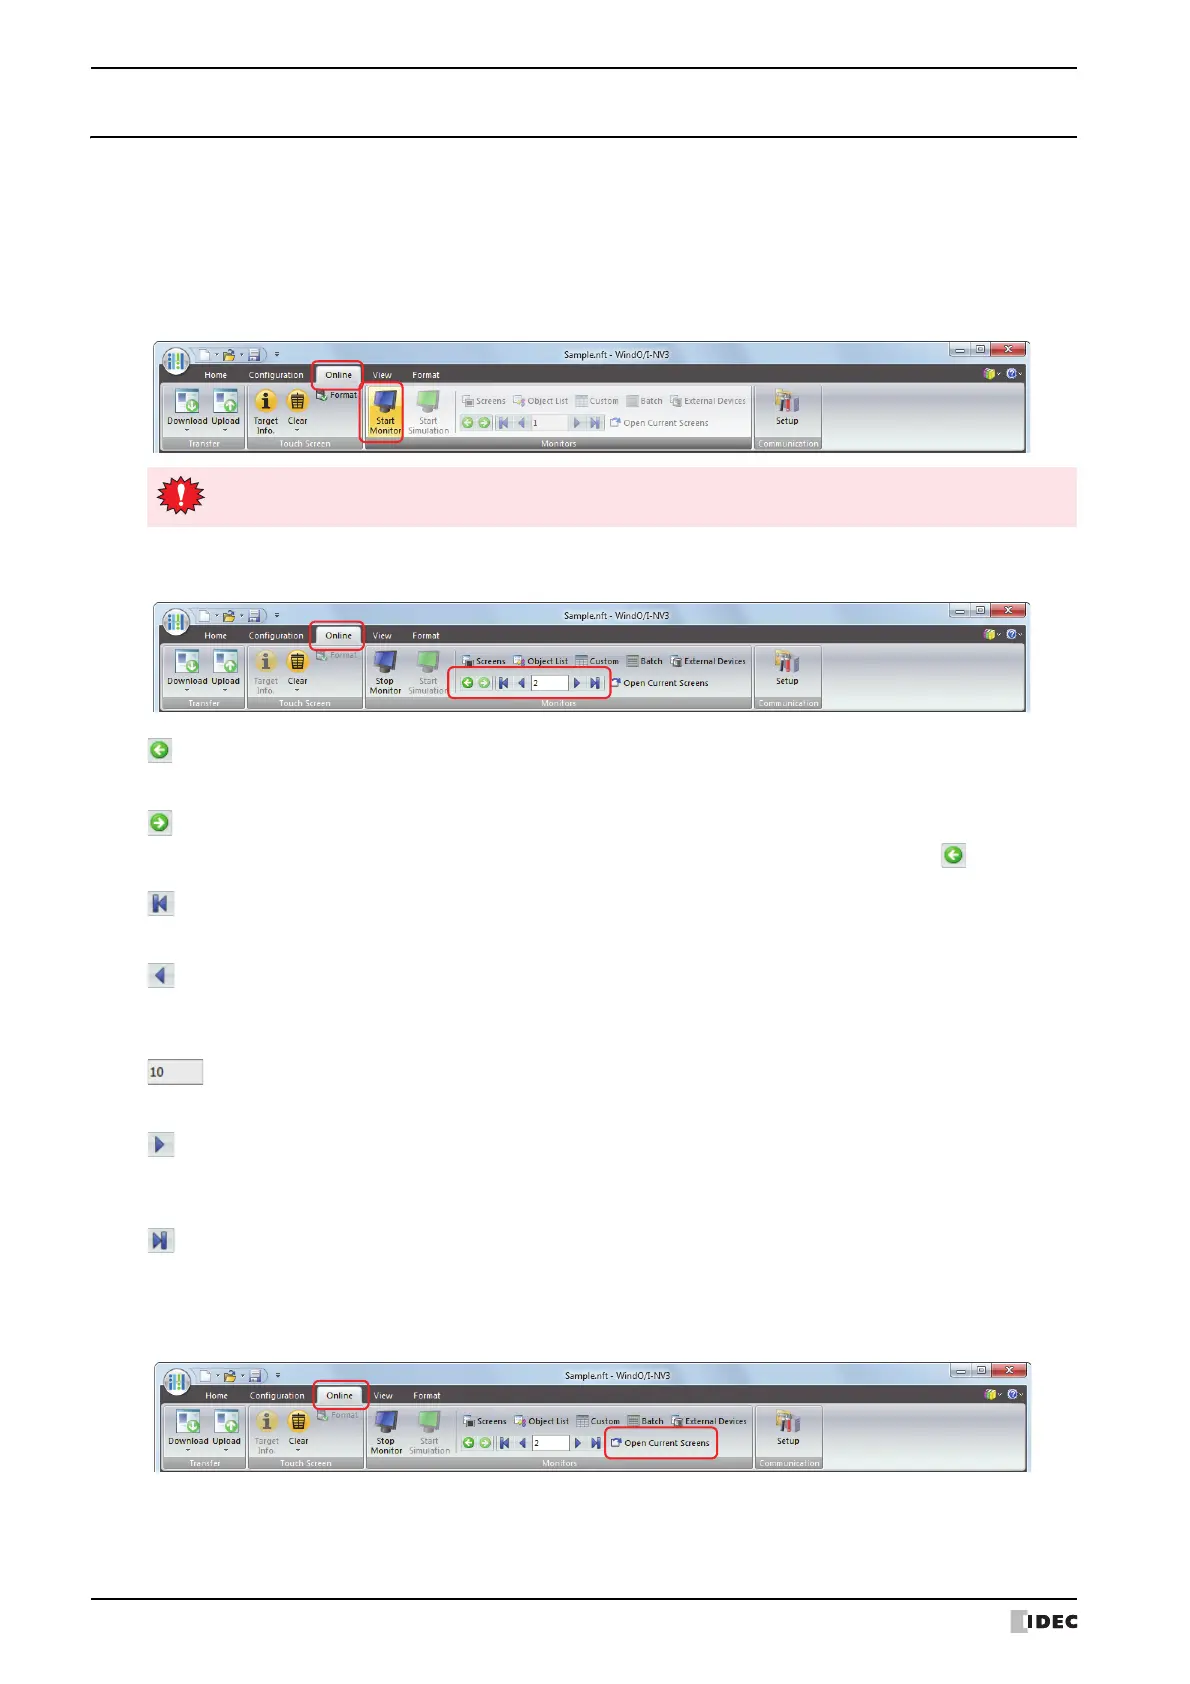
2 On the Online tab, in the Monitors group, click Start Monitor.
The Touch switches to monitor mode and Monitor Mode is displayed at the bottom left of the screen.
3 On the Online tab, in the Monitors group, click the following button or enter the number to the text box to switch
the screen displayed on the Touch to the Monitor screen.
■ (Back)
You are returned to the Base Screen that was displayed immediately before the screen was switched.
■ (Forward)
Advances to the Base Screen that was displayed immediately before the screen was switched using (Back).
■ (First Screen)
Switches to the Base Screen of the lowest screen number in the project data.
■ (Previous Screen)
Switches to the Base Screen of screen number one lower than the Base Screen currently displayed. If the screen
numbers are not sequential, switches to the screen of next lowest number.
■ (Specified Screen)
Switches to the Base Screen with the specified number.
■ (Next Screen)
Switches to the screen with screen number one higher than the Base Screen currently displayed. If the screen
numbers are not consecutive, switches to the screen of next highest number.
■ (Last Screen)
Switches to the Base Screen of highest screen number in the project data.
4 On the Online tab, in the Monitors group, click Open Current Screens.
The screen displayed on Touch opens in the editing window.
If a password has been configured for the project data, the Enter Password screen will be displayed. Enter
the password. For details, refer to Chapter 21 “User Accounts and the Security Function” on page 21-1.
 Loading...