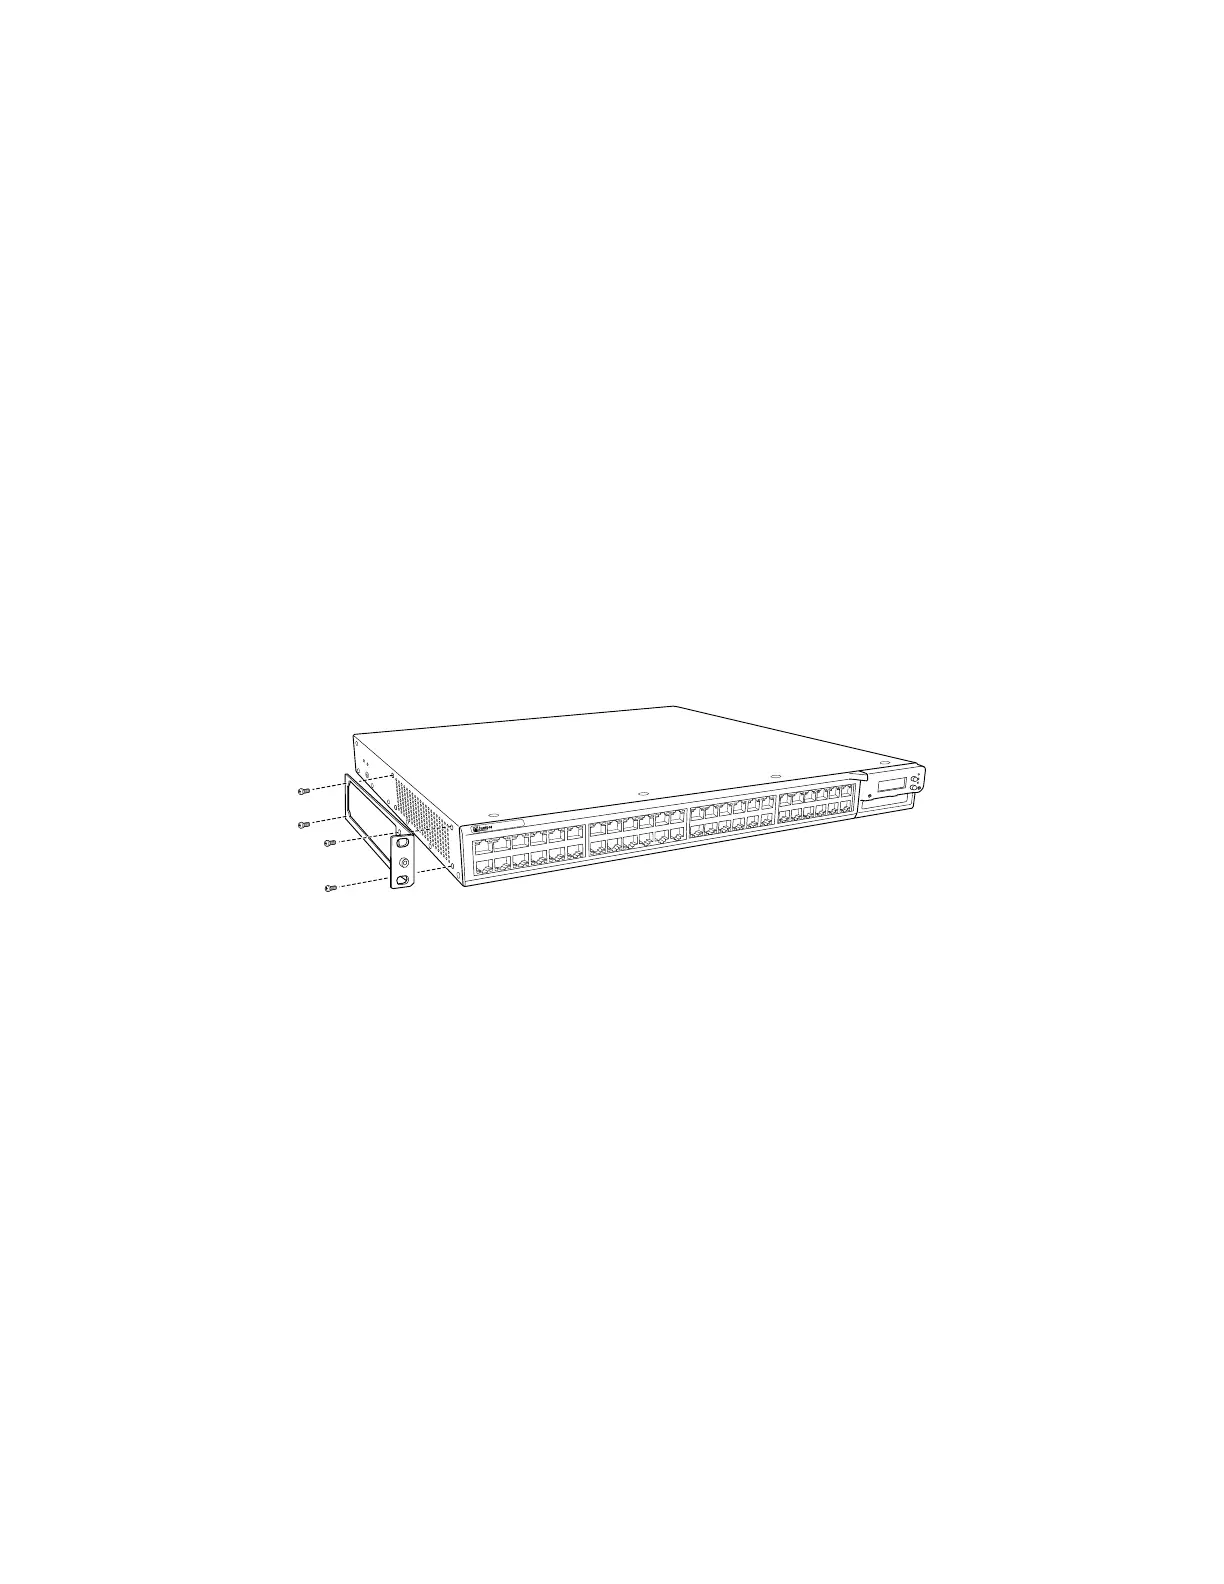
1. Place the EX-series switch on a flat, stable surface.
2. Align the mounting brackets along the front, rear, or center of a side panel of
the EX-series switch chassis depending on how you want to mount the switch
in a rack or cabinet. For example, if you want to center-mount a switch, align
the mounting brackets along the center of the side panel. For instructions on
mounting an EX-series switch on a rack or cabinet, see “Mounting an EX-series
Switch on a Rack or Cabinet” on page 67.
3. Align the bottom hole in the mounting bracket with a hole on the side panel on
the EX-series switch chassis.
4. Insert one mounting screw (provided in the accessory box shipped with the
switch) into each of the two aligned holes. Use a Phillips (+) screwdriver,
number 2 to tighten the screw to the chassis. Ensure that the other holes in the
mounting bracket are aligned with the other holes in the side panel.
5. Insert screws into the other holes in the mounting bracket aligned with the holes
in the side panel and tighten the screws to the chassis using a Phillips (+)
screwdriver, number 2.
Figure 29: Attaching Mounting Brackets Along the Front of an EX-series Switch
Related Topics Mounting an EX-series Switch on a Rack or Cabinet on page 67■
■ Rack Requirements and Specifications for an EX-series Switch on page 50
■ Cabinet Requirements and Specifications for an EX-series Switch on page 52
Mounting an EX-series Switch
You can mount an EX-series switch:
■ On a 19-in. or 23-in. equipment rack or cabinet by using mounting brackets.
The switch is shipped with mounting brackets and screws to be used to secure
the chassis to rack or cabinet rails.
■ On a desk or other level surface by using rubber feet. The switch is shipped with
4 rubber feet to be used to stabilize the chassis on a desk or other level surface.
■ On a wall. You can order the wall-mount kit separately.
Related Topics Mounting an EX-series Switch on a Rack or Cabinet on page 67■
■ Mounting an EX-series Switch on a Desk or Other Level Surface on page 66
■ Mounting an EX 3200 or EX 4200 Switch on a Wall on page 69
Mounting an EX-series Switch ■ 65
Chapter 3: Installing the Switch
 Loading...