NOTE: Do not block the vents on the top of EX2300-C switches. Blocking
the vents can lead to overheating of the switch chassis.
Ensure that you have the following parts and tools available:
•
(Optional and separately orderable; applies only to EX2300-C switches) 1 cable guard
kit. The kit includes the cable guard and 3 number-8 Phillips truss-head screws to
secure the cable guard to the EX2300-C switch
•
(Optional and separately orderable; applies only to EX2300-C switches) 1 standard
cable lock kit to secure the EX2300-C switch from theft by connecting the cable to
the security slot on the switch and a desk or a rack to fasten the cable lock. The kit
includes the standard cable lock and its key.
To mount a switch on a desk or other level surface:
1. Remove the switch from the shipping carton (see “Unpacking an EX2300 Switch” on
page 123).
2. (Optional; applies only to EX2300-C switches) Attach the cable guard to protect
cable connections:
a. Use the 3 truss-head screws to attach the cable guard to the bottom of the chassis.
b. Use the thumbscrews to tighten or loosen the cable guard so that you can insert
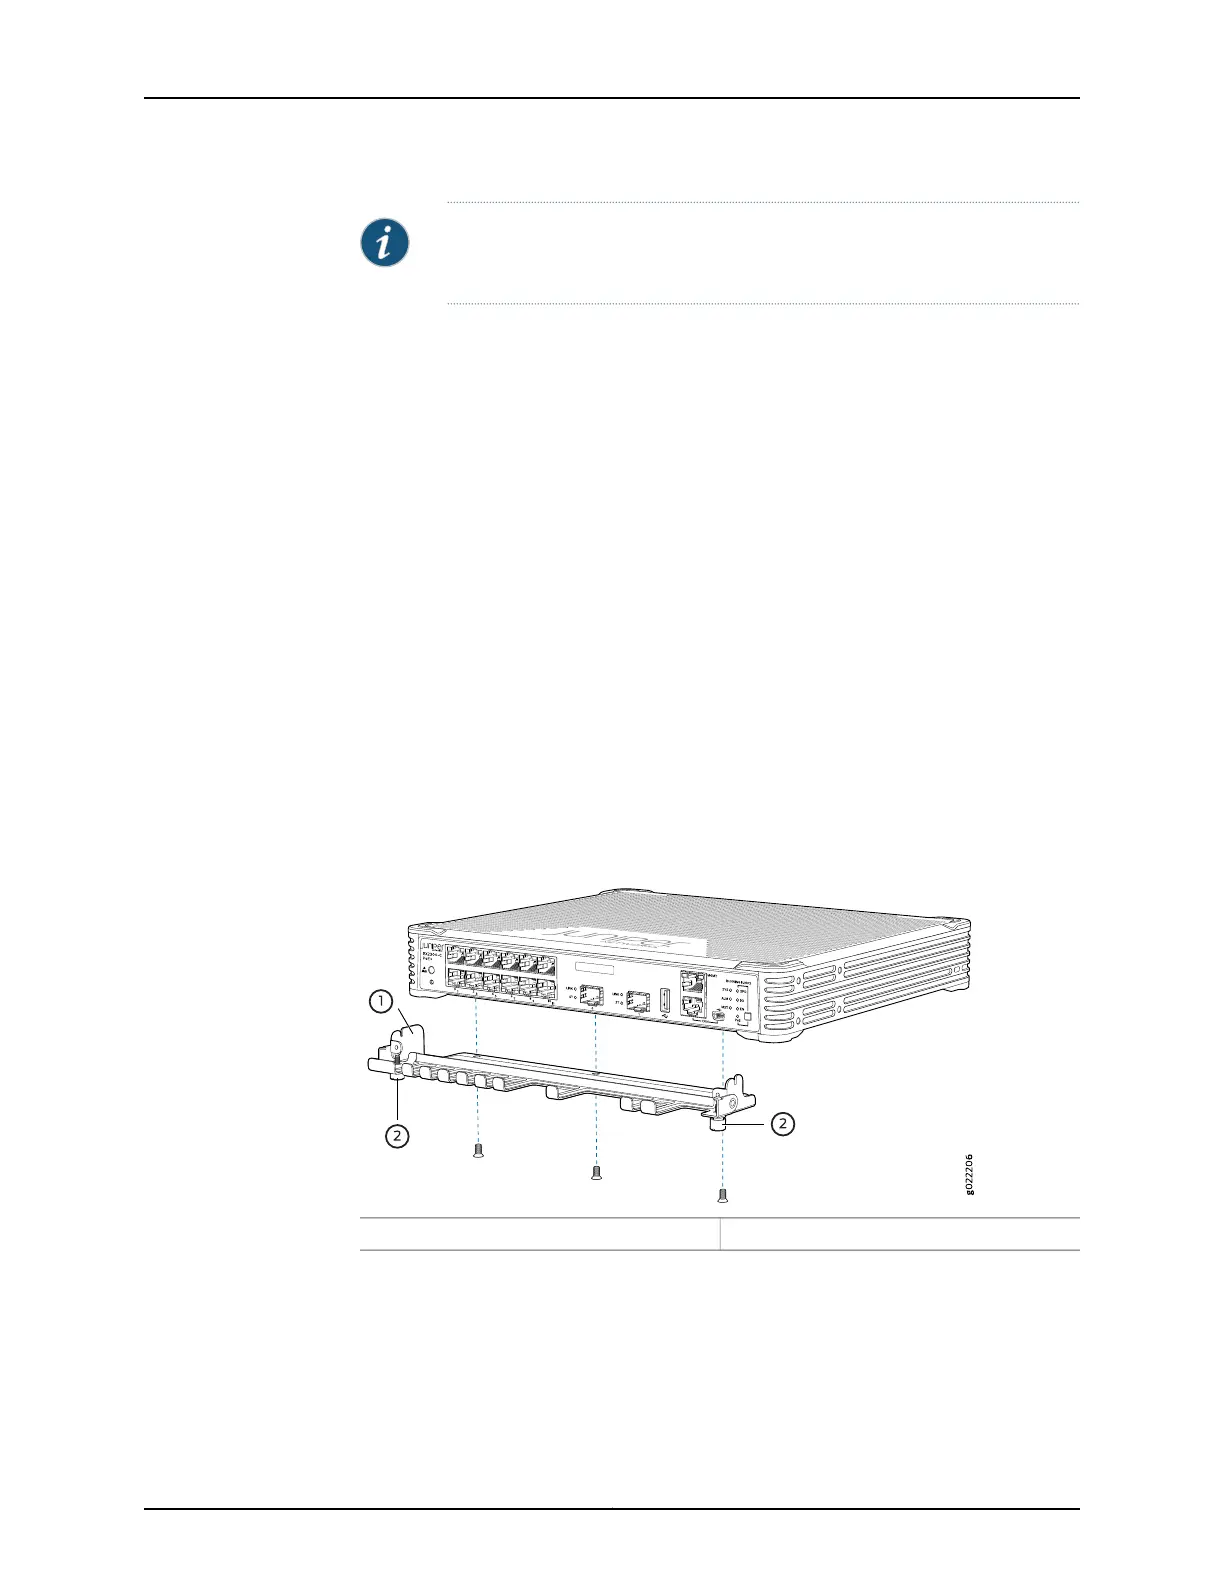
cables. See Figure 30 on page 130.
Figure 30: Attaching a Cable Guard to an EX2300-C Switch
2—1— Thumb screwsCable guard
3. Place the switch on the desk or the level surface.
Copyright © 2017, Juniper Networks, Inc.130
EX2300-C and EX2300 Switches Hardware Guide
 Loading...


