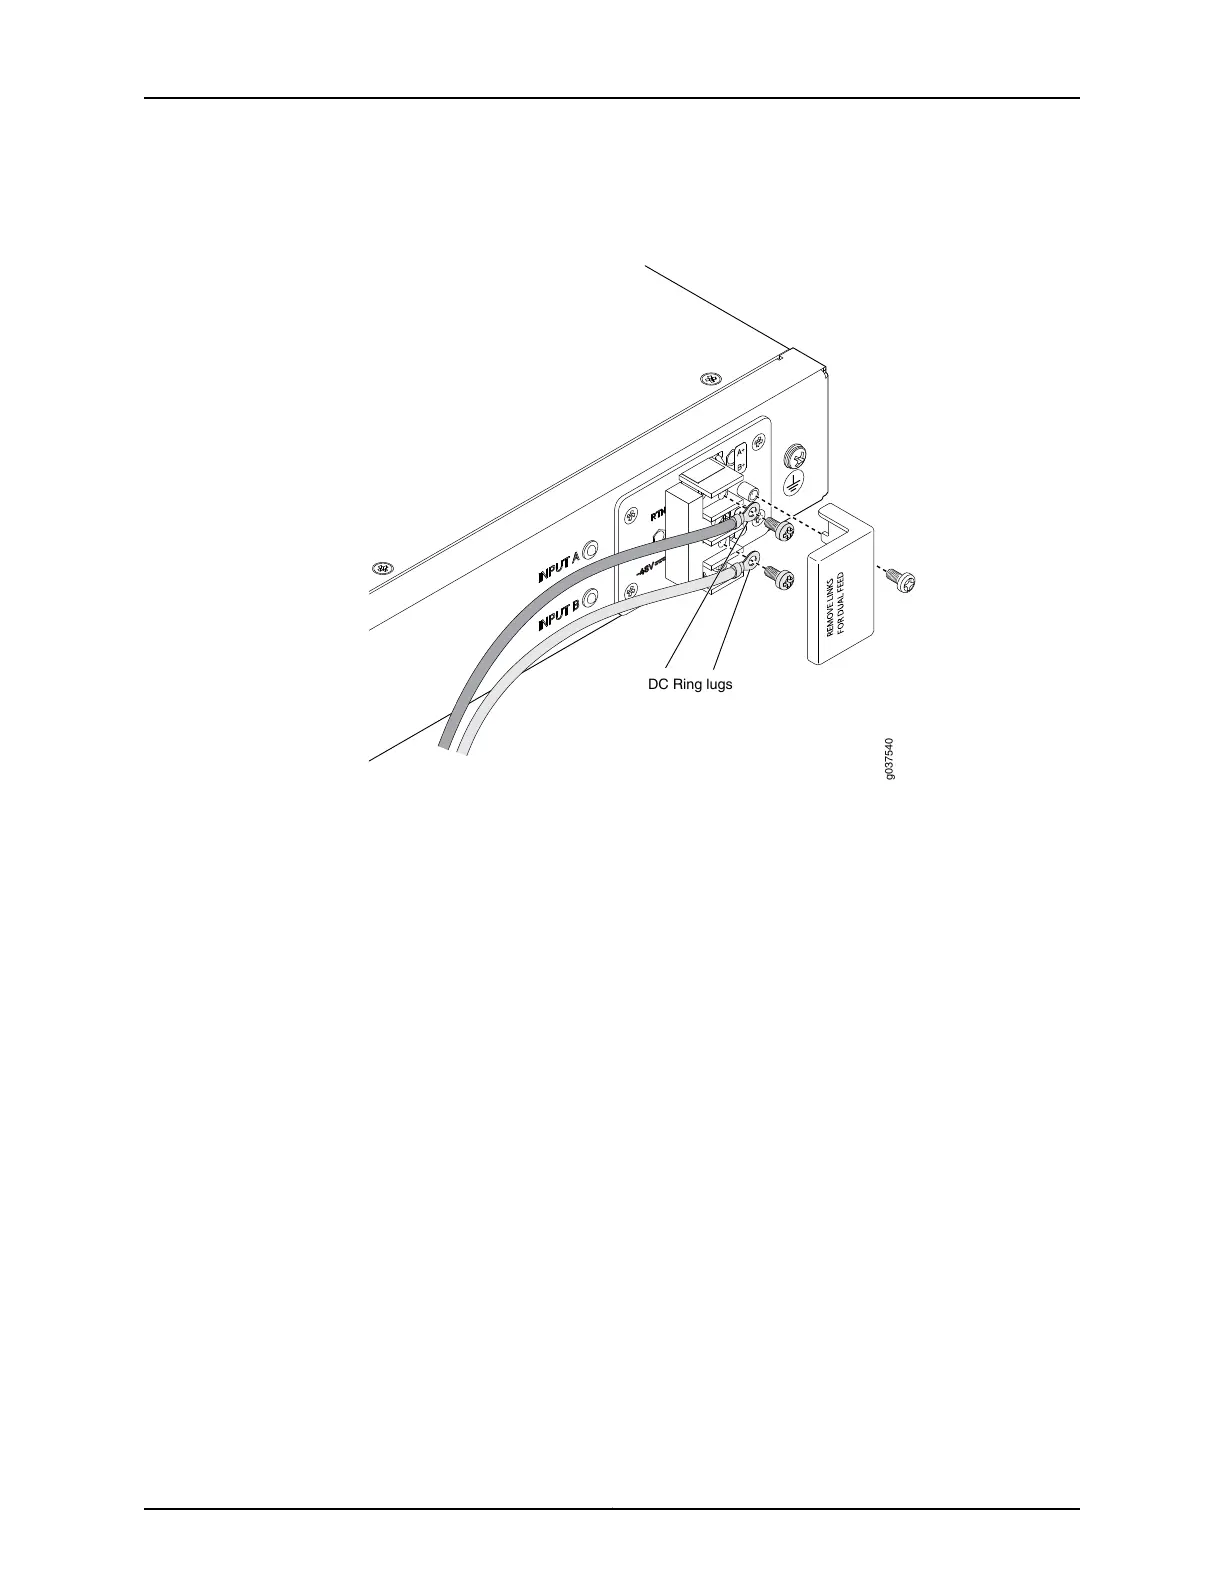
Figure 17: Connecting DC Power to the SRX240 Services Gateway with
DC Power Supply Model
To connect to a single power source:
1. Leave the links (jumpers) on the terminal blocks in place.
2. Secure the ring lug of the RETURN (+) DC power source cable to the A+ terminal
on the terminal block.
3. Secure the ring lug of the -48 VDC power source cable to the A– terminal on the
terminal block.
4. Tighten the screws on the power supply terminals until snug using the Phillips (+)
screwdriver, number–2. Do not overtighten—apply between 8 lb-in. (0.9 Nm) and
9 lb-in. (1.02 Nm) of torque to the screws.
To connect to two power sources:
1. Remove the links (jumpers) and insulator on the power supply terminal block.
2. Secure the ring lug of the RETURN (+) DC power source cable from the first DC
power source to the A+ terminal.
3. Secure the ring lug of the -48V DC power source cable from the first DC power
source to the A– terminal.
4. Secure the ring lug of the Return (+) DC power source cable from the second DC
power source to the B+ terminal.
73Copyright © 2015, Juniper Networks, Inc.
Chapter 14: Providing Power to the SRX240 Services Gateway
 Loading...


