D9U001MCX-0101_03
74
FUNCTION BUTTONS
The function buttons 1, 3, 5 and 8 are described in chapter „13 Bed Positioning“ on the page 77.
To switch on the ashlight:
► Press ashlight button
.
NOTE Depending on the patient’s condition, the nursing sta decides whether the patient is allowed to adjust the bed’s position.
If required, prevent the patient from adjusting the bed as follows:
► Disable functions.
NOTE An adapter for the handset is available. The adapter enables quick installation and removal (e.g. replacing a defective
handset, using the handset for another bed).
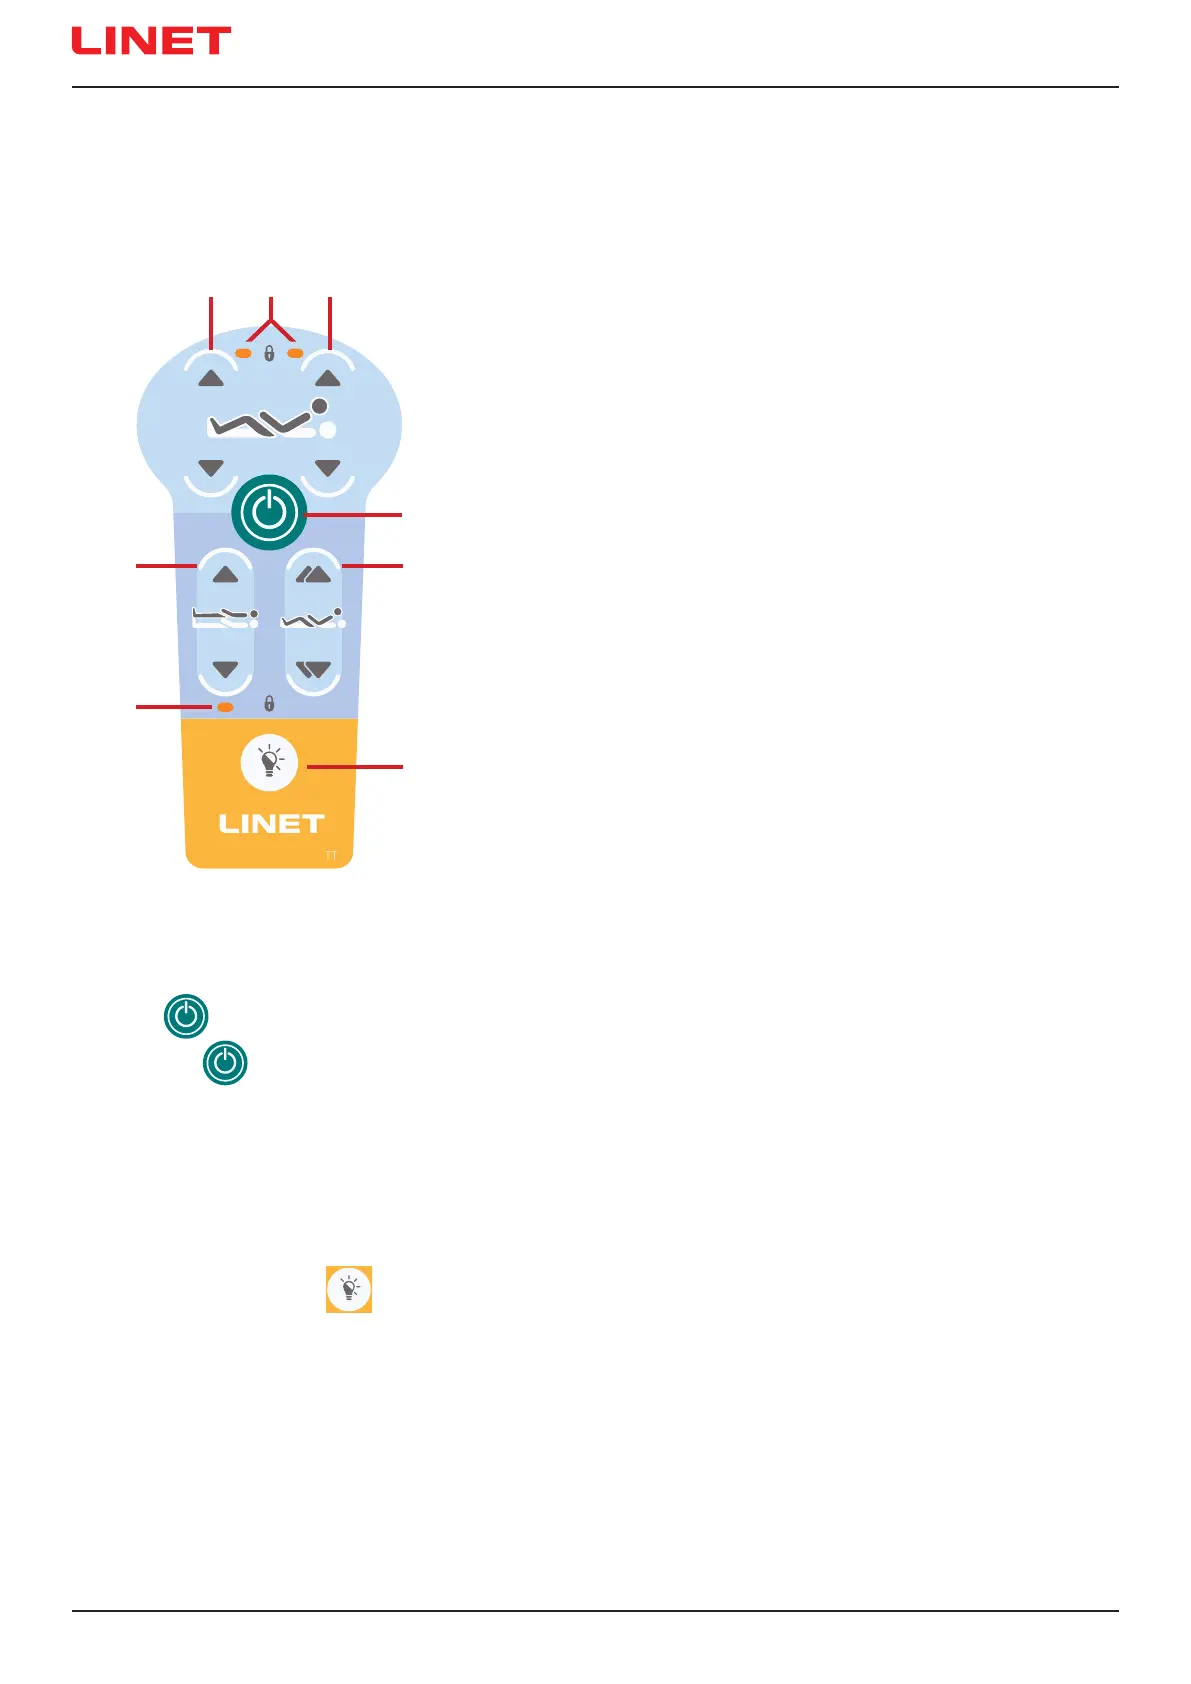
12.3 Handset (optional)
The handset is available with illuminated keyboard.
The illumination is activated for 7s if any button was pressed and the illumination is activated for 3 minutes if GO Button was pre-
ssed.
GO BUTTON
The button activates the keyboard of all Control Elements, except for Lateral Tilt Foot Control.
Pressing button
will keep the keyboard active for 3 minutes.
Pressing a button will keep the keyboard active for another 3 minutes.
1. Thighrest Adjustment Buttons
2. Thighrest/Backrest Lock LED
3. Backrest Adjustment Buttons
4. GO Button
5. Autocontour Adjustment Buttons
6. Flashlight Button
7. Height Lock LED
8. Bed Height Adjustment Buttons
Fig. Handset
1 2 3
4
5
6
7
8
 Loading...