Attaching the main unit
For VL-100U5-E
1)Hangthecatchholesonthemainunitonto
thecatchesofthemountingplateasshown
below.(Bothsides)
2) Press the main unit into the wall and secure
it with the two screws provided. At this time,
rmlypressthepowercordintothecut-outon
thesideofthemainunit.(Theunitwillnotsit
snuglyifthecordisnotseatedinthecut-out.)
Caution
- Tighten the two screws securely. (The joint
gap could cause the wall to become dirty.)
3) Insert the power plug into a wall outlet.
For VL-100EU5-E
1)Openthepanel.Placeyourngersonthe
centersofthesidesoftheunitandpull
forwardandup.
When opening and closing the panel, be sure
not to stress the panel attachments.
2)RemoveterminalblockcoverAfromthemain
unit prongs.
3) Remove the screw, and then remove terminal
blockcoverB.
Catch hole
Catch holes
Main unit
mounting
screws
Power cord
Catch
Mounting
plate
Cut-out
(on the
leftside)
Main unit
Panel
Screw
Prong area
on main unit
Terminalblock
cover A (plastic)
Terminal
blockcoverB
(metal)
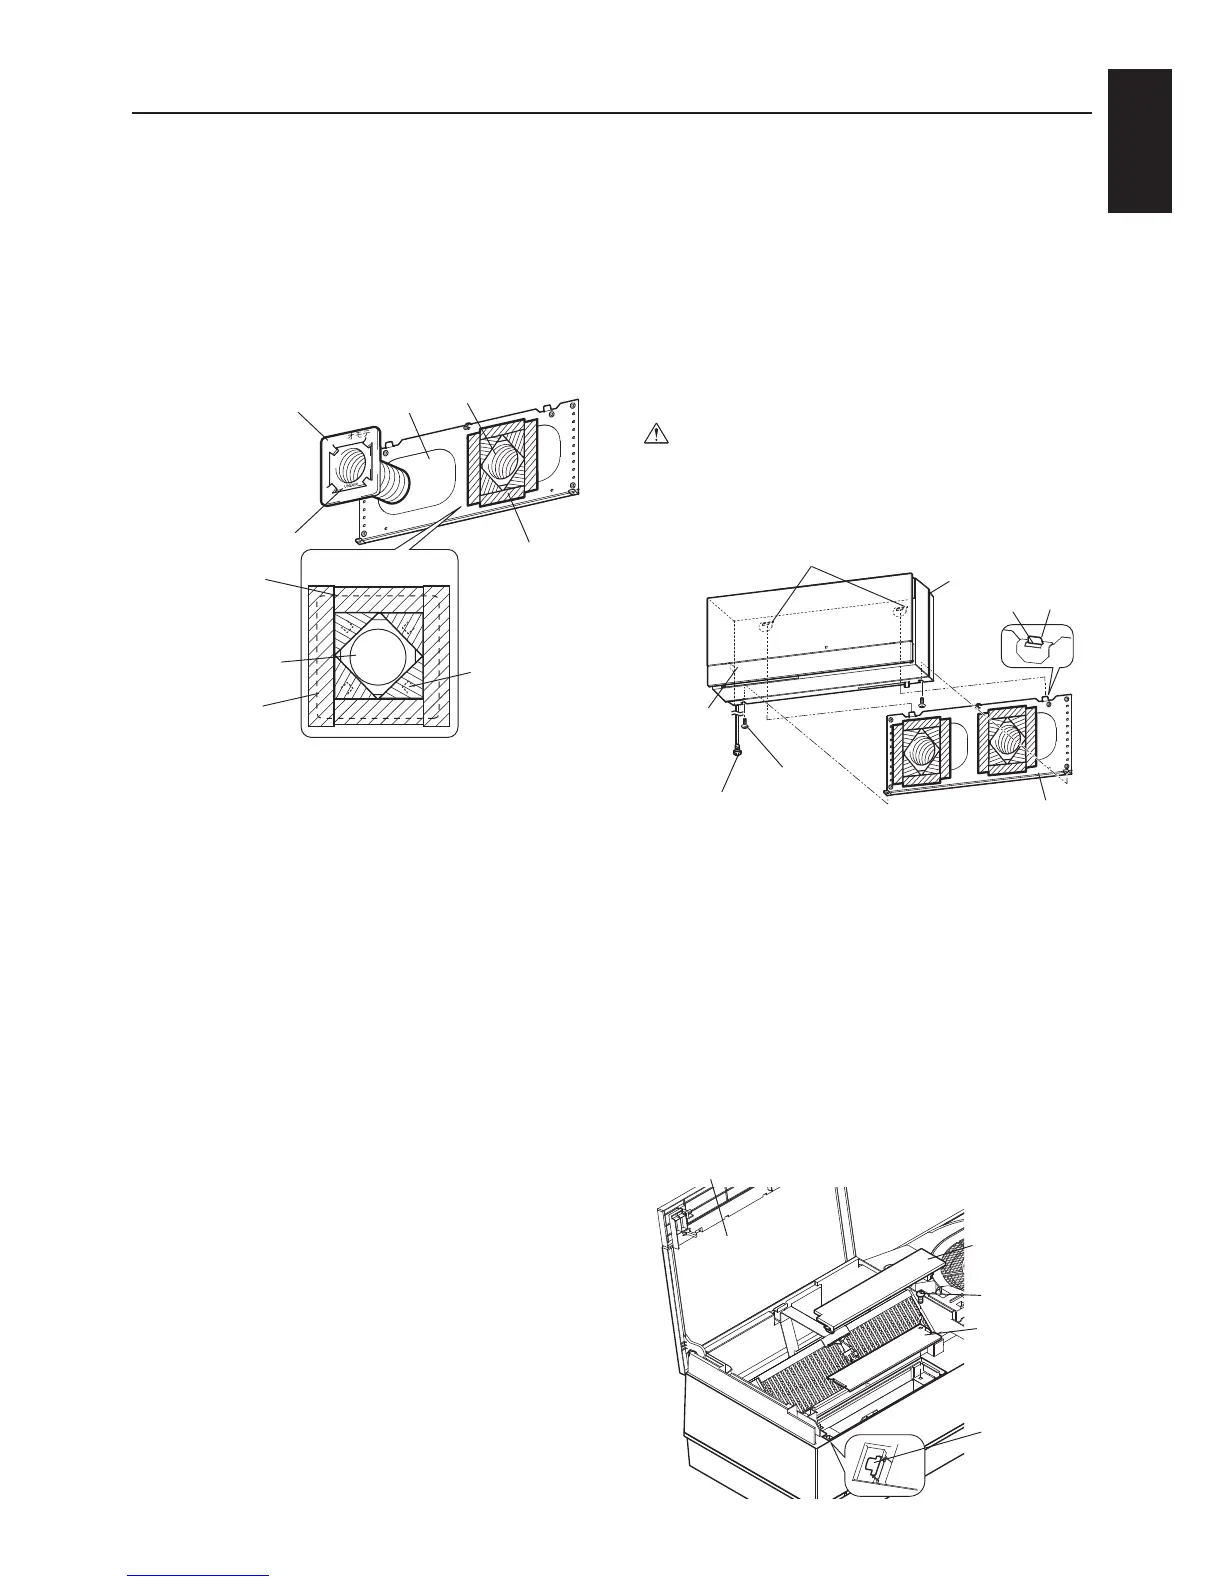
Attaching air supply/exhaust pipes
1)Inserttheairsupply/exhaustpipes,whichare
attached to the pipe mounting plates, into the
wall holes.
2)Tapetheairsupply/exhaustpipestightlyto
thewallasshownbelowusingoff-the-shelf
aluminumtape.(Ifthesealisnottight,the
pipesmayshiftandtheshuttermaynot
operate properly.)
Note
- Mount the air supply/exhaust pipes A so
that the UNDER marker is at the bottom.
- After mounting the pipes, check that they
slope downward as they go outside.
- When mounting the weather covers, do not
push the air supply/exhaust pipes into the
wall. (The shutter may not operate properly.)
Air supply side
Air supply/
exhaust pipe
Pipe mounting
plate
Tapewith
aluminum tape
to cover prongs
(4 locations).
(Seefromfront)
Pipe mounting plate
Mount the air
supply/exhaust
pipes A and pipe
mounting plates
tightly to the wall so
theydonotshift.
Aluminum tape
Apply so that it
does not cover
the pipe opening.
Aluminum tape
(on both air
supply and
exhaust sides)
Exhaust side
UNDERmark
 Loading...