Rockwell Automation Publication 2080-UM002L-EN-E - November 2021 53
Chapter 4 Wire Your Controller
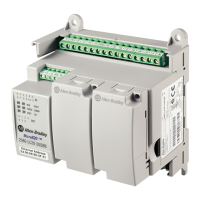
2080-LC30-48QVB / 2080-LC30-48QBB / 2080-LC50-48QVB / 2080-LC50-48QBB
Controller I/O Wiring This section contains some relevant information about minimizing electrical
noise and also includes some wiring examples.
Minimize Electrical Noise
Because of the variety of applications and environments where controllers are
installed and operating, it is impossible to ensure that all environmental noise
will be removed by input filters. To help reduce the effects of environmental
noise, install the Micro800 system in a properly rated (for example, NEMA)
enclosure. Make sure that the Micro800 system is properly grounded.
A system may malfunction due to a change in the operating environment after
a period of time. We recommend periodically checking system operation,
particularly when new machinery or other noise sources are installed near the
Micro800 system.
Analog Channel Wiring Guidelines
Consider the following when wiring your analog channels:
• The analog common (COM) is not elec
trically isolated from the system,
and is co
nnected to the power supply comm
on.
•
Analog channels are not isolated from each other.
• Use Belden cable #8761, or equivalent, shielded wire.
• Under normal conditions, the drain wi
re (shield) should be connected to
the me
tal mounting panel (earth ground
). Keep the shield connection to
earth ground as
short as possible.
• To ensure optimum accuracy for voltage type inputs, limit overal
l cable
impedance by keeping all analog
cables as short as possible. Locate the I/
O system as close to your voltage type sensors or actuators as possible.
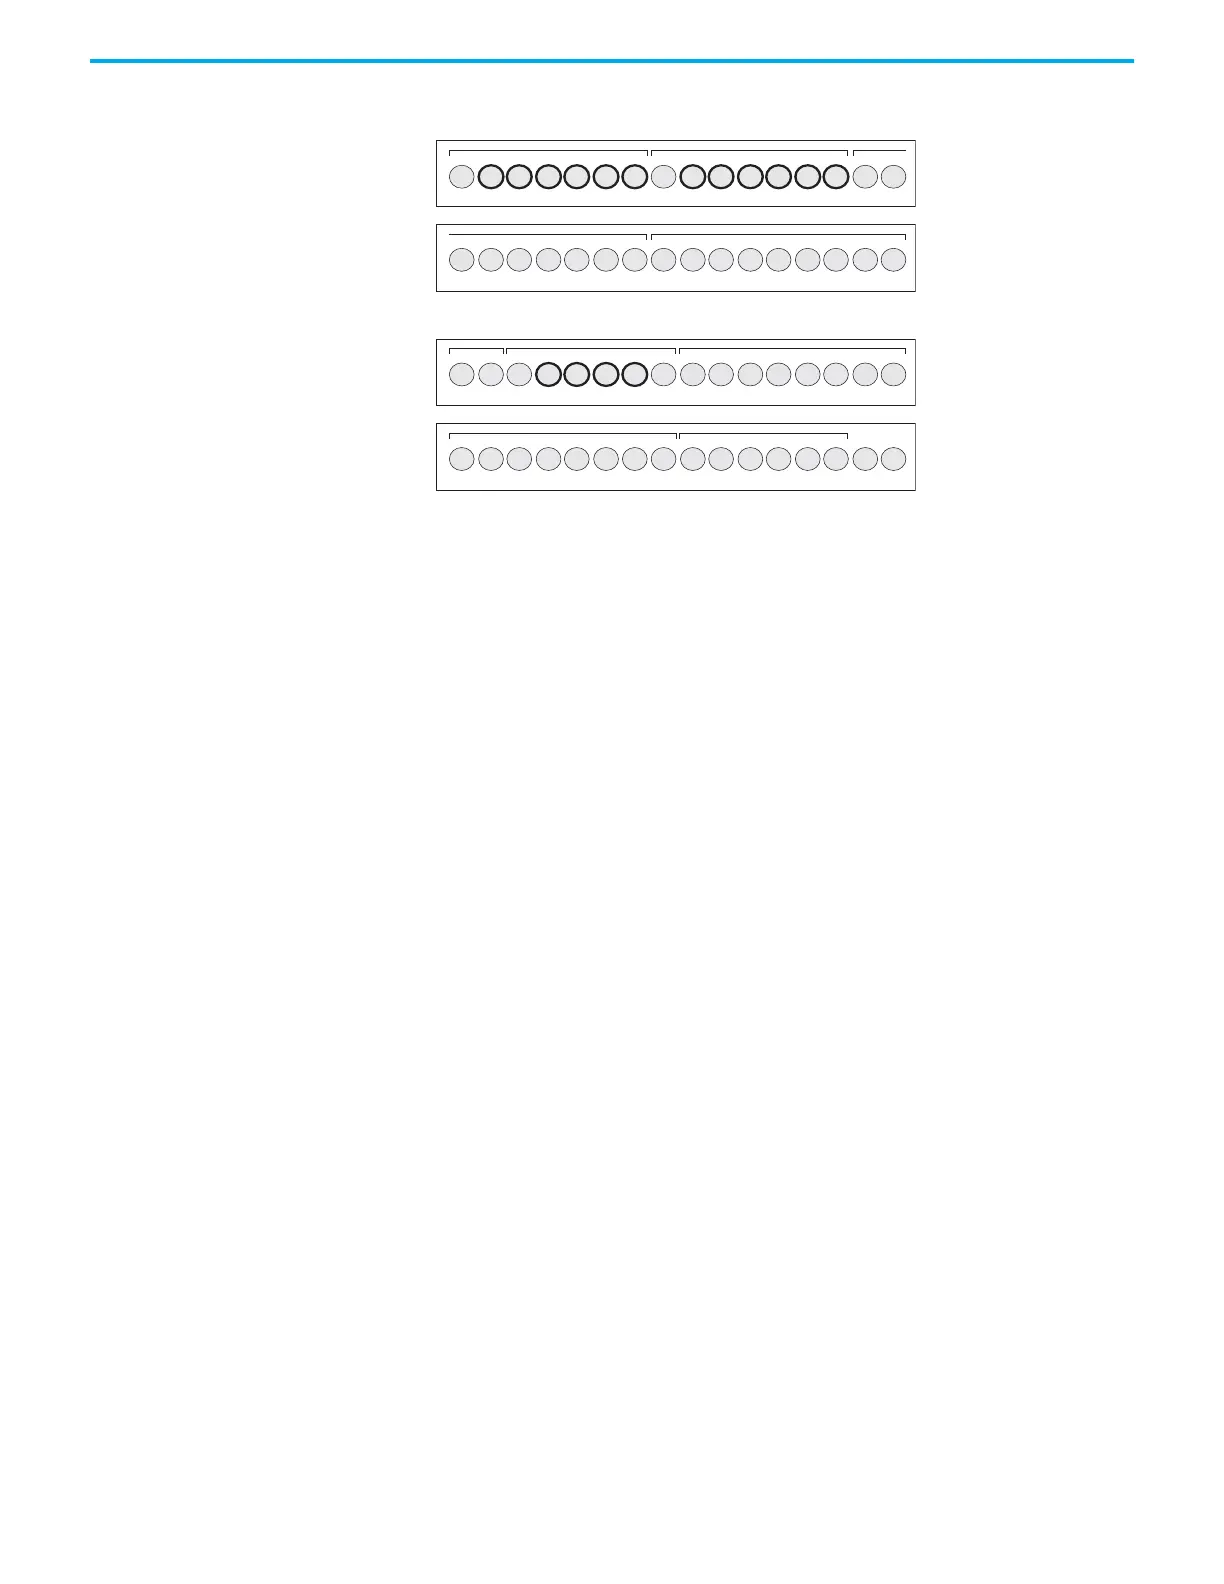
I-00
COM0 I-01
I-02
I-03
I-04
I-05
COM1 I-07
I-06
I-09
I-08
123456789101112
I-13 I-15
I-16I-14
I-17
I-18
I-19
COM3 I-21
I-20
I-23
I-22
123456789101112
I-11
I-10
I-12
COM2
13 14 15 16
I-25
I-24
I-27
I-26
13 14 15 16
-DC24
+DC24 +CM0
O-00
O-01
O-02
O-03
-CM0 O-04
+CM1
O-06
O-05
123456789101112
+CM2 O-11
O-12O-10
O-13
O-14
O-15
-CM2 O-16
+CM3
O-18
O-17
123456789101112
O-08
O-07
-CM1
O-09
13 14 15 16
-CM3
O-19
NC
NC
13 14 15 16
TERMINAL BLOCK 1
TERMINAL BLOCK 3
TERMINAL BLOCK 2
TERMINAL BLOCK 4
Input terminal blocks
Output terminal blocks
 Loading...