Layering Two Patches (Dual)
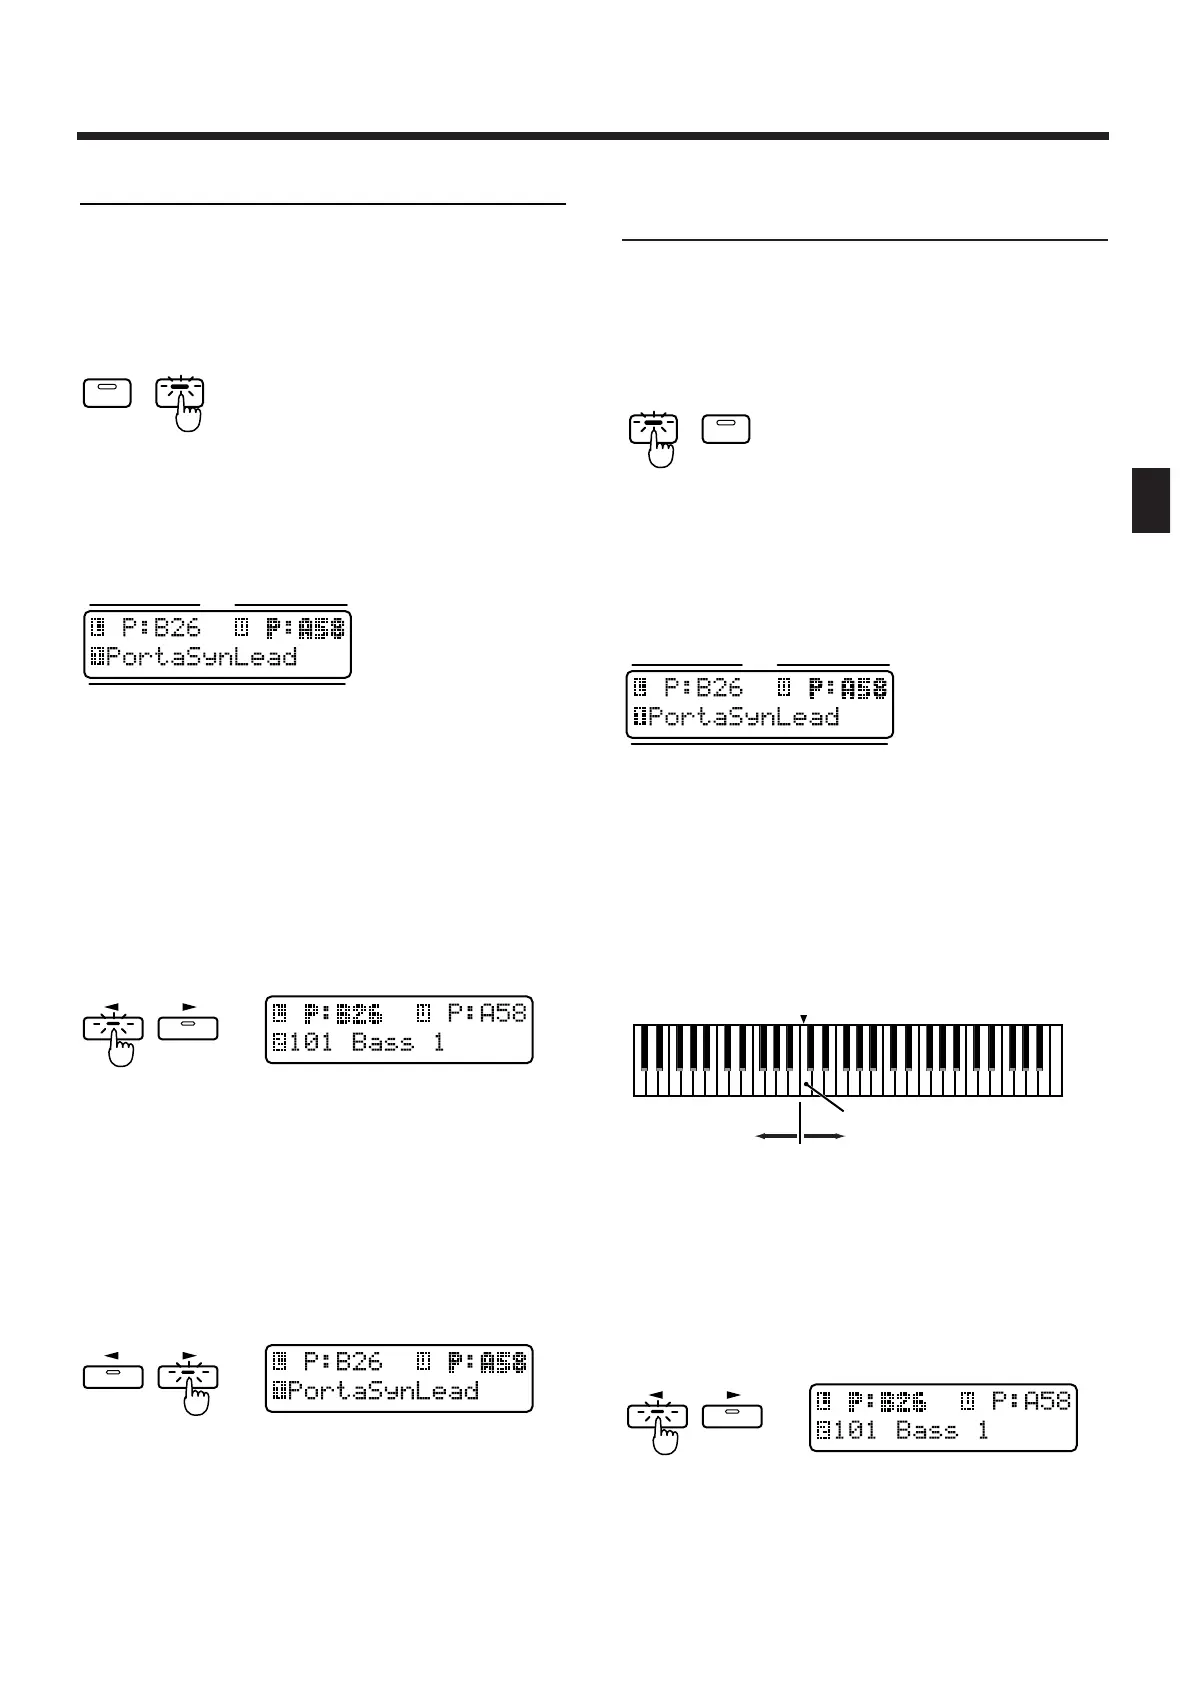
1. In the DISPLAY section, press [PATCH].
The indicator lights.
2. In the KEYBOARD section, press [DUAL].
The indicator lights.
fig.2-5
When you select Dual, the following screen will
appear. The part shown in the right of the upper row
is called the “upper part,” and the part shown in the
left of the upper row is called the “lower part.”
fig.2-6
When you play the keyboard, the patches of the lower
part and the upper part will sound simultaneously.
Next, try changing the patch of each part.
3. Press [LOWER].
The indicator lights. The group, bank and number of
the patch for the lower part will be displayed in bold
characters. The lower line of the display will show the
name of the patch that is currently selected for the
lower part.
fig.2-7
4. Select a patch.
The patch of the lower part changes.
5. Press [UPPER].
The indicator lights. The group, bank and number of
the patch for the upper part will be displayed in bold
characters. The lower line of the display will show the
name of the patch that is currently selected for the
upper part.
fig.2-8
6. Select a patch.
The patch of the upper part changes.
7. To return to normal playing condition
(Single), press [DUAL] once again to make
the indicator go dark.
Playing Different Patches with
the Left and Right Hands (Split)
1. In the DISPLAY section, press [PATCH].
The indicator lights.
2. In the KEYBOARD section, press [SPLIT].
The indicator lights.
fig.2-9
When you select Split, the following screen will
appear. The part that is shown in the right of the
upper row is called the “upper part,” and the part that
is shown in the left of the lower row is called the
“lower part.”
fig.2-6
In Split mode, the keyboard is divided into two areas.
Playing the left area will sound the patch of the lower part,
and playing the right area will sound the patch of the upper
part. The note at which the keyboard is devided into left and
right is called the Split Point. For example if the split point is
C4, the keyboard will be divided as shown below. The split
point is included in the Upper part.
fig.2-10TEXT
Here’s how to change the patch of each part:
3. Press [LOWER].
The indicator lights. The group, bank and number of
the patch for the lower part will be displayed in bold
characters. The lower line of the display will show the
name of the patch that is currently selected for the
lower part.
fig.2-7
4. Select a patch.
The patch of the lower part will change.
 Loading...