Recording Individual Notes to
Grid Locations (Step Recording 2)
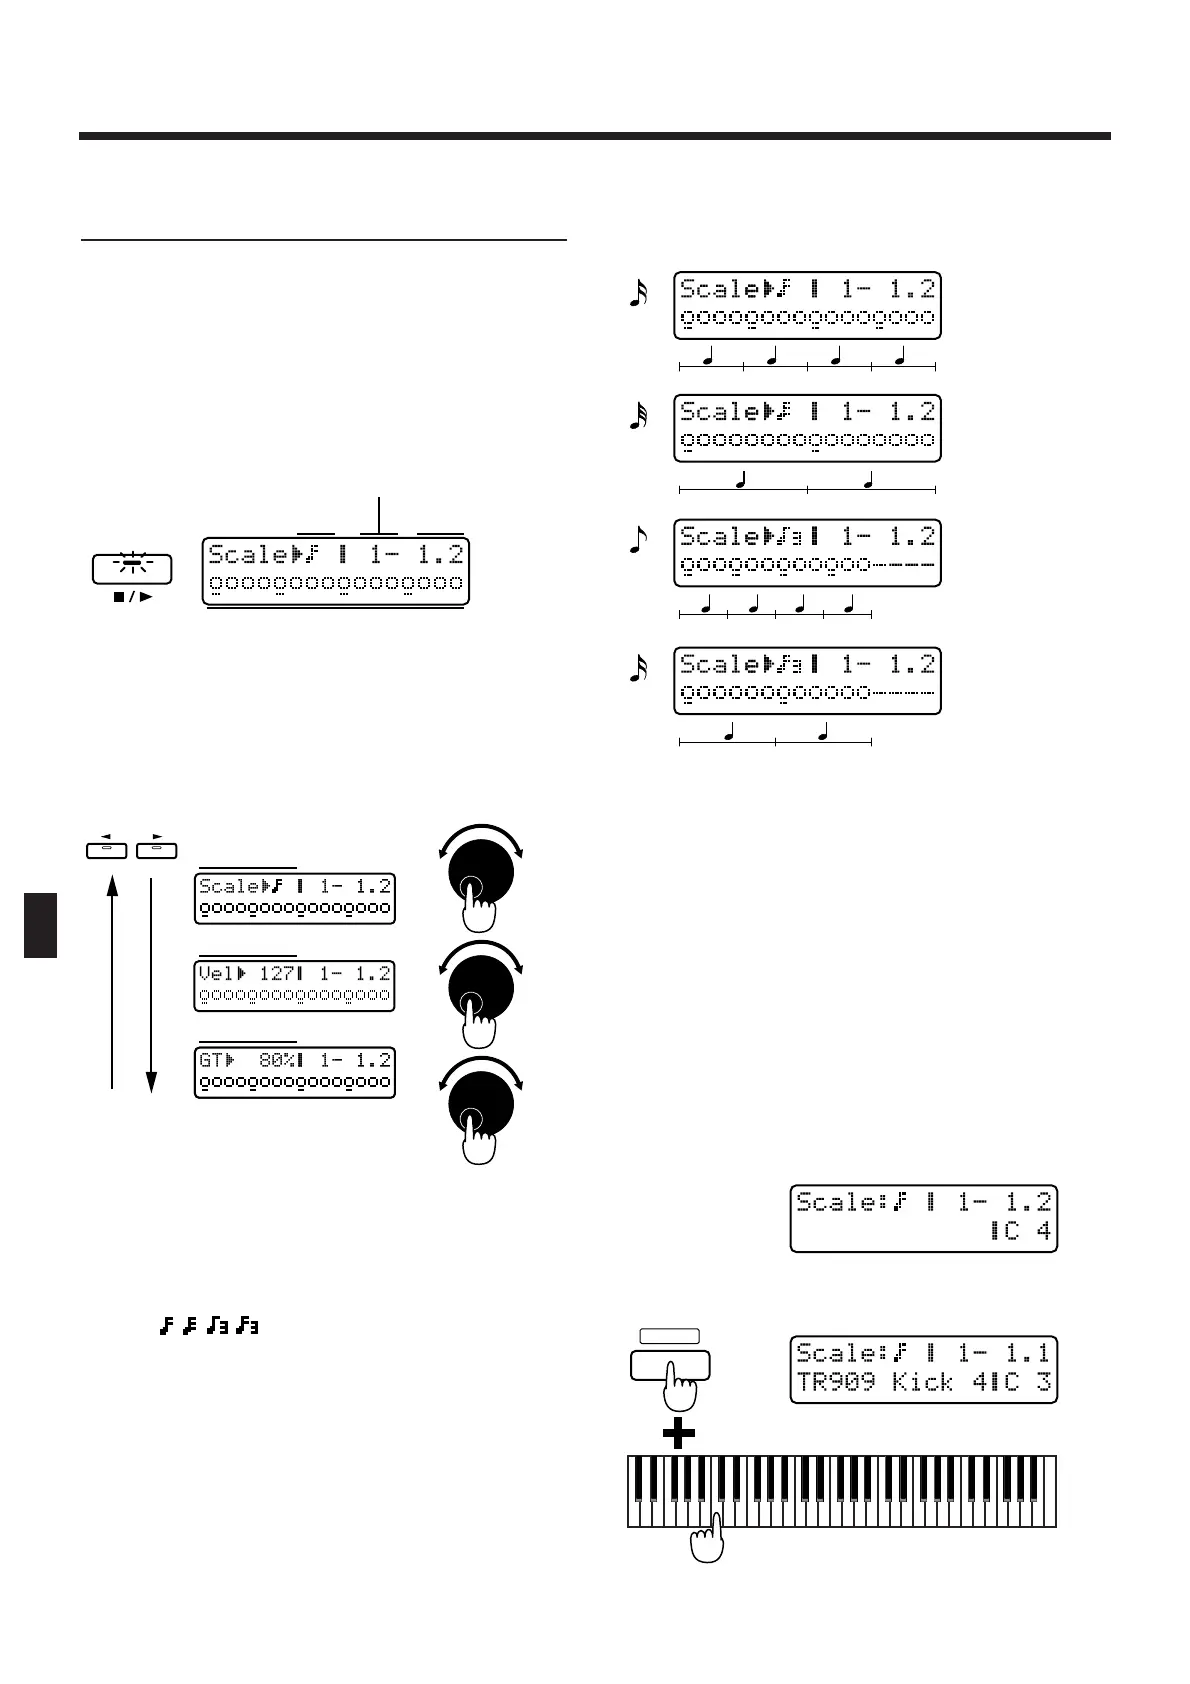
5. Press [STOP/PLAY] to begin recording.
The [STOP/PLAY] and [REC] indicators will light.
The display will indicate the current recording input
area within the pattern and the playback location.
In the following illustration, the current recording
input area is measure 1, and the second beat of mea-
sure 1 is being played back.
fig.8-37TEXT
6. Before you input notes, select the Scale, the
note (rhythm tone) to be input, the velocity,
and the gate time ratio (for parts 1–7).
Use PAGE [<] [>] to select the parameter, and use
[INC] [DEC] or the [VALUE] dial to set the value.
fig.8-38TEXT (=MC fig.10-30)
Scale
Select the note value of the notes that you wish to
input. The recording input area is determined by the
scale that you select.
Range:
x : Sixteenth notes can be input, with the white keys
F3–G5 corresponding to one measure of recording
input area.
r : Thirty-second notes can be input, with the white
keys F3–G5 corresponding to two beats of record-
ing input area.
e! : Eighth note triplets can be input, with the white
keys F3–C5 corresponding to one measure of
recording input area.
x! : Sixteenth note triplets can be input, with the white
keys F3–C5 corresponding to two beats of record-
ing input area.
fig.8-39-1
Selecting the note for input (Rhythm Tone)
To select a note (rhythm tone), hold down [SHIFT] and
press the desired note on the keyboard. While you
hold down [SHIFT], the various notes (rhythm tones)
will be assigned to the keyboard in the same way as
during play, and the display will show the currently
assigned note (rhythm tone). Play the keyboard to
select the note that you wish to input. After sounding
the note that you wish to input, release [SHIFT] and
the last-sounded note will be selected.
To shift the key range, use OCTAVE [-] [+].
The screen display will differ according to whether the
recording part is the rhythm part or another part.
fig.8-40TEXT
 Loading...