21
Button Operation and Displays
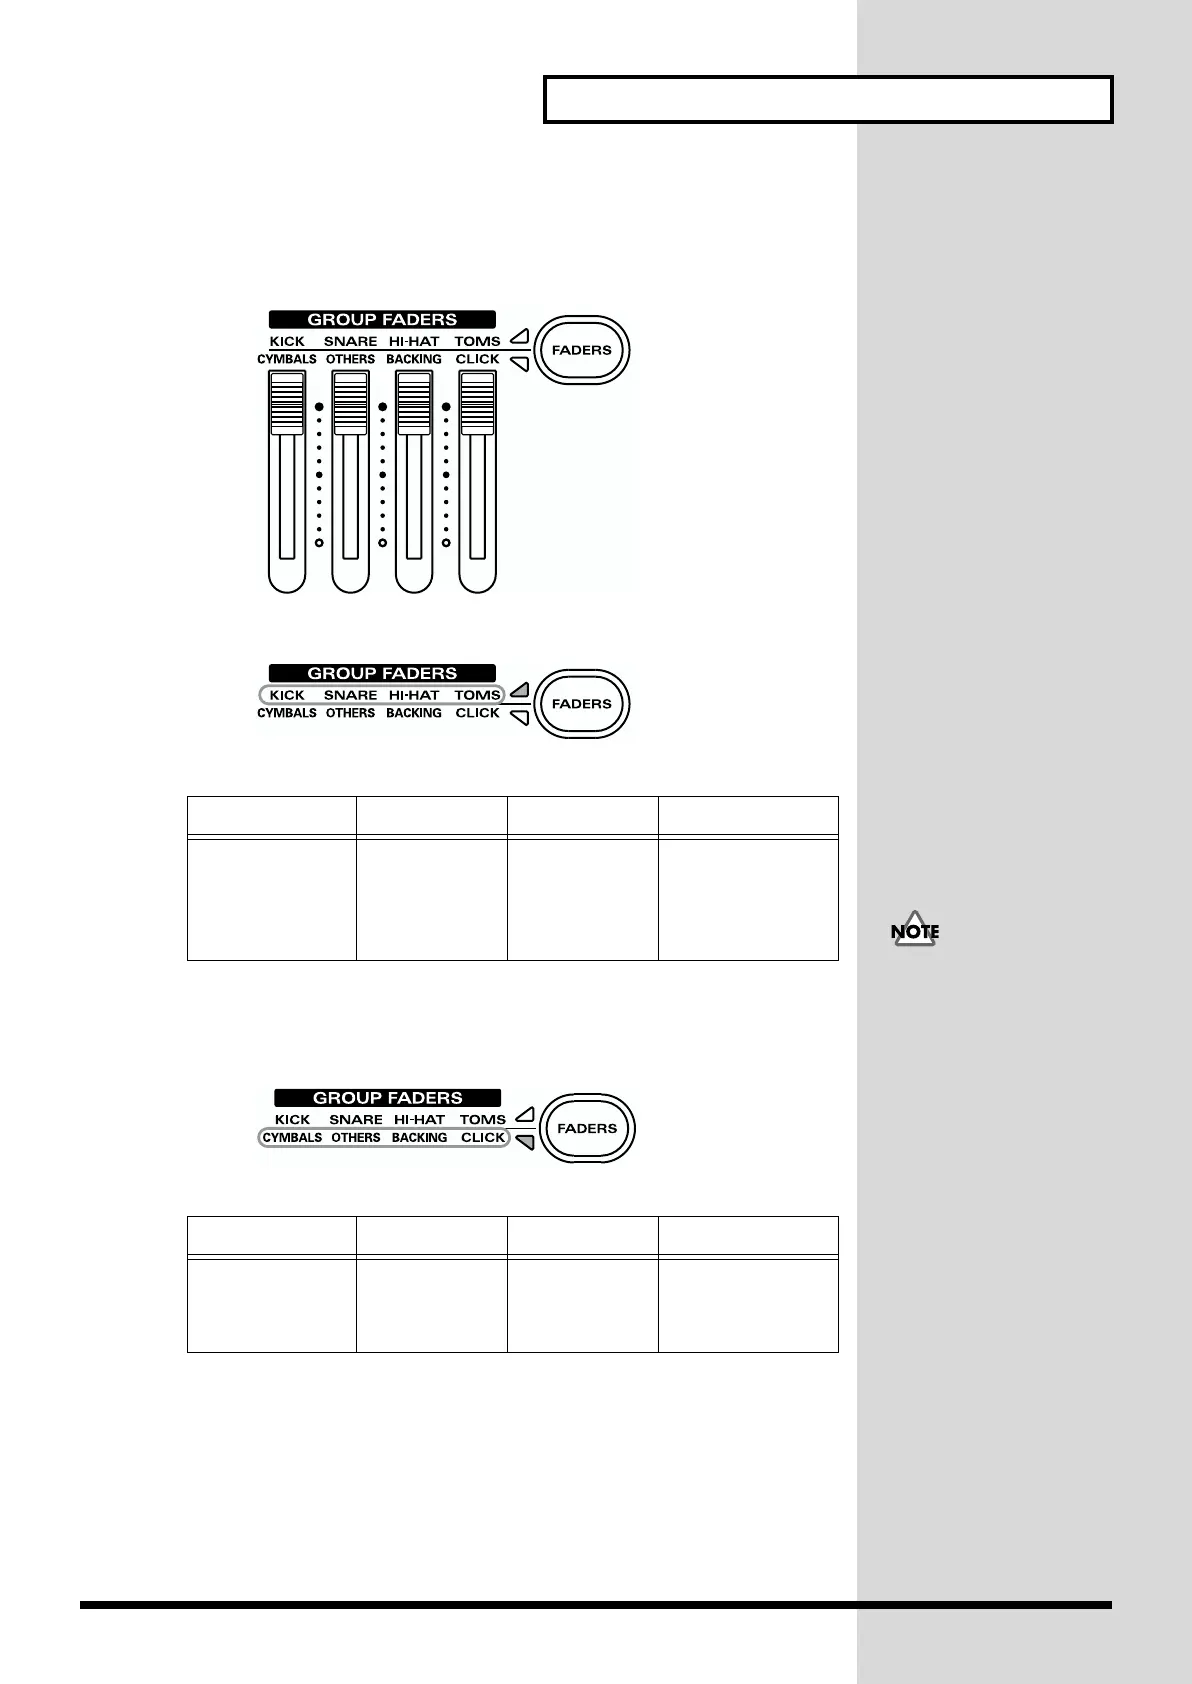
Using [FADERS] and [GROUP FADERS]
The indicator lights to the left of [FADERS] shows what is being set with the
[GROUP FADERS].
fig.012
• When the upper indicator is lit:
fig.013
You can adjust the volume of following trigger inputs.
In the text, these are indicated by [KICK], [SNARE], [HI-HAT], AND
[TOMS], respectively.
• When the lower indicator is lit:
fig.014 (Upper right [FADERS] lit)
You can adjust the volume of following trigger inputs.
In the text, these are indicated by [CYMBALS], [OTHERS], [BACKING],
and [CLICK], respectively.
Example: Adjusting the Snare Volume
1. Press [FADERS], lighting the upper indicator.
2. Move the [GROUP FADERS] [SNARE] slider.
The slider position shows the current snare volume.
[KICK] [SNARE] [HI-HAT] [TOMS]
1/2 (KICK1/2) 3 (SNARE) 7 (HI-HAT) 4 (TOM1)
5 (TOM2)
6 (TOM3)
11/12 (AUX1/2)
[CYMBALS] [OTHERS] [BACKING] [CLICK]
8 (CRASH1)
9 (CRASH2)
10 (RIDE)
Percussion
part (p. 102)
Backing part
(p. 102)
Metronome click
• Even when the
indicators are switched
with [FADERS], the
settings values for the
[GROUP FADERS]
sliders do not change. In
other words, current
slider positions and
actual settings values
may differ. Be sure to
move the sliders when
adjusting the volume.
• When the power is
turned on, the settings
values previously in use
when the power was last
turned off are recalled,
regardless of the slider
positions.
 Loading...