24
Configuring Recording Settings (User Settings)
Chapter 2 Preparation
If the crop size does not match the recording
resolution, black bars will appear at the top, bottom,
left, and right of the image.
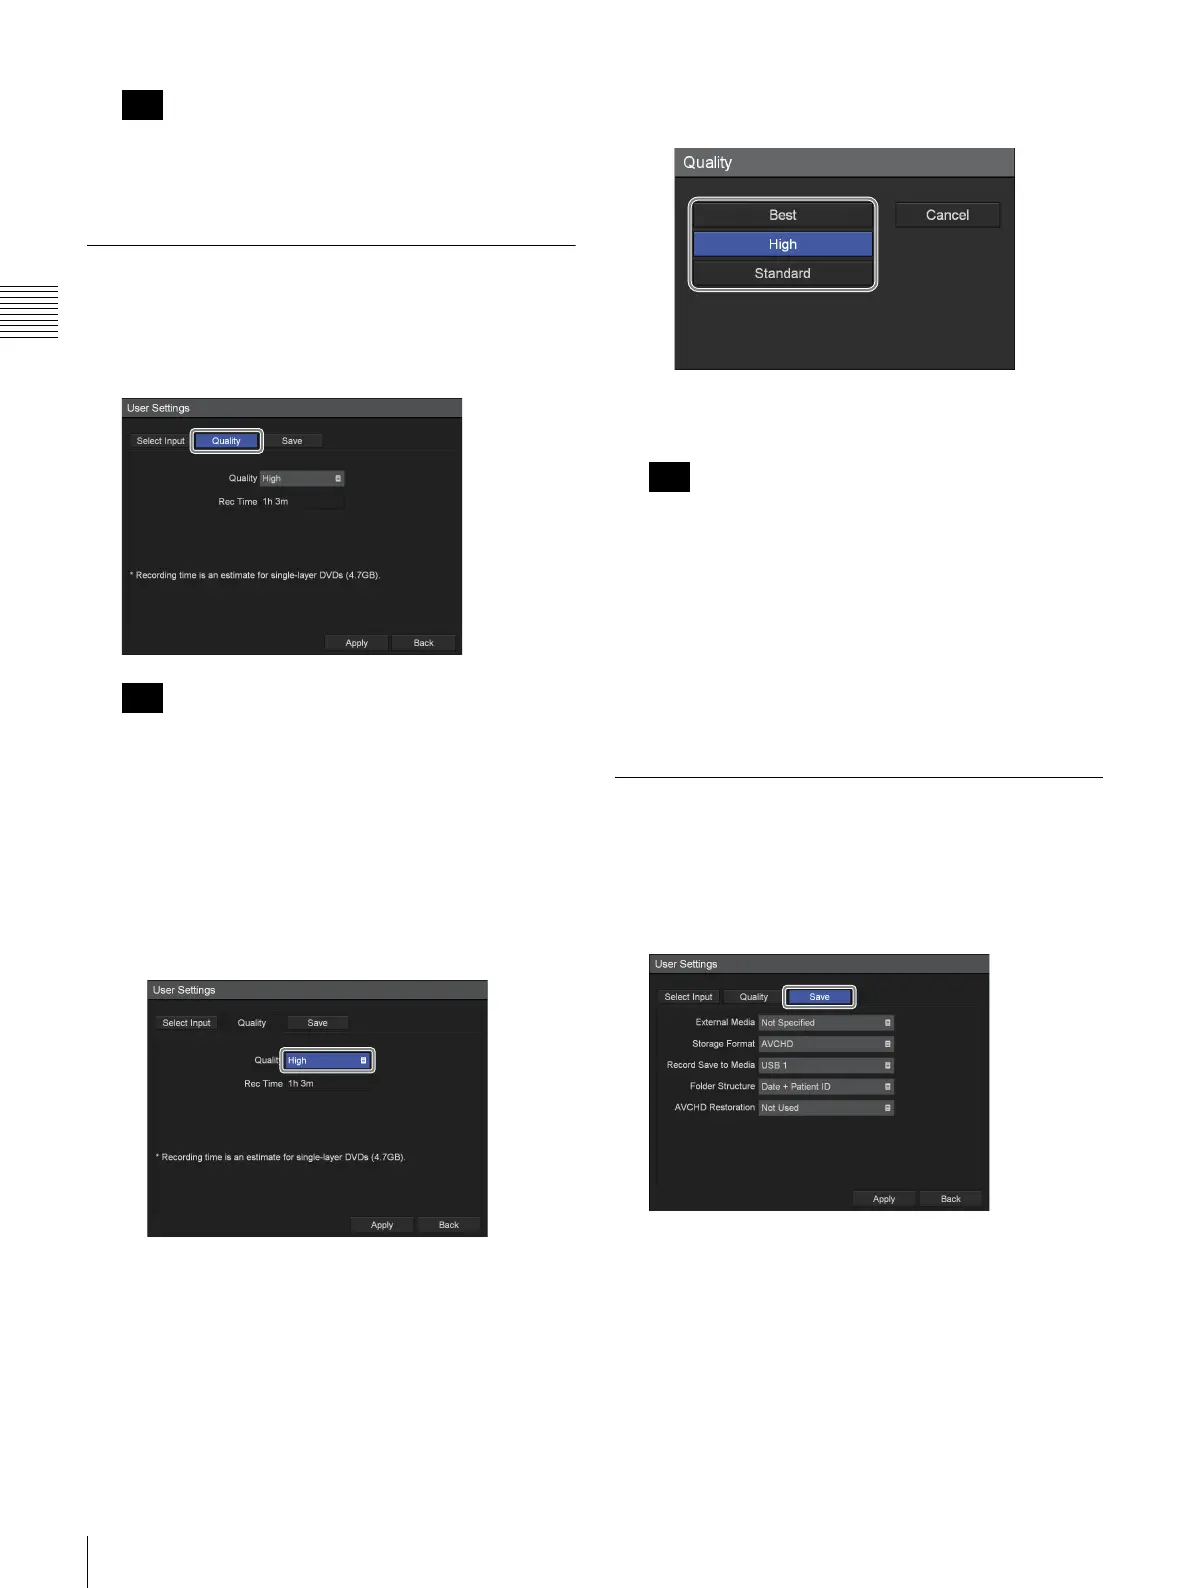
Configuring Image Quality Settings
Configure image quality settings for videos.
1
Use the B and b buttons to select the [Quality] tab.
[Rec Time] displays the following information.
• For the HVO-500MD: Estimated recording time
available for USB media (500 GB).
• For the HVO-550MD: Estimated recording time
available for single-layer DVD-R1 discs (4.7 GB).
2
Configure the video settings.
1 Use the
v button to select the [Quality] box, and
press the ENTER button.
The [Quality] screen appears.
2 Use the
V and v buttons to select the image quality,
and press the ENTER button.
The [Quality] screen closes, and the [Quality] tab
appears again.
The setting configured here will be used as the initial
value for the [Video Quality] setting in the [Recording
Preparation] screen.
3
To configure save settings, proceed to “Configuring
Save Settings” (page 24).
If you are finished configuring, use the
V, v, B, and b
buttons to select [Apply], and press the ENTER
button.
Configuring Save Settings
Configure settings related to external media used to store
recorded data, and specify whether to output metadata.
1
Use the B and b buttons to select the [Save] tab.
2
Configure each setting.
Select an item using the
V and v buttons, and press the
ENTER button to display the setting screen for that
item.
Tip
Tip
Tip
 Loading...