37
Recording Preparation
Chapter 4 Recording and Playback
Recording Preparation
Before starting to record, enter information regarding the
exam patient, configure the storage destination and quality
settings for recorded data, and then perform a test
recording.
You can prepare for recording and test record in the
[Recording Preparation] screen.
Patient Information and Data
Storage Settings
Enter information regarding the exam patient, and
configure the storage destination and quality settings for
recorded data.
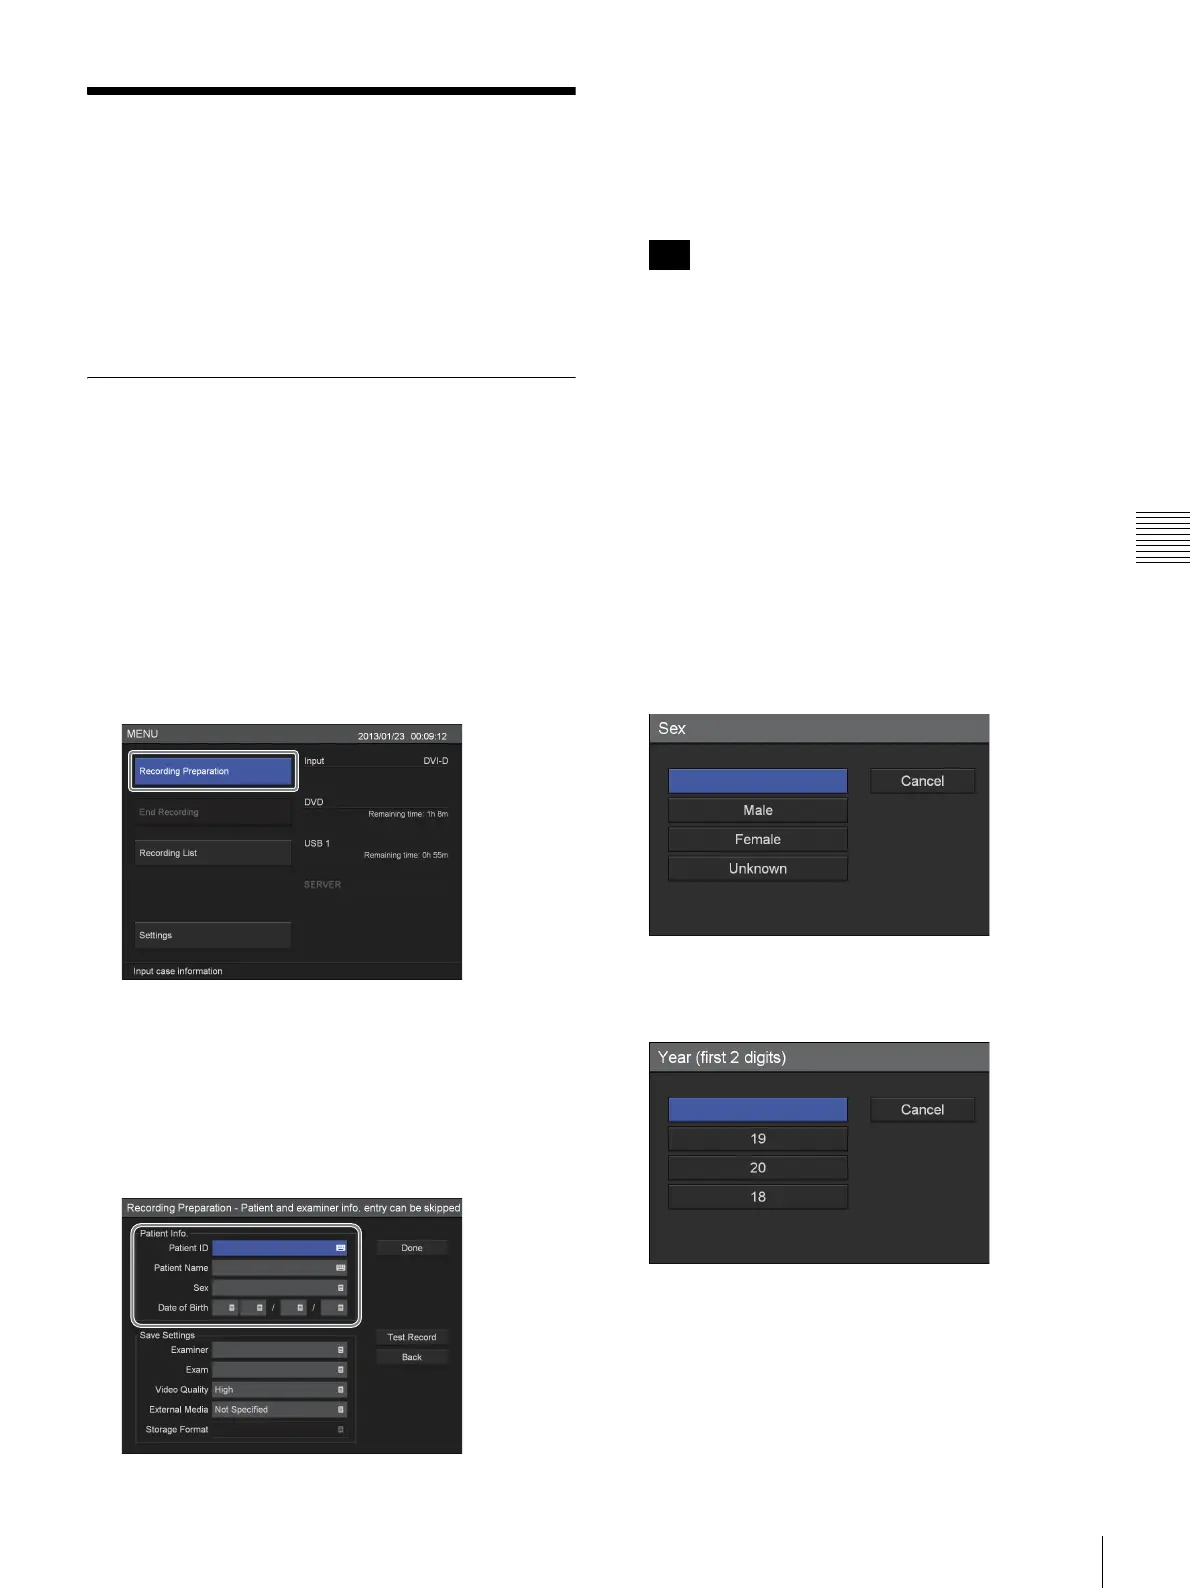
1
Press the MENU button.
The [MENU] screen appears.
2
Use the V and v buttons to select [Recording
Preparation], and press the ENTER button.
The [Recording Preparation] screen appears.
3
Enter patient information.
Select an item using the
V, v, B, and b buttons, and
press the ENTER button to display the setting screen
for that item.
[Patient Info] entry can be skipped.
[Patient ID]
Enter an identification number for the patient using the
on-screen keyboard.
For details on using the on-screen keyboard, see
“Using the On-Screen Keyboard” (page 26).
Certain symbols (\ / : ? * " < > | .) cannot be used for
the patient ID. In addition, the front panel will not
display characters other than ASCII characters 0x20 to
0x7D.
[Patient Name]
Enter up to 20 characters in each field of the patient’s
name (1 character for the middle name) using the on-
screen keyboard.
For details on the input fields for the patient name, see
“[Patient Name Field]” (page 57).
For details on using the on-screen keyboard, see
“Using the On-Screen Keyboard” (page 26).
[Sex]
Select the patient’s gender in the setting screen that
appears, and press the ENTER button.
[Date of Birth]
Select the year, month, and day in the setting screens
that appear, and press the ENTER button.
Tip
 Loading...