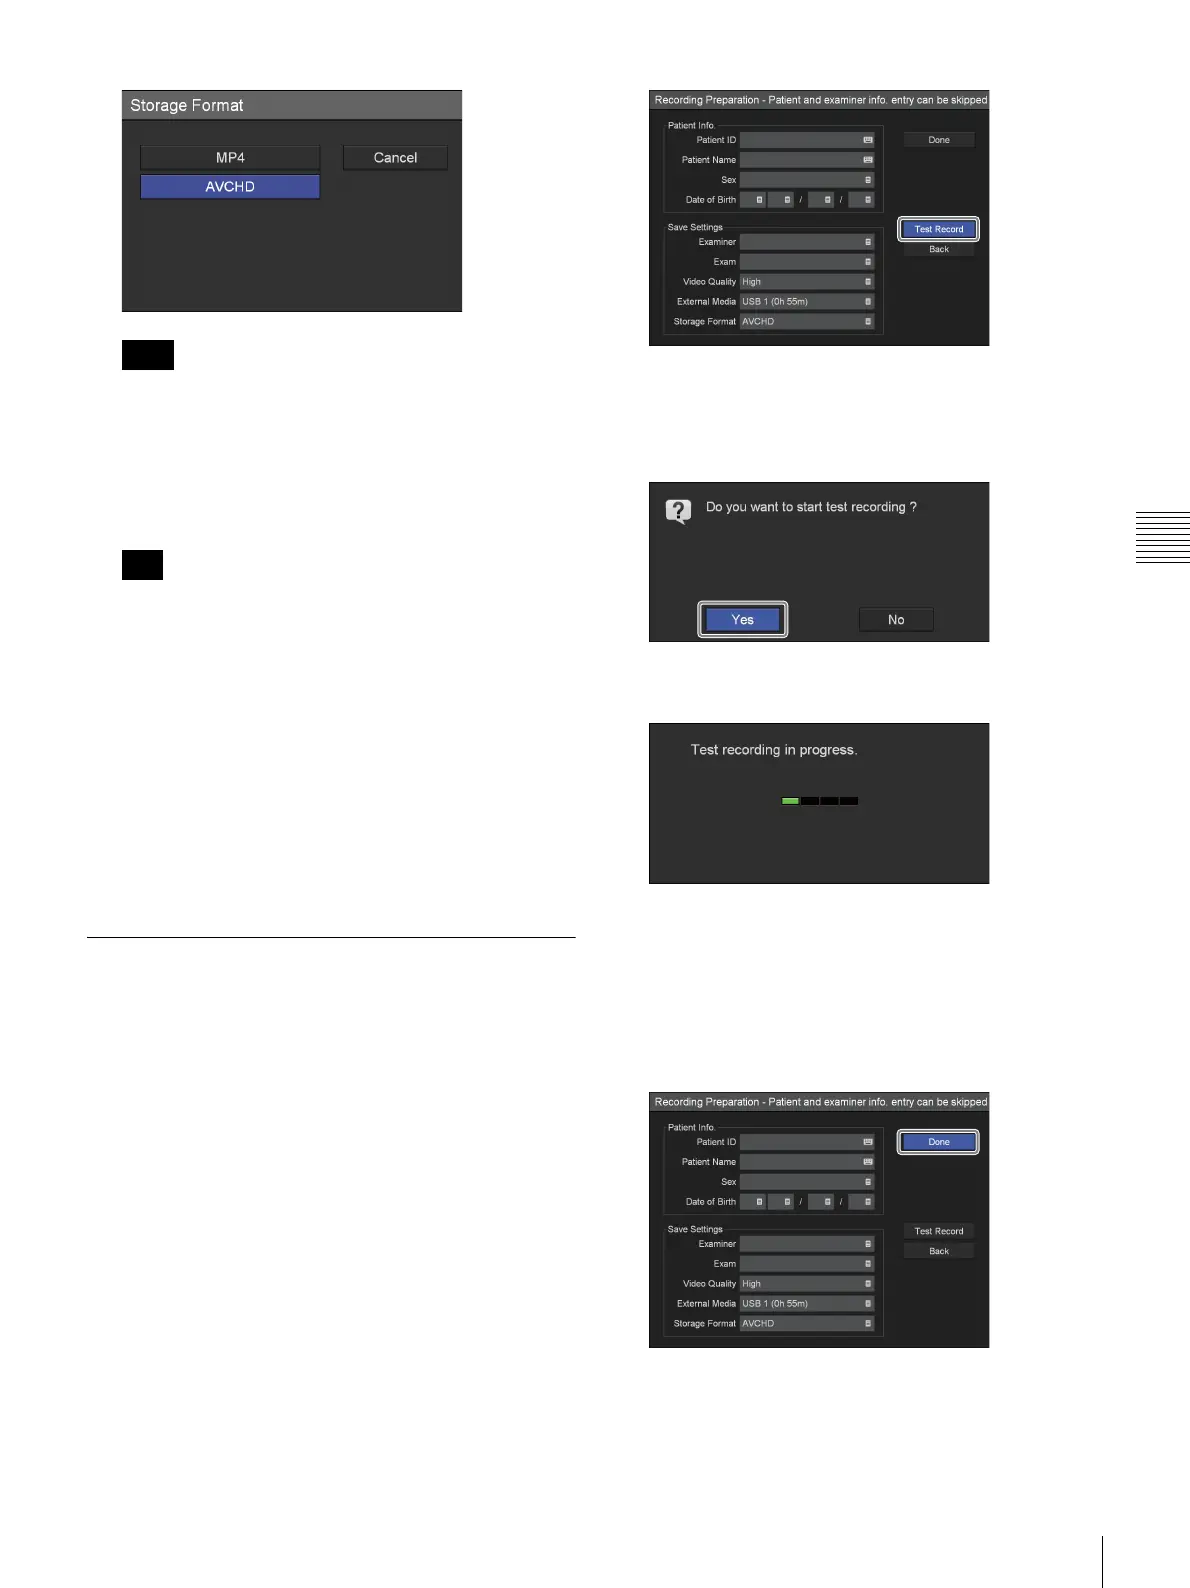
39
Recording Preparation
Chapter 4 Recording and Playback
When saving recorded data in AVCHD format to
servers, do not specify the same share name (i.e., share
folder) on the same server as the storage destination
for multiple recorders. Performing multiple saving
operations at the same time may result in damage to
the recorded data.
When recording to a DVD on the HVO-550MD,
additional recording is only possible when recording
identical formats. Additional recording will not be
possible if you change the storage format in the middle
of recording. For example, if you are saving to a DVD
in AVCHD format, you cannot change the format to
MP4 and perform additional recording.
5
To perform a test recording, proceed to “Test
Recording” (page 39).
If you are finished configuring, use the
V, v, B, and b
buttons to select [Done], and press the ENTER button.
Test Recording
Confirm whether images record properly.
When you perform a test recording, images record for five
seconds and then play back automatically.
1
In the [Recording Preparation] screen, use the V, v, B,
and
b buttons to select [Test Record], and press the
ENTER button.
The following message appears.
2
Use the B and b buttons to select [Yes], and press the
ENTER button.
Recording starts, and the following screen appears
while test recording is in progress.
After images are recorded for five seconds, playback
starts automatically.
When the test recording is finished, the [Recording
Preparation] screen appears again.
3
Use the V, v, B, and b buttons to select [Done], and
press the ENTER button.
The [MENU] screen appears again.
Note
Tip
 Loading...