EasyManuals Logo
Home>Vanderbilt>Security Sensors>bright blue

Vanderbilt bright blue User Manual

Vanderbilt bright blue
242 pages
To Next Page IconTo Next Page
To Previous Page IconTo Previous Page
Page #149 background imageLoading...
Page #149 background image
148 bright blue Installation Manual
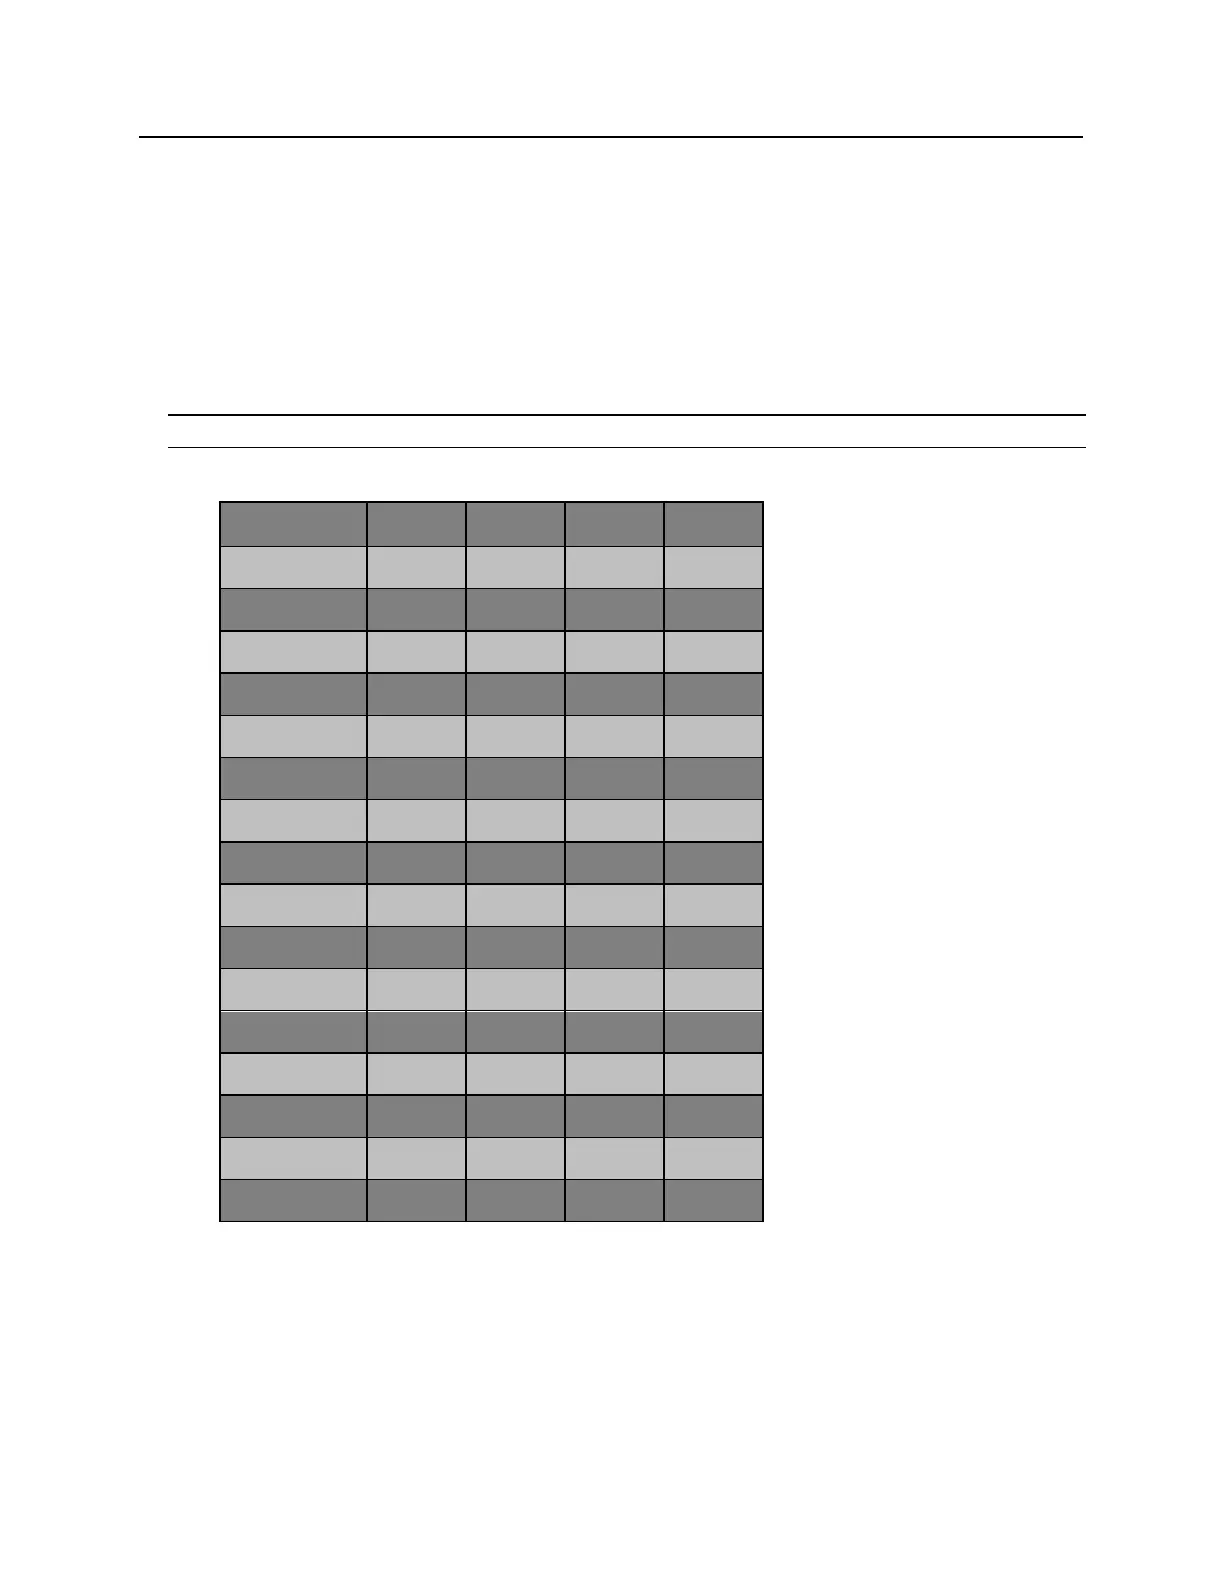
Addressing the VIP Lock
There are a set of 12 dip switches on the VIP lock, the first four of which are used to set the address for the
device. It is recommended that the set address correspond to the slot on the bright blue controller it is connected
to. For example, if the VIP is connected to the bright blue controller at Device 1-2 (Channel 1, Address 2) then
the switches on the VIP should equal 2. If the VIP is connected to Device 2-10 (Channel 2 Address 10) then the
dip switches should equal 10.
After the VIP has been connected to the bright blue controller, make a note of the address. This information will
be required to set up the lock in the software.
Note: Only the first 4 switches are used for addressing.
VIP Address Chart
VIP Address
Switch 1
Switch 2
Switch 3
Switch 4
1
Off
Off
Off
Off
2
On
Off
Off
Off
3
Off
On
Off
Off
4
On
On
Off
Off
5
Off
Off
On
Off
6
On
Off
On
Off
7
Off
On
On
Off
8
On
On
On
Off
9
Off
Off
Off
On
10
On
Off
Off
On
11
Off
On
Off
On
12
On
On
Off
On
13
Off
Off
On
On
14
On
Off
On
On
15
Off
On
On
On
16
On
On
On
On

Table of Contents

Questions and Answers:

Question and Answer IconNeed help?

Do you have a question about the Vanderbilt bright blue and is the answer not in the manual?

Vanderbilt bright blue Specifications

General IconGeneral
BrandVanderbilt
Modelbright blue
CategorySecurity Sensors
LanguageEnglish

Related product manuals