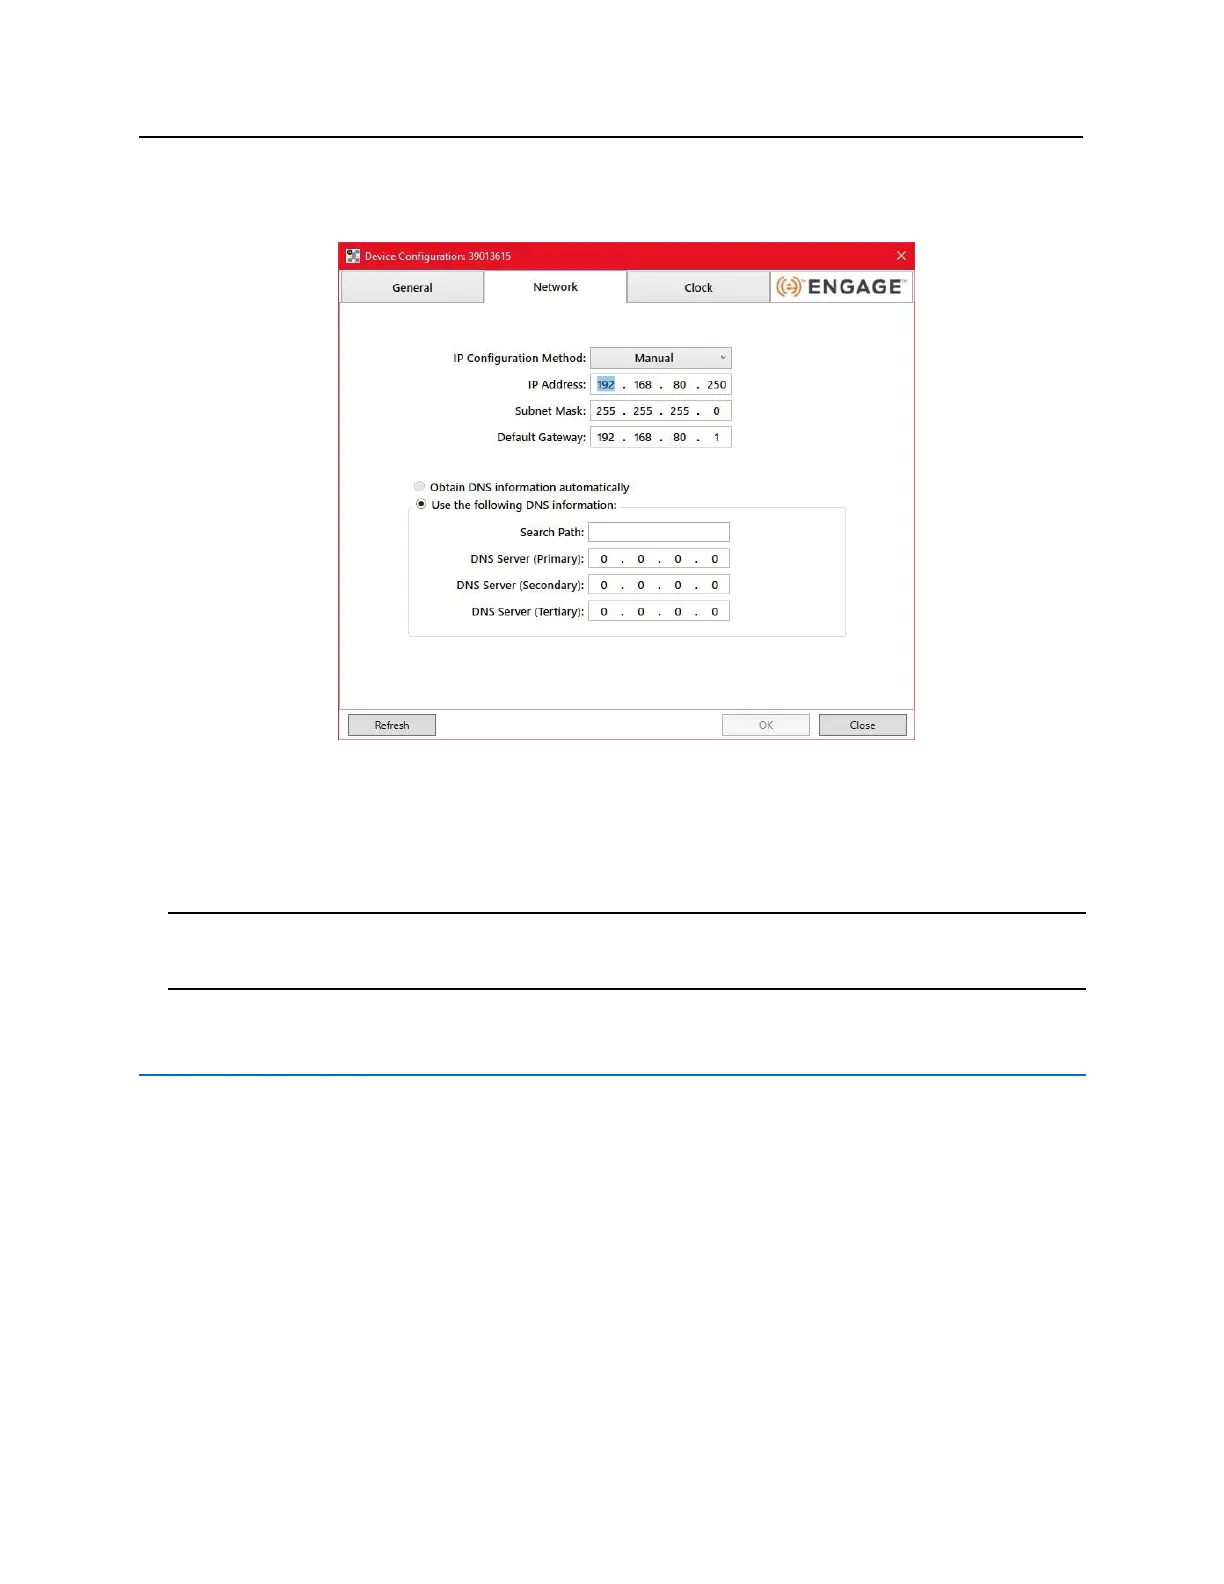
c) Click on the Network tab.
d) Using the drop-down box, change the IP configuration method to DHCP.
e) Click on the OK button to apply the change.
f) Make a note of the IP Address. Enter the IP address into a web browser to connect to the bright blue
software. It may take a few seconds for the new IP address to be generated.
5 Exit the Discovery and Configuration program.
Note: DHCP is not recommended for bright blue. If the dynamic IP address is changed then the Discovery and
Configuration tool will need to be run to find the new IP address and any bookmarks for bright blue will be
invalidated. Static IP is recommended for bright blue.
bright blue Date and Time Setup
The date and time for bright blue has to be set up for the system to work properly. The date and time can be
entered in two ways: 1) Through the bright blue software. 2) Using the Discovery and Configuration Tool as
described below.
Using the bright blue software to set date and time
1 Connect a PC with a web browser to the bright blue controller.
▪ Direct Connection - Using a cross-over cable, the controller can be connected directly to the network
card of the PC.
▪ Network Connection - Using a regular network cable, the controller can be connected to a hub or switch
that is on the same network as the PC.
2 Open a web browser.
 Loading...